Categories
Blogposts

The Elizabeth Woodville Jacket

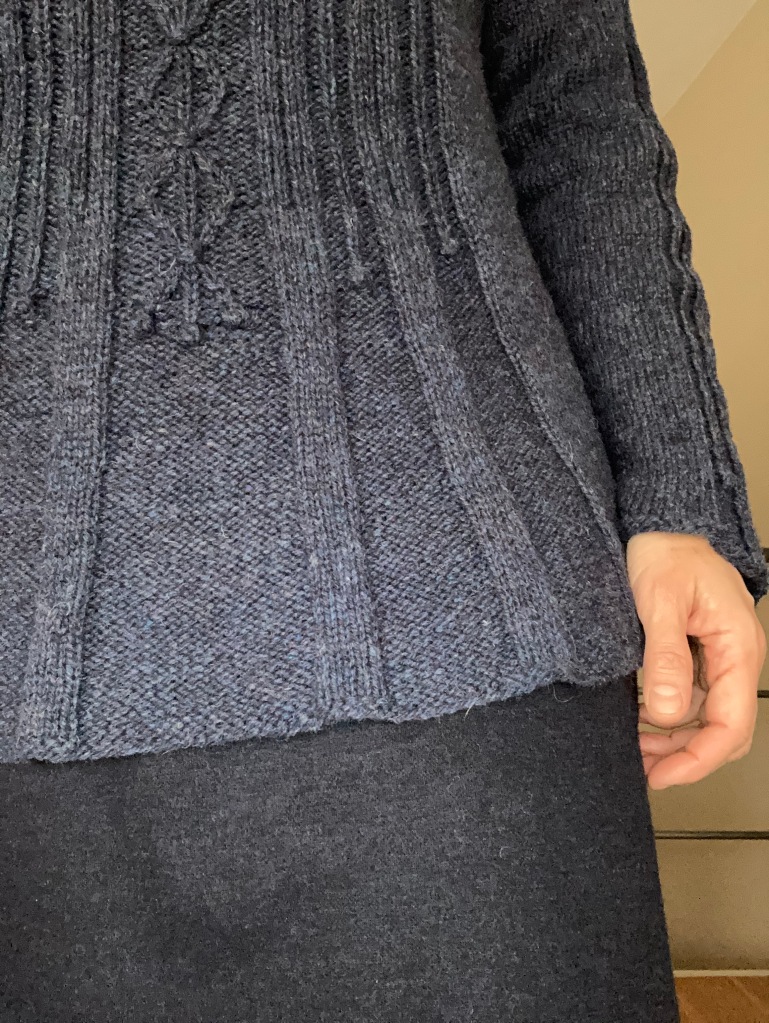
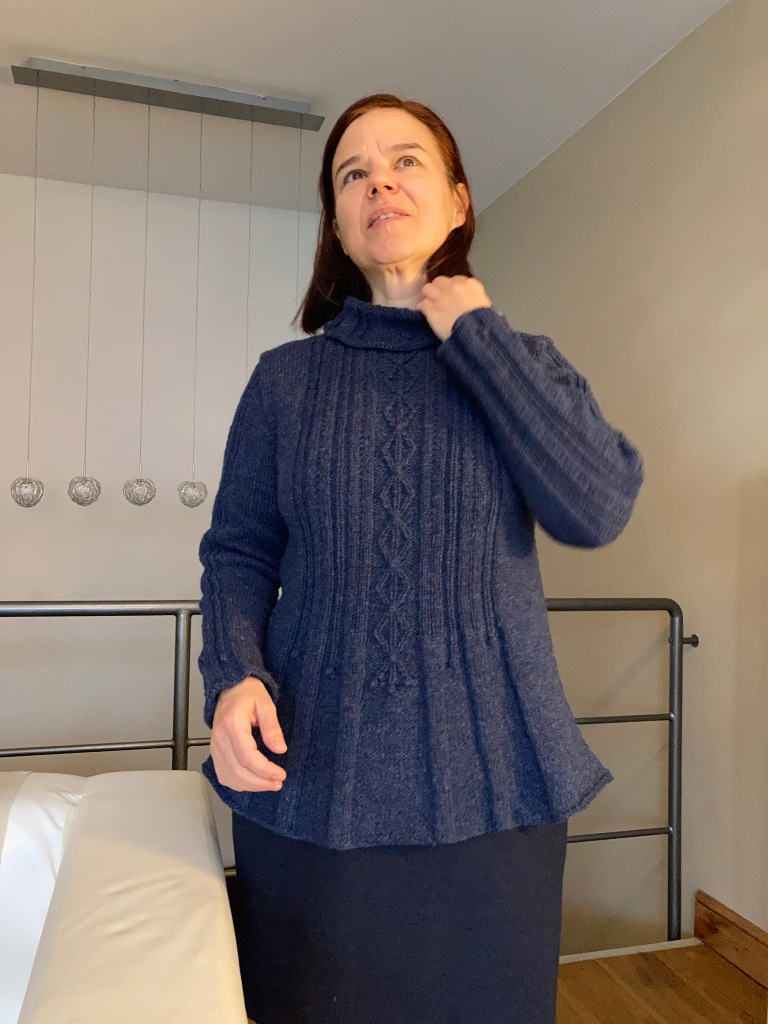
One of the simpler knits in the Tudor Roses book by Alice Starmore is the Elizabeth Woodville jacket: A beautiful border, elegant waist shaping and lots of stocking stitch. 

Elizabeth Woodville knitted jacket designed by Alice Starmore, knitted by Annaplexis

I had a couple of skeins of blue yarn in my stash, which were the exact shade of a skirt I have. I was looking for a pattern to accent this colour without requiring a large amount of it.

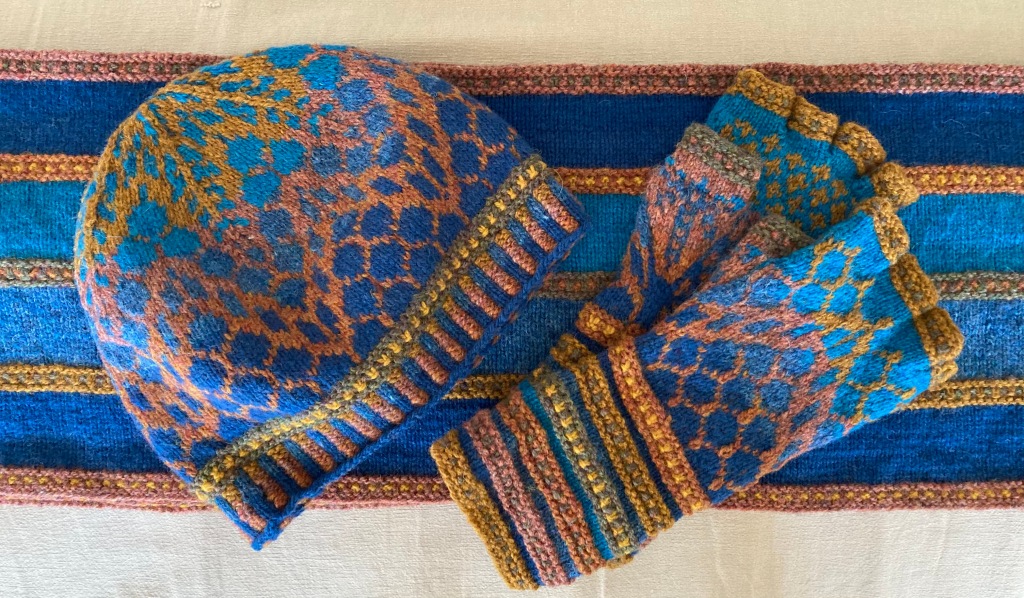
So I used the blue (Einband Lopi 250m/50g) for the borders and beige Ice Yarns Baby Alpaca Superfine 400m/50g for the main body. Both yarns are held double. The jacket weighs 286 g in total. (Size medium).

The two yarns are completely different in texture: The Einband Lopi is rough and hard, while the Alpaca is very soft. I love this contrast and it works well on this jacket.

The sleeves

I started knitting with the sleeves. I do this often instead of (or even in addition to) swatching 🙂  Swatching is not an exact science: By starting with the sleeves, if there is something I don’t like, I will know sooner and will have to frog less than if I start with the body. 

I worked the sleeves in the round on DPNs. I know from experience that my tension on DPNs is tighter than on other needles, so I went up half a size compared to the body: The rest of the jacket is worked on 3mm needles, for the sleeves I used 3.5 mm DPNs.

Much as I like the sleeve flare, I feel most comfortable wearing tight-fitting sleeves. So I started with the number of stitches after the decrease rounds (51 sts for size M), i.e. I made 25 picots. After having picked up the sts on the picots, I joined in the round.

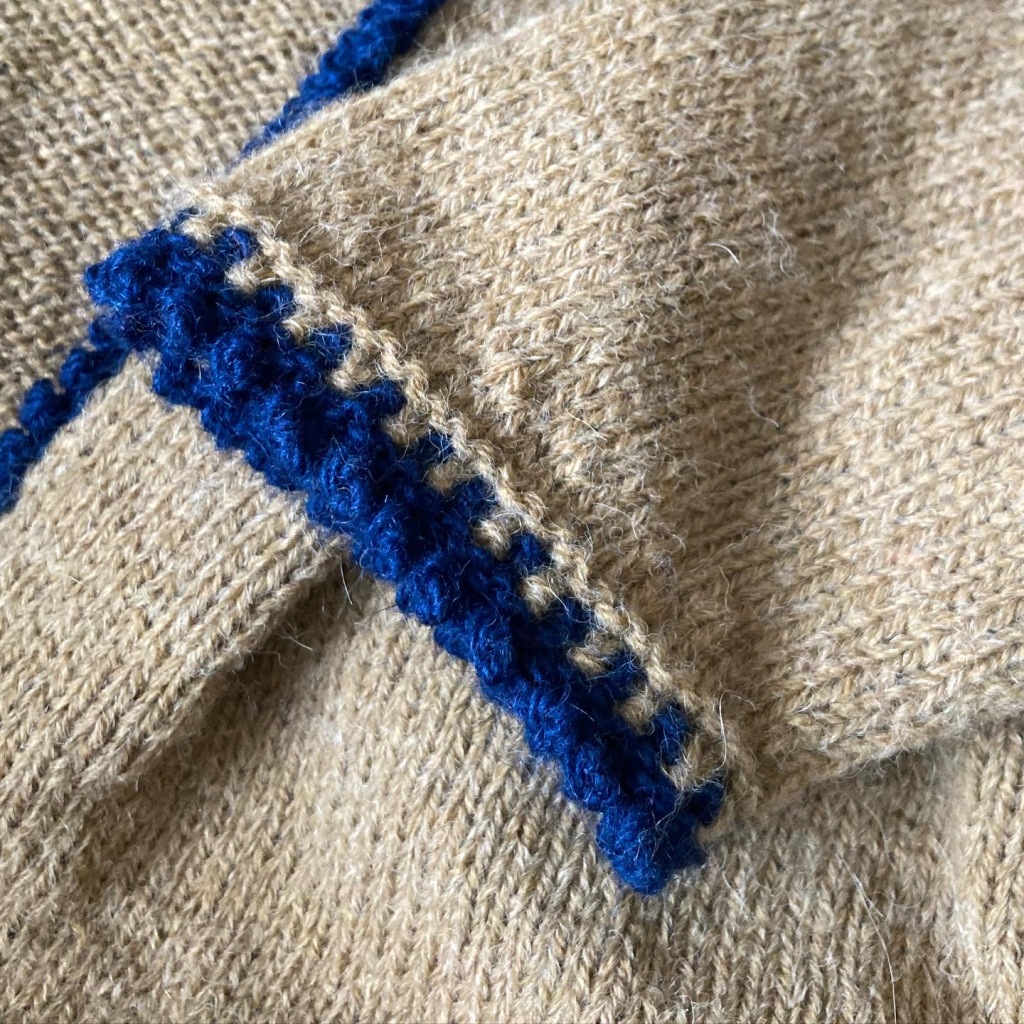
After the 5 border rows, there is a series of short rows. I used German short rows, which is, in my opinion, the easiest and neatest short row technique.

For the increases, I used M1R and M1L for symmetry.

I used my own stitch counts for the sleeve cap and armhole. I have quite a large bust, so I make steeper decreases for the armhole to avoid too much fabric at the sleeve join. 

I love the neat tailored look of inset sleeves, but attaching them can be a bit of a challenge. This is how to do it: Turn the bodice inside out. Place the sleeve right side out in the armhole. Pin or clip together at shoulder seam and side seam. Then pin or clip together the rest distributing any slack evenly.

I make my sleeve cap and armhole decreases two stitches in from the edge, as follows:

RS dec rows: K2, ssk, k to last 4 sts, k2tog, k2.

WS dec rows: P2, purl 2 tog, p to last 4 sts, ssp, p2.  

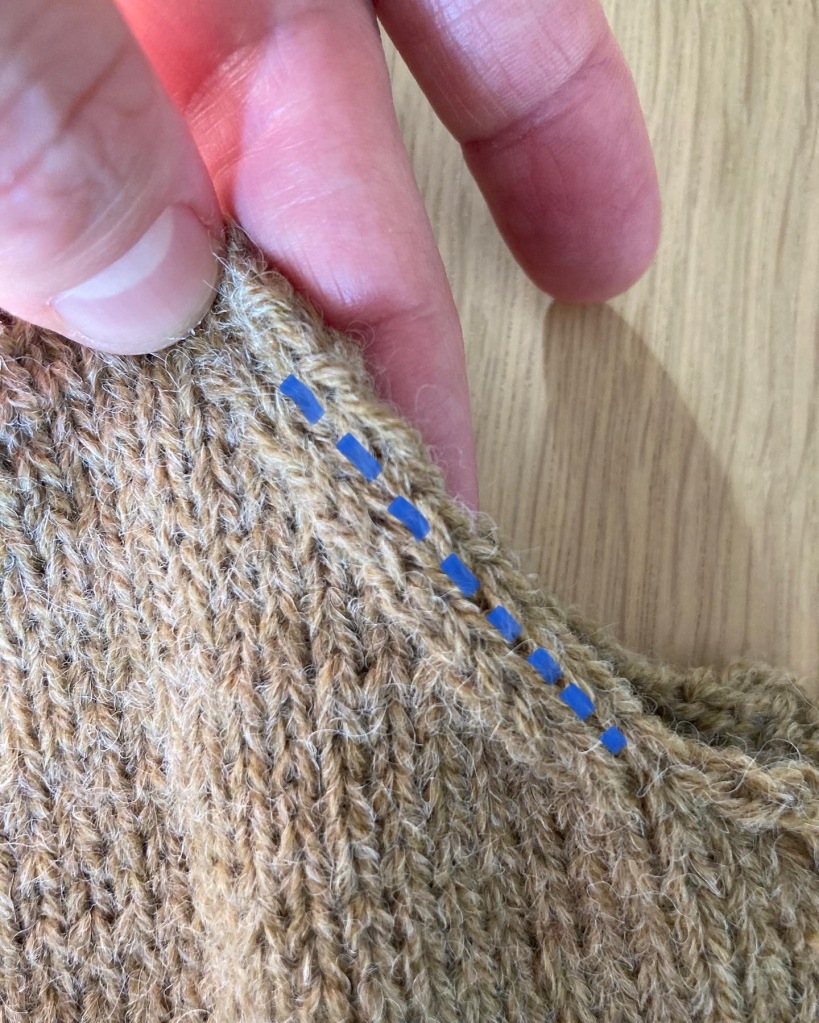
I join the sleeves to the body using crochet slip stitches through the second stitch from the edge. I find crocheting easier than sewing and I like the result better. It gives a neat join with the right amount of stretch.

The bodice

I made the bodice in one piece to avoid the extra bulk and extra work of side seams.

I added up the total number of sts of back and front pieces (211 sts for size M), subtracted 1 and divided by 2 to find the total number of picots I would need. 

I did not break the yarn, as stated in the pattern, but knitted to the point where I was supposed to re-attach the yarn on the right front, completed the short row section and then knitted on to the point where I was supposed to reattach the yarn for the back and so on. This meant, however, that I had to switch right and wrong side row turns.

After completing the short rows I continued knitting the bodice in one piece. Here, too, I used German short rows and symmetrical increases. I also used my own decreases to match the modified sleeve cap.

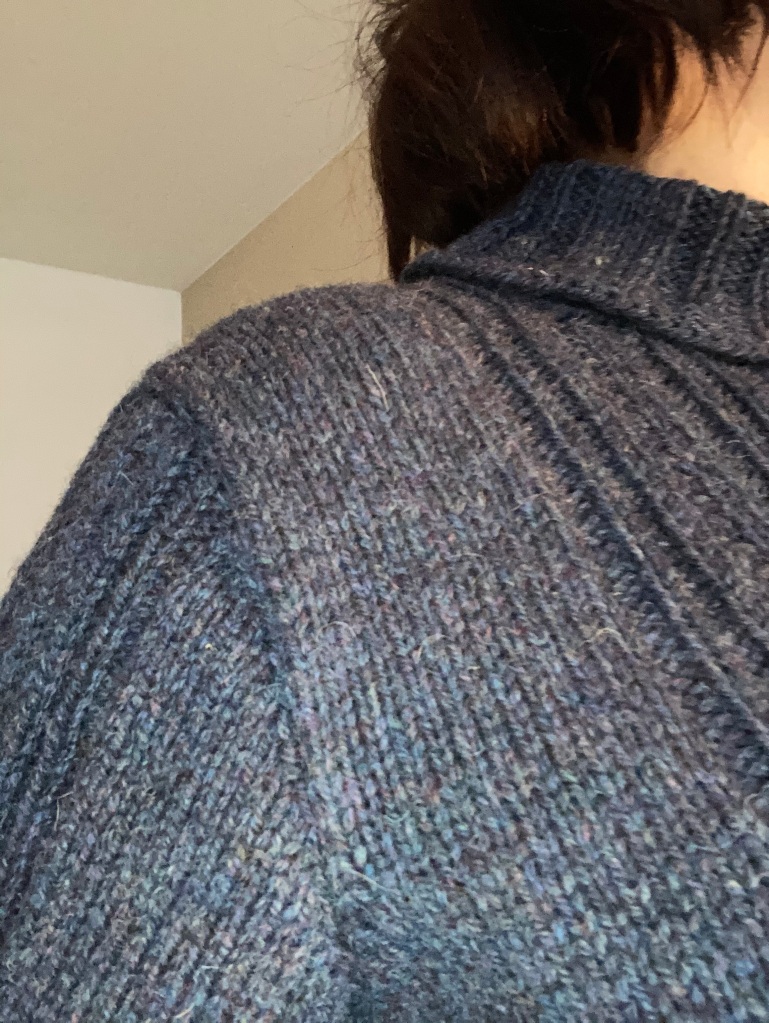
For the shoulders I used German short rows and I joined them together using the 3-needle bind-off.
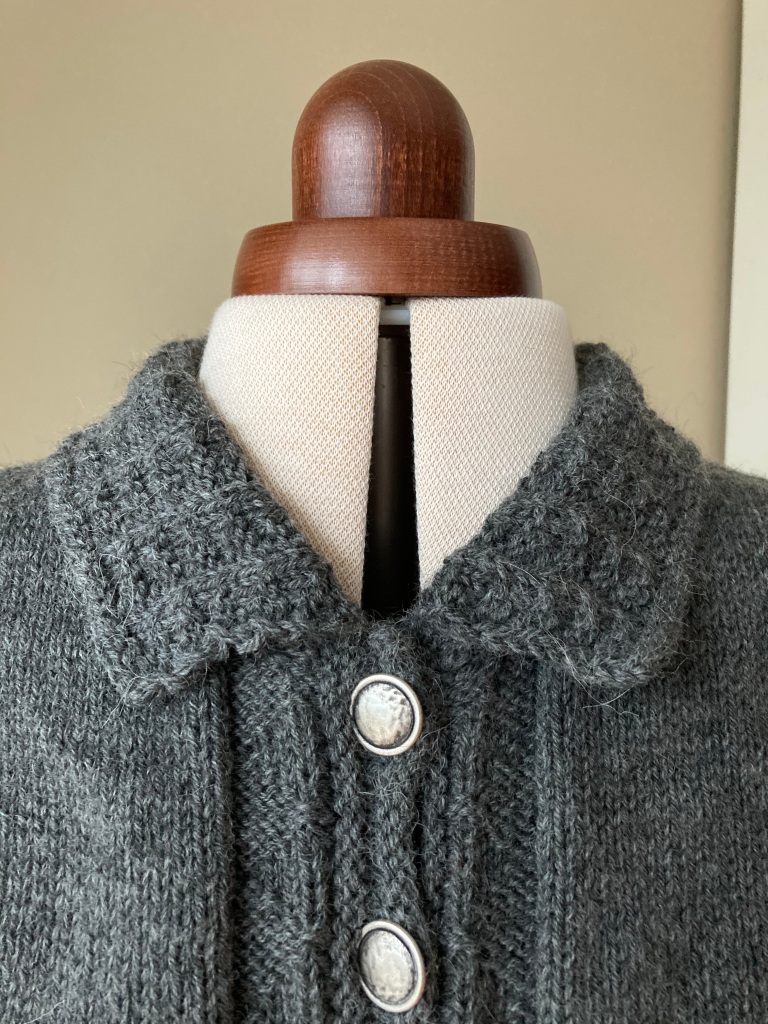
Finishing

I used my usual method of attaching the button bands, i.e. knitting them up on separate needles and attaching them to the bodice using the 3-needle method (without binding off). I then continue knitting to make a flap that I later stitch in place. This method is useful to cover up the raw edges of a steek, but it also provides support for the button band as a kind of light boning. So I use it even when there are no raw edges to cover up. You can find a detailed description in my blogpost on the Jane Seymour jacket.

I added a couple of extra buttons, i.e. I have 9 in all. I hate gaping button-bands, so I try not to space buttons too far away from each other…

When knitting the neckline, I also knitted a couple of garter rows in the contrast colour on top of the buttonbands, to get a neat top edge.

On my first attempt the neckline was quite loose letting the shoulders sag somewhat. I redid the bind-off row using a 2.5 mm needle to pull the neckline in somewhat. If I knit this jacket again, I will decrease some stitches at the neckline before binding off.

Elizabeth Woodville knitted jacket from Tudor Roses by Alice Starmore knitted by Annaplexis
Categories
Blogposts

Damselfly hat and fingerless gloves

Damselfly knitted cap and fingerless gloves

Having knitted the cardigan, I thought it would be nice to have a matching accessories set.

Maybe it is a bit over the top to wear all of this together. 🤔 Or maybe not 🤓 Hmm, well, I’ll have to think about it… Anyway, I believe everyone knows by now how much I ❤️LOVE❤️ Alice Starmore’s patterns and the glorious colours of the yarn. 

The pattern for the hat and fingerless gloves is available as a patterncard kit. The scarf is based on the cardigan pattern and my own calculations (see below). 

The kit also includes instructions and yarn for a beret and handwarmers, but I preferred to use the excess yarn from this kit and what I had left over from the cardigan for a scarf instead.

The hat set lacks two of the colours used in the cardigan: Machair and Whinn. I thought this a pity, and since I still had some yarn in these colours, I modified the colour sequence in the garter stitch bands to incorporate these two colours as well. 

This set is a good introduction to the more complex Alice Starmore patterns, since it includes quite a few advanced techniques but is not quite as daunting a project as a cardigan or sweater.

My notes on the pattern:

The cap

I like to make a set up row for the corrugated ribbing, i.e. introduce both colours in knit stitch, K2 in colour A and K2 in colour B, before starting the ribbing. That way you avoid having two-coloured purl stitches in the first row. 

I made the garter stitch band in Machair and Whinn.

Maybe it’s me, but I could not gather from the pattern what colour the decrease stitches should be worked in. I think I did it wrong in the end, using the pattern colour all the way up, but I am quite pleased with the result. 

The fingerless gloves

I made size small. While the rest of the fingers fit snugly, the thumb is 24 stitches in the round, which is a bit wide (at least for my thumb). Next time, I am planning to decrease 2 and make the thumb 22 stitches. 

(In the meantime I have knitted another pair as well as the Herald fingerless gloves. Scroll to bottom of the page to read an update on the fingerless gloves.)

The longest floats in the Damselfly pattern are 5 stitches long. I did not bother to catch them in the hat. But gloves are a different matter. You do not want your fingers getting tangled up in the loops every time you put on the gloves. So, here I would catch either the middle stitch or the 2nd and 4th stitches in alternate rows. Catching floats onto the same stitch in consecutive rows makes them more visible from the right side (the so-called grinning effect) and is to be avoided.

The scarf

To make the scarf I cast on 385 stitches. The scarf weighs 140 g and is 154 cm long and 23 cm wide.

The blue stripes are 16 rows wide and the first and last 5 stitches in these stripes are in garter stitch to avoid curling.

Scarf knitted sideways

I used the Icelandic cast off.

The advantage of knitting a scarf sideways is that you get perpendicular stripes when wearing the scarf. The disadvantage is that you only know when it is too late, whether your scarf will be long enough. It turned out just long enough, but I could have added another 15 sts to get a scarf of a length corresponding to my height, which is a good rule of thumb for calculating scarf lengths.

The tension is the same as for the cardigan (27 sts = 10 cm in stocking stitch). If you find that the math does not add up, you are right! This is because the garter stitch bands have a looser tension and they determine the length of the scarf. 

Someone asked to see the wrong side of the scarf, so here it is. Ideally, a scarf should not have a wrong side, but as wrongs sides go, it is not that bad, IMHO.

Damselfly scarf

Update on the fingerless gloves

In the meantime, I have made a pair of Herald fingerless gloves and a second pair of Damselfly fingerless gloves. I made the thumbs 20 stitches, and they fit perfectly.

The pattern of the Herald gloves is 35 rows tall, which means that the palm pattern ends in the middle of a cross. I added one more row οn the inside of the hands to finish off the crosses.


I made a second pair of Damselfly gloves, because I wanted narrower cuffs, like the ones on the Herald gloves.

Categories
Blogposts

The Damselfly Cardigan

I find the Damselfly in the Northern Blue colourway one of the most beautiful Alice Starmore designs.

Alice Starmore - The Damselfly Cardigan

That being said, I am quite curvy and have short arms, so I chose to make some adaptations to the pattern. The challenge was to keep the general frame while changing the dimensions of the different parts. I am quite pleased with the result, though I did have to sacrifice the uppermost blue (Mara) stripe in the bodice. 

I also chose to leave out the top centre back chevron to let the beehive pattern stand out more.

I knitted the medium size with the following adjustments:

The bodice and yoke

I made all stripes on the sleeves and bodice 18 rows wide. Since I have rather short arms, I figured I did not need to make a wider stripe at the wrist.

However, for the stripes on the sleeve and the bodice to line up, I only had room for 4 stripes on the bodice.

I have quite a bit of a bust and I wanted the yoke border to really sit below my bust. Furthermore, I was concerned that the yoke band might flare. So, I increased the distance from the yoke to the armhole slightly and I knitted the yoke band one size smaller.

I made all the decreases on the bodice as in the pattern, but then continued up to the yoke band without increasing. I made the yoke band in size small. After attaching the yoke band, I increased to 241 stitches and continued in size medium. This way I got a slightly more pronounced empire line.

Much as I love that the original pattern only has buttons on the yoke, I am not comfortable wearing a half open cardigan, so I added buttons all the way down.

The sleeves

As usual, I made my own sleeve decreases, decreasing more steeply for the sleeve cap. I have found a set of decreases that work well with my shape and I am very reluctant to change them. 

The button and neck bands

I want the neck band to sit on top of the button bands, i.e. I first make the button bands and then the neck band, placing the uppermost button and buttonhole on the neck band. 

I always knit button bands separately. Subsequently, I pick up stitches down the front or around the neck respectively, and join the bands to the bodice using the three-needle method – without binding off. I knit another 4-5 rows in stocking stitch, and sew down the flap to cover up the raw edges of the steek.

The Damselfly Cardigan by Alice Starmore - Steek

I cast on 138 stitches for the button band, i.e. fewer than in the pattern. My garter stitch tension is looser than my stocking stitch tension and I did not want the button band to flare.

I made a shaped neck band, casting on 101 stitches, increasing to 123 after the first 3 garter stitch ridges. I attached it as described above for the button bands.

…and a couple of technical notes

I used 2.5 mm needles for the striped sections and a 3 mm circular needle for the fair isle section to get the right tension using 2-ply Hebridean from Virtual Yarns.

Since I had to make a steek anyway for the yoke, I knitted the whole bodice in the round. I am a continental knitter and knitting is considerably faster than purling for me.

I also knitted the sleeves in the round on double-pointed needles up to the armhole. The sleeve cap is knitted flat.

Whenever I had 5 stitches (or more) between stitches of the same colour, I would catch the float, making sure not to catch it onto the same stitch in consecutive rows. (If you do this, the floats may be visible on the right side, an effect also known as “grinning”.) Here is how I catch the upper and lower yarn respectively:

I always secure steeks on the sewing machine before cutting. The purist side of me does not like the idea of a polyester thread in such a lovely garment, but secured steeks a) are a necessity if you pick up the stitches the way I do and b) allow for much thinner steeks, i.e. less bulk.

I made the sleeve, armhole and neck decreases after the first two and before the last two stitches respectively. These stitches including the decreases I worked in stocking stitch even on the machair bands. 

Damselfly hand knit cardigan by Alice Starmore. Setting in the sleeve.

When joining the sleeves to the bodice, I do this by crocheting slip stitches through the middle of the second stitch of the row. (I always slip the first stitch, so the second stitch is the first “full” stitch and the one before the decreases.)

Damselfly hand knit cardigan by Alice Starmore
Categories
Blogposts

The Margaret Beaufort Jacket

While waiting for my Virtual Yarns Kit for the Damselfly to arrive I knitted Alice Starmore’s Margaret Beaufort from Tudor Roses using dark grey (mix 0519) Drops Lima from my stash.

Margaret Beaufort Jacket by Alice Starmore

Like the Strathspey, given that it is one colour only and that large parts of it are in stocking stitch, it is a relatively easy and quick knit, compared to other Alice Starmore designs.

As always I made a couple of adjustments to the pattern:

Alice Starmore’s patterns mostly have a very tight gauge. I had to go down to 3 mm needles to get it right. I did not make a swatch, but started with the sleeves to make sure I had the right gauge. 😉

I knitted the bodice in one piece and the sleeves in the round so as to avoid having side and sleeve seams. (Less work and less bulk!)

I used German short rows instead of the wrap-and-turn method throughout. I find these much easier and I like the result better.

I wanted a more fitted garment but have rather wide hips, so I used the medium size for the peplum and the small size for the edging and the rest of the bodice, and I decreased both at the side seams and at the “darts” on every decrease row, i.e. 8 decreases x 4 rows = 32 stitches decreased for the waist.

Even though I love the buttons at the back, I knew I would never wear it that way, so I made a higher neckline at what was going to be the back for me.

I wanted the collar to go right up to the middle of the button band, so that the left and right collar meet at the front without a gap over the button band. This meant that after having knitted the neckband, I had to attach the button band so that I could pick up the stitches to knit the collar. 

Alice Starmore, Tudor Roses, Margaret Beaufort knit cardigan. Button band and collar.

I cast on 109 stitches for the button band and then attached it to the bodice with the 3-needle method, as I have described in my blogpost on the Jane Seymour jacket. Button bands tend to stretch, so I often find that fewer stitches give a better result.

Margaret Beaufort Jacket by Alice Starmore - The button band

For the sleeves, I started with 49 sts increasing up to 79 sts, i.e. small size at the wrist and medium size at armhole height, increasing every 7th row. I have rather short arms and like to have rather tight sleeves at the wrists.

I used the following sleeve cap, which is more or less the one I used on the Strathspey and which I have found to work well for me. The decreases are steeper at the beginning resulting in less fabric at the armpits.

Sleeve cap:

Cast off 5 sts at beginning of next 2 rows, 3 sts at beginning of next 2 rows, 1 st at each end of following 3 rows. Work 1 WS row without shaping. Cast off 1 st at each end of next and every following alternate row 10 times. Cast off 1 st at each end of next and every following row 5 times. Cast off 3 sts at beginning of next 2 rows. Cast off remaining 21 sts, knitting 2 together at beginning and end of middle panel. 

Categories
Blogposts

The Strathspey Sweater

Alice Starmore is my favourite knitting designer and I have just finished my third Starmore project, the Strathspey sweater. I used the original yarn from Virtual Yarns: Hebridean 3-ply, Colour: Storm Petrel.

Alice Starmore Strathspey Sweater
  • I used a 3 mm circular needle to get the right gauge.
  • I did not use a cable needle to cross the stitches. I find that too fussy, especially when crossing a single stitch, as in this design.
  • I knitted the bodice on a circular needle. (No reason to have side seams. These add bulk to a garment. I am a curvy girl and will do anything to have a more sleek garment.)
  • I purled a round around the hem and the bottom of the sleeve and collar.

I made a couple of modifications to the design to adapt it to my body type. I have quite a large bust and “strong” upper arms (a euphemism!) but rather narrow shoulders and short arms.

For the sleeves, I wanted less fabric around the wrist.

For the upper bodice, I wanted narrower shoulders, a tighter neckline and less fabric around the armpits than in the original design. 

The sleeves

I started with the amount of stitches the sleeve has after all the decreases, i.e. 53 stitches.

I knitted 10 rows before starting with the knot pattern. This gives a small flare at the edge.

I increased every 6th row of the sleeve (I have quite short arms).

The sleeves are knitted in the round up to the armpit and then knitted flat for the sleeve cap.

The sleeve cap

To have less fullness around the armhole, I made a narrower sleeve cap, i.e. I decreased more steeply in the beginning.

(I decreased as follows: 5 sts at the beginning of the first 2 rows, 3 stitches at the beginning of the next 2 rows, 1 stitch at each end of the next 5 rows, 1 stitch at each end of every following alternate row 9 times, 1 stitch at each end of the next 5 rows, 3 stitches at the beginning of the next 2 rows, cast off the remaining stitches.)

Shoulders and neckline

When decreasing for the neckline, I kept decreasing until I had 23 sts on each shoulder (instead of 26).

I used German short rows and the 3-needle bind off for the shoulders.

Three-needle cast off

I decreased 4 stitches in each centre panel and then made sure to pick up more stitches on the sides to arrive at 90 sts to make the collar. This means that my stitches were distributed differently around the neckline and I had to check to make sure that I get a knot centre front.

I knitted the 6 rows of ribbing on a 2,5 mm needle to make it nice and tight.

The finishing touch

I do not really block my knits. I wash them on the “hand wash” programme in the washing machine and lay them out to dry flat. I press the stocking stitch parts lightly with a steam iron.

Do not judge the fit of this sweater when it is fresh off the needles. You need to block or wash it to see how much ease there is in the pattern.

…and finally thank you…

…to the kind soul from the Alice Starmore Knitting Group on Facebook who pointed out that the middle stitch in the stocking stitch panels changes from purl to garter stitch after the first repeat of the chart. I would have missed that fine detail!

I can warmly recommend joining the group: lots of lovely people and useful and encouraging comments!


Categories
Blogposts

The Jane Seymour Jacket

Alice Starmore’s designs were a revelation to me as a knitter. I love the way she creates different textures and combines different techniques. I also adore the luxurious garments, the shaped waistlines the historical references and the rich decorations.

The two most complicated and challenging projects I have ever completed are the Jane Seymour and the Anne Boleyn jackets from the book Tudor Roses.

A major drawback of these designs is that I cannot knit them while watching TV 🙄. You really need to look all the time. This meant that it took me a long time to complete both jackets, as I could not knit them during my usual TV-series-and-knitting evening slot…

I hardly ever follow a knitting pattern to the letter, though. Below are a couple of modifications I did to the pattern.

I knitted the second size (medium) in Drops Fabel sock yarn and I used scrap yarn for the embroidery. I was not familiar with Virtual Yarns back then. I am now converted and have just ordered my second yarn pack 🧶🙂

Here are three things I did to streamline the pattern:

  1. No side seams
  2. The rose leaf edging
  3. The button band

1. No side seams

Alice Starmore - Jane Seymour jacket - Tudor Roses - knitting

I always knit without side seams. Side seams add bulk and extra work. So, I added the amount of stitches needed for the back and the two front pieces, placed a marker at each side “seam” and knitted it all in one piece.

I subtracted one stitch on every side, so as to have a central stitch (in the contrast colour) marking the side seam. Added stitches were gradually worked into the pattern.

I knitted flat (back and forth, not in the round) on a circular needle. At the armhole I divided the work and finished each part separately.

The sleeves are knitted in the round on double-pointed needles up to the armhole. The sleeve cap is then knitted back and forth.

2. The rose leaf edging

The pattern starts with the rose leaf edging. Each leaf has to be knitted separately. This makes for a lot of ends to be woven in. Furthermore, in my size it asks for half a leaf on each side of the button band at the front. I did not like this.

Instead, I added up the total number of leaves I would need for the back and two front pieces (26 in total) and multiplied this by the number of stitches I would need for each leaf (21). So, I cast on 546 stitches. Since I would be knitting it all in one piece, I could distribute the leaves evenly across the whole of the bodice.

I then completed the first leaf (having changed colour) over the first 21 stitches, and then moved on to the next 21 stitches for the next leaf without breaking the yarn. The yarn is carried to the next leaf, much like the strands in fair isle knitting, as seen in the photo below.

Alice Starmore - Jane Seymour jacket - Tudor Roses - knitting

3. The button band

I like to cover up the button band seam, even if I have not steeked the garment, for two reasons: it gives a very neat finish and it gives support to the button band.

To do this, I cast on for the front band on two needles and knit the button band. I then pick up stitches along the front, place the button band in front of the front panel, right sides facing, and knit them together with the 3-needle technique.

There is some math to do here. I invariably pick up more stitches than I need, so every now and then I have to knit one button band stitch together with two stitches from the front panel.

Knit together, but do not bind off! Knit 4 or 5 rows more, bind off, cut the yarn leaving a long tail, which you will use to sew the flap down, thus covering the join.

Even though I made my jacket longer than in the pattern, I used the given amount of stitches for the front bands. Garter stitch always comes out a lot stretchier and with a larger gauge than stocking stitch, so I make sure not to cast on too many stitches.

A couple of other comments:

  • I made it longer than the original. Back length is 49 cm.
  • I added a couple of stitches to the upper sleeve. Normal sleeves are often too tight for me.
  • I crocheted the shoulder seams and the armhole seams together with slip stitches. I prefer this to sewing with backstitches, as it gives some elasticity that matches the texture of the rest of the garment.
  • I did not use a cable needle. When you only need to cross one stitch at a time, using a chain needle is a lot of fuss.

  • Here is a small video showing how I hold the yarn for the garter stitch patterns on the button bands. Only recently have I gone over to holding two colours in one hand when doing stranded knitting. Makes things a lot easier!