
How to purl

There are two basic stitches in knitting: the knit stitch and the purl stitch. With this square you will be learning how to purl.
There are different ways of working the purl stitch, all of which produce the same result. Each method has advantages and disadvantages.
Personally, I use the Norwegian purl. The movement is larger than with the other methods, but the advantage is that you do not need to change the position of the working yarn between knit and purl stitches.
If you have already learned to purl a certain way, you may want to stick with that – or you may want to experiment with other methods! 🤓
- Norwegian purl:
- English style purl:
You already know how to
Instructions
Cast on 27 stitches.
Rows 1 to 6: Slip the first stitch purlwise, knit the remaining 26 stitches.
Υou have now 3 garter ridges on the right side of your knitting.
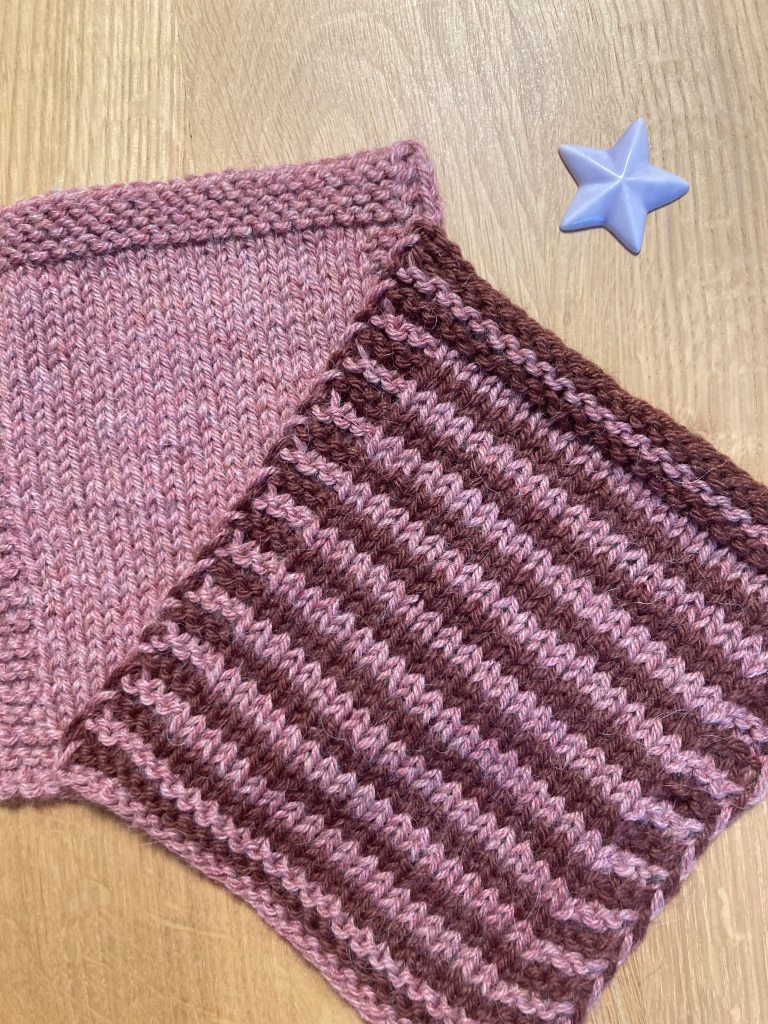
Row 7 (Wrong side): Slip the first stitch purlwise, knit 3 stitches, purl 19 stitches, knit 4 stitches.
Row 8 and all even-numbered rows until and including row 40: Slip the first stitch purlwise, knit the remaining 26 stitches.
Row 9 and all odd-numbered rows until and including row 41: Slip the first stitch purlwise, knit 3 stitches, purl 19 stitches, knit 4 stitches.
At this point you should have 21 garter stitch ridges in the garter stitch border of the square.
Rows 42 to 47: Slip the first stitch purlwise, knit the remaining 26 stitches.
Υou now have 24 garter stitch ridges in the garter stitch border.
Cast off and weave in ends.
This is how to weave in the ends in stocking stitch on the wrong side.
Anna’s tips 😉
🧶 At some point, you will come to the end of your skein. If you are in the middle of a square, you will need to join a new skein. My preferred way of doing this is by sewing one end into the other.
For more detailed explanations on how to join skeins, click here.
🧶 You can also make this square with stripes.
Geeky Notes 🤓
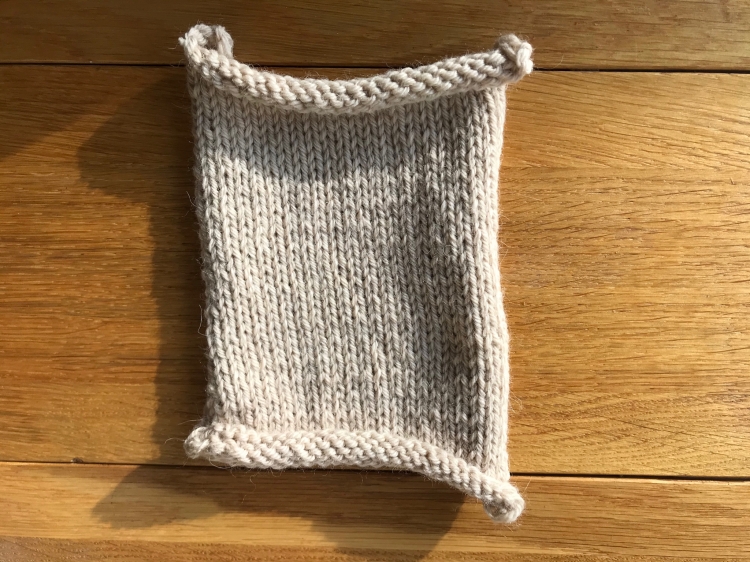
As mentioned already, whenever you knit a row, a series of Vs is formed on the side facing you, and a ridge is formed on the back side. The opposite happens when you purl a row. By alternating knit and purl rows, you get all the Vs on one side and all the ridges on the other. This pattern is called stocking stitch or stockinette and is probably the most common pattern.
If you knit a patch entirely in stocking stitch, the top and bottom edges roll inwards and the sides roll outwards. This cannot be remedied, no matter how much you iron or press it. Therefore, in most cases, it is advised to knit a border in another pattern like garter stitch, rib or seed stitch (see next square).
Stocking stitch can be lightly pressed with a steam iron or a hot iron and a wet cloth. You should however take care not to press the more textured patterns like garter stitch, ribbing or seed stitch.
This square will probably turn out a bit taller than the previous ones. Each kind of knitting has its own texture and elasticity. You need not worry about that too much. It will not be a problem once you have assembled the pieces.
If you successfully completed this square, you have learned how to
- purl
…and you can move on to
Square Four: The One with the Abbreviations
Well done this far! Congratulations for learning to purl! Knitting and purling are the two main stitches in knitting. Things will be a lot easier in the next squares.
