How to knit in the round
A very interesting and useful technique is knitting in the round using a circular or double-pointed needles. This way you can knit a sweater or a hat with no side seam ☝️ Another advantage of knitting in the round is that you are always on the right side, which minimizes purling. This is particularly useful, if you have an intricate pattern such as colourwork.
You already know how to
- cast on
- knit
- cast off
- slip the first stitch purlwise
- knit horizontal stripes
- purl
- follow a knitting pattern containing abbreviations
- decrease by knitting two stitches together
- place and slip a marker
- make a left-leaning decrease
- slip a stitch knitwise
Extra materials
- Yarn in two different colours
- 1 circular needle 4mm (US size 6 or UK size 8), 40cm (16in) long
- 5 double-pointed needles, size 4mm (US size 6 or UK size 8)
- 4 markers, one of which should be different than the rest
New abbreviations
- SM: Slip marker
- Rnd(s): Round(s)
- DC: Dark-coloured yarn
- LC: Light-coloured yarn
- DPN(s): Double-pointed needle(s)
Instructions
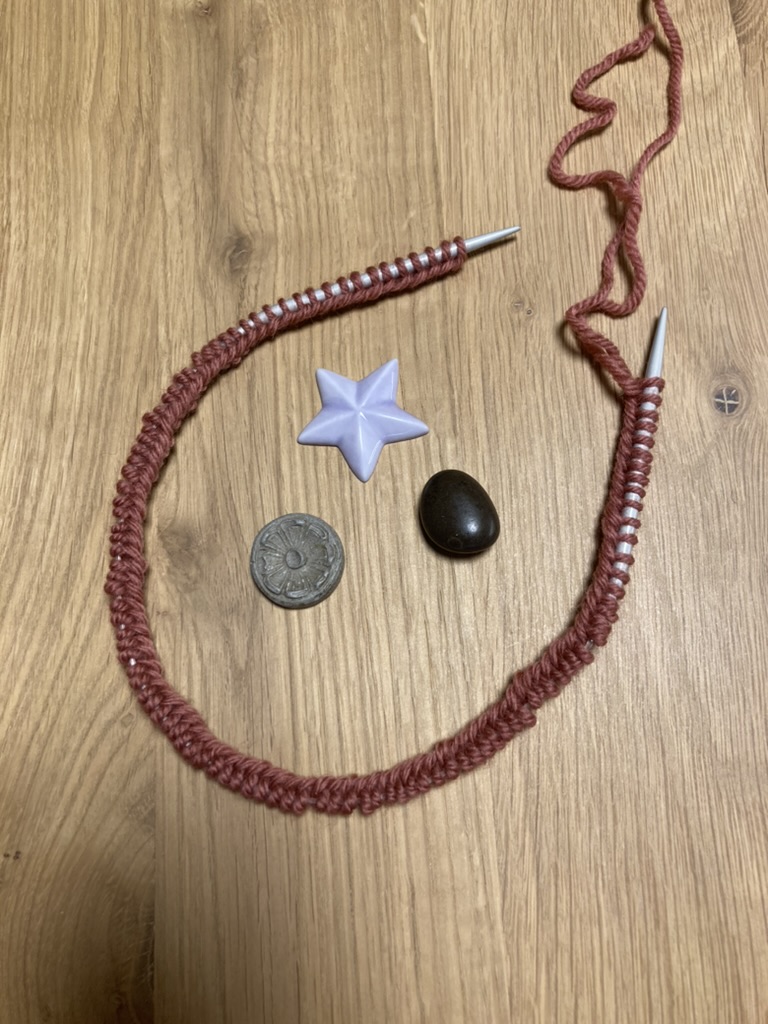
Using a circular needle and dark colour yarn (DC), cast on 108 sts. You will need a tail of yarn of approx 2m in length.
Join in the round as follows: Cast on an extra stitch (i.e. 109 in total) and pass it over the first stitch of the round (you now have 108 sts). Place the marker that differs from the rest to mark the beginning of the round.
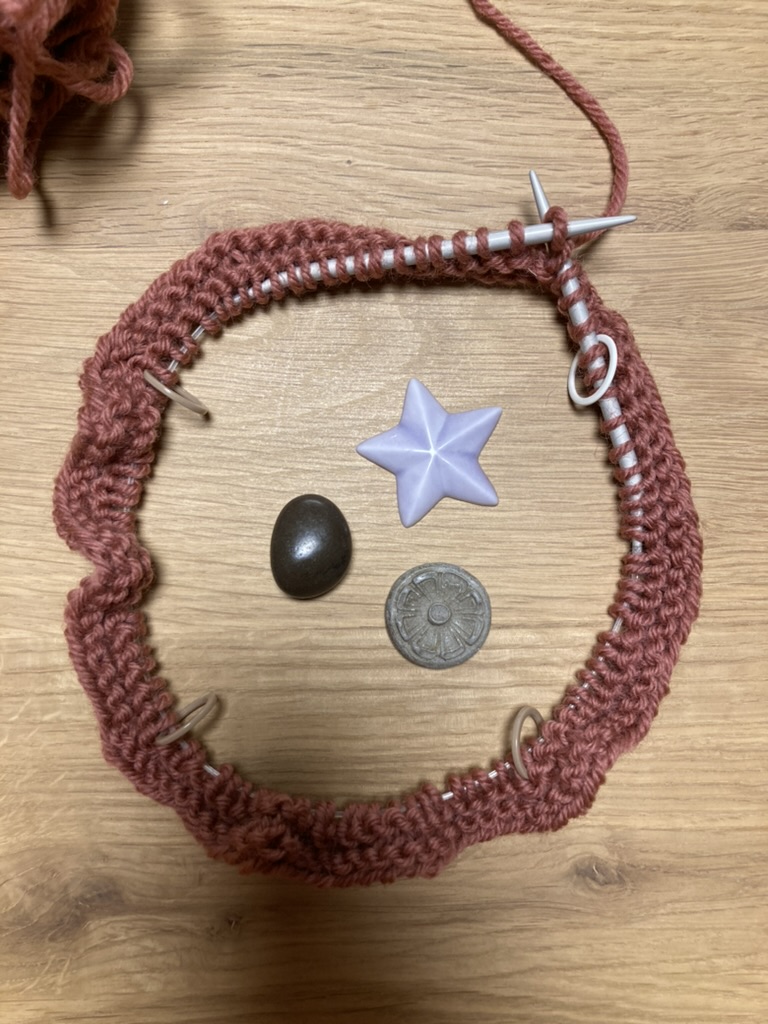
Rnd 1: Purl a round placing markers after the 27th, the 54th and the 81st stitch.
Take care not to twist your stitches, or you will end up with a Möbius strip.
If you did happen to twist the stitches, you can still rectify the situation after the 1st round, when you arrive at the beginning of the round. (After the 2nd round it will be too late: the twist will show.)
Rnd 2: [Ssk, k to 2 sts before marker, k2tog, SM] 4 times. (100 sts.)
Rnd 3: Purl.
Rnd 4: As rnd 2. (92 sts.)
Rnd 5: Purl.
Rnd 6: Knit.
Rnd 7: As rnd 2. (84 sts.)
Rnd 8: As rnd 2. (76 sts.)
Rnd 9: Knit
Rnd 10: As rnd 2. (68 sts.)
Rnd 11: As rnd 2. (60 sts.)
Cut the yarn and continue with LC.
Rnd 12: Knit.
Rnd 13: As rnd 2. (52 sts.)
Rnd 14: As rnd 2. (44 sts.)
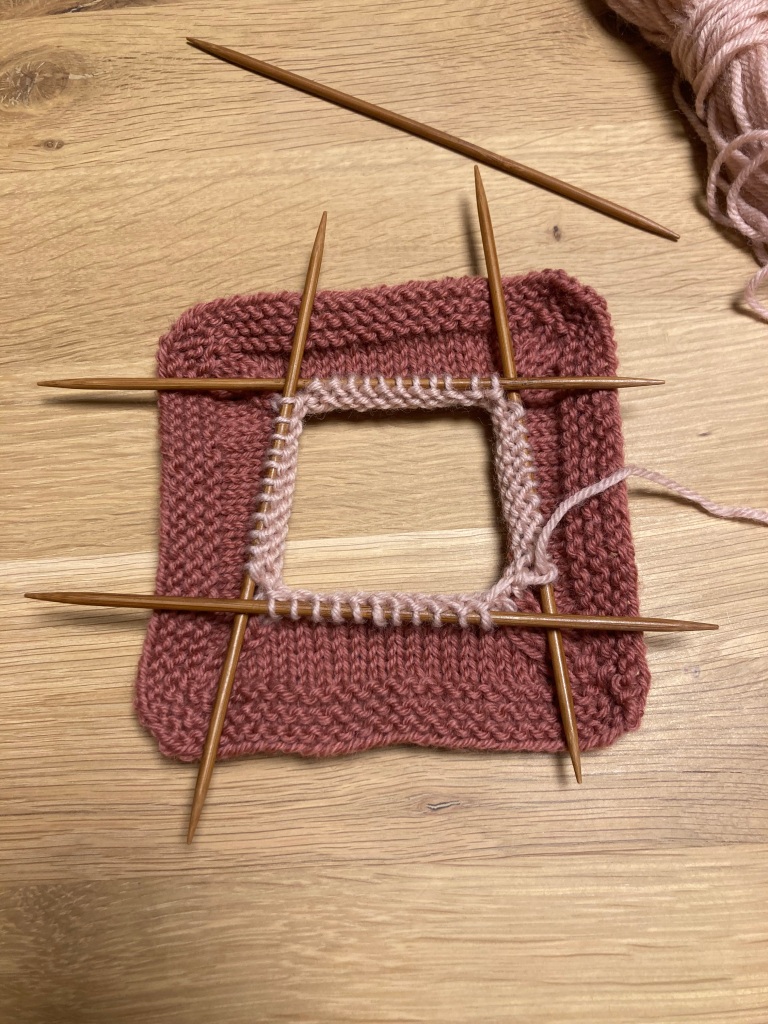
At this point you have 44 stitches left in total. If you continue on a circular needle, things will start getting difficult. So you should transfer the stitches to double-pointed needles (DPNs) as follows:
Rnd 15: Take a DPN and knit 11. Take another double-pointed needle and knit the next 11 stitches. Repeat until all stitches of the round have been transferred to 4 DPNs.
Rnd 16: Using the 5th DPN, knit as follows: Ssk, knit 7, k2tog. Using the needle that was just freed up, knit the stitches of the next needle in the same way. Repeat to end of round. (36 sts.)
Rnd 17: [Ssk, k5, k2tog] 4 times. (28 sts.)
Rnd 18: Knit.
Rnd 19: [Ssk, k3, k2tog] 4 times. (20 sts.)
Rnd 20: [Ssk, k1, k2tog] 4 times (12 sts.)
Rnd 21: Knit.
Cut the yarn leaving a tail of 15cm. Knit the first stitch and pull the loop until the tail has passed through the stitch. Repeat to end of round. Pull the yarn to close the hole tightly and weave in all ends.
Anna’s tips 😉
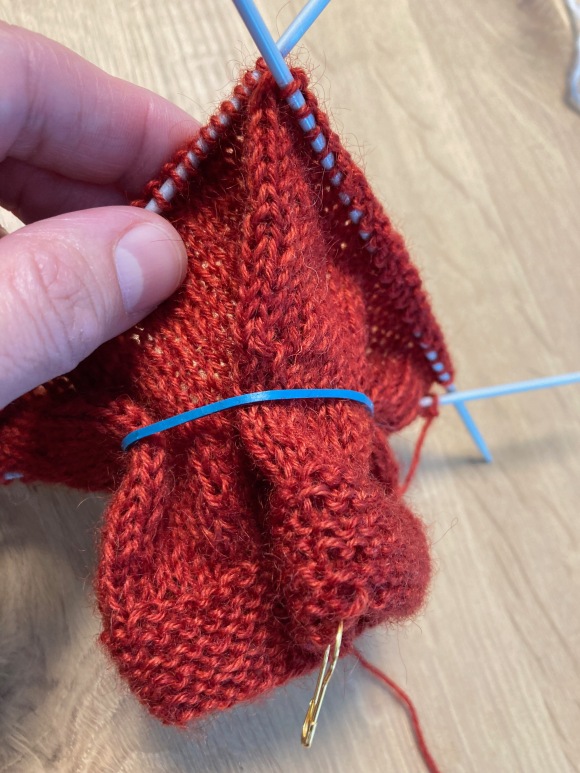
🧶 When knitting on double-pointed needles, if you are afraid of dropping your stitches or if you have a lot of them, you can hold them together with a rubber band.
🧶 Make sure to tighten the yarn a bit when changing needles, otherwise you may get a ladder of loose stitches at these points.
🧶 When casting off, I like to pass the yarn twice through all the stitches before pulling tight. I make a buttonhole stitch or two before weaving in the end.
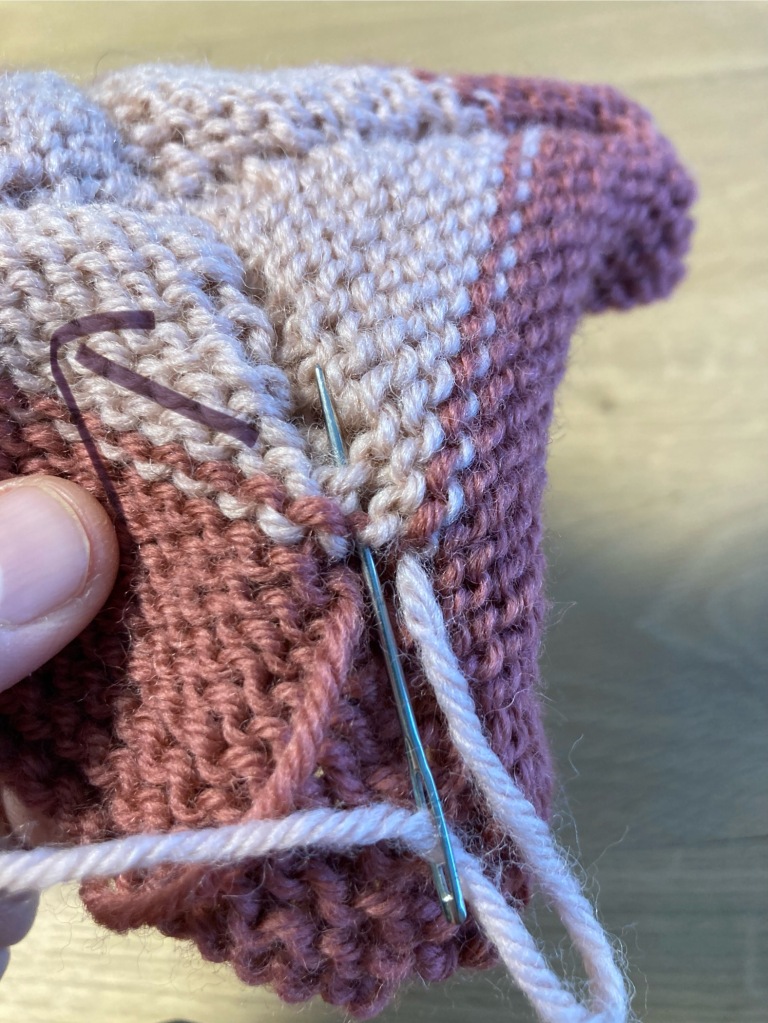
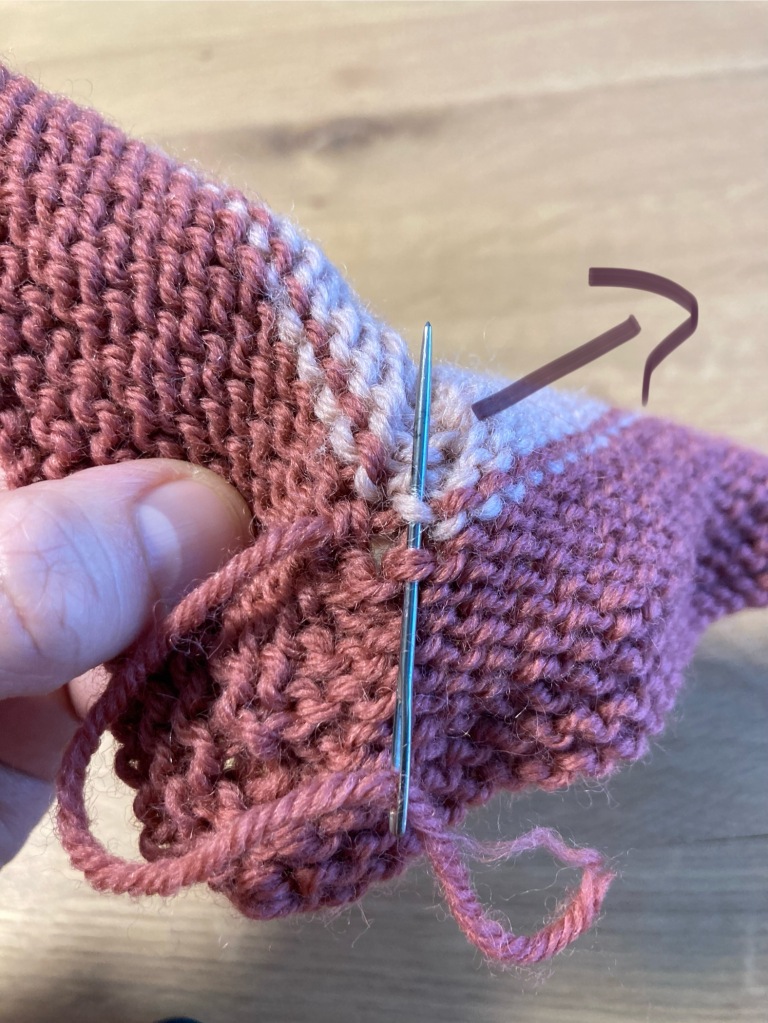
🧶 When weaving in the ends at the colour change, you can minimize the jog by going in the opposite direction from the one the yarn is coming from and sewing into the next stitch of the same colour.
🧶 If you find double-pointed needles daunting, there is the magic loop method, using a long circular needle. Personally I haven’t found it worth the while since it takes a lot more time than just changing needle.
If you have tried or are planning to try the magic loop method, I would very much like to hear your experience and opinion. Let me know in the comments field at the bottom of this page 👇
Geeky Notes 🤓
When knitting in the round, you are always facing the right side of your project. This means that knitting every round will result in stocking stitch, whereas for garter stitch you will have to alternate between knitted and purled rounds.
When casting on and joining in the round on a circular needle, you get a slight jog at the beginning of the round. By casting on an extra stitch and passing it over the first stitch of the round, you can eliminate the jog.
Knitting with double-pointed needles looks very complicated and always reminds me of Edward Scissorhands, but is in fact quite simple: you just knit as normal with two of the needles, while the others are on hold.
It is admittedly a bit messy, and you need to take care not to lose your stitches, especially if you knit very loosely or your needles are particularly heavy. You do, however, get used to it, and for some strange reason I LOVE 😍 knitting this way. I know I am not the only one. Many knitters get particularly addicted to sock knitting 🧦🧦🧦
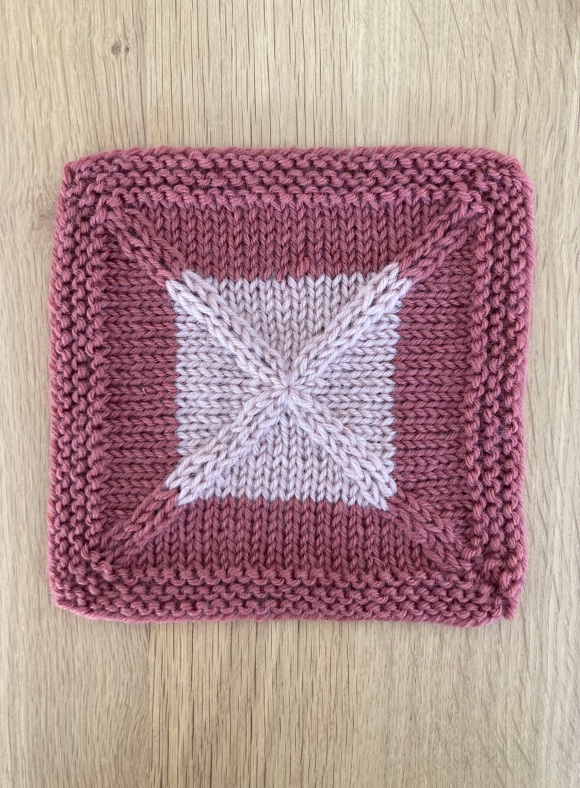
The way this square is knitted is more or less the way that a classic hat or beanie is knitted: Cast on the stitches on a circular needle, knit ribbing (k1, p1 or k2, p2) with a thinner circular needle for 4-5cm (1-2in), continue knitting in the round with a thicker circular needle. When project measures 12-15 start decreasing. When you are left with too few stitches for the circular needle, transfer the stitches to double-pointed needles. Continue decreasing and in the end cast off as above.
If you successfully completed this square, you have learned how to
- knit in the round

One reply on “Square Sixteen”
What a clever project! I love it
LikeLiked by 1 person