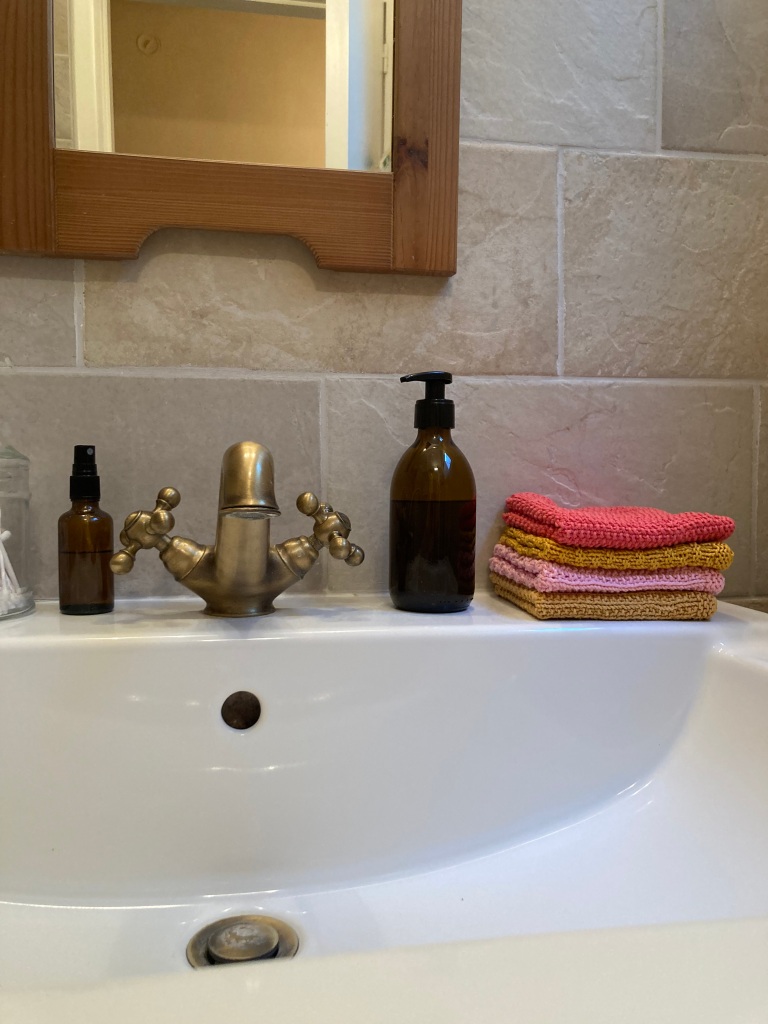
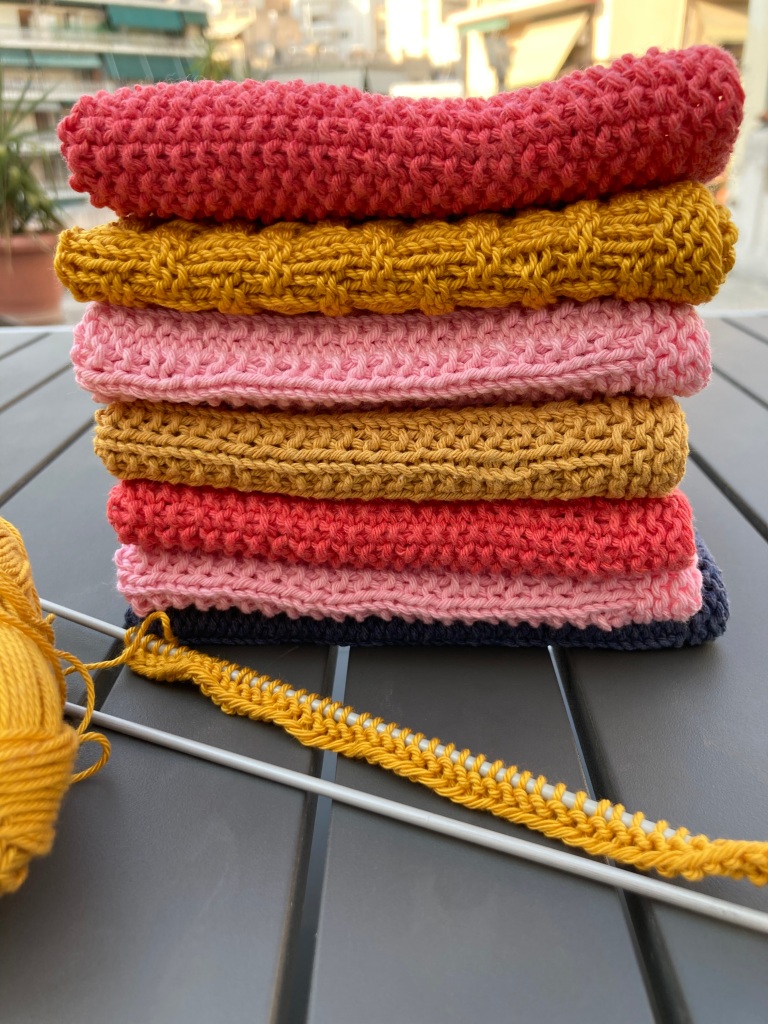
Philoxenia is the Greek word for hospitality, so it’s an apt name for these small personal guest towels. They are easy to make: You need one 50g skein of cotton yarn for each and you only need to know how to knit, purl and slip the first stitch.
Abbreviations
k: knit
p: purl
sl1p: slip one stitch purlwise
RS: right side
WS: wrong side
sts: stitches
Measurements
Approx 27 x 27cm.
Yarn
1 skein (50g) of DK cotton (approx 120m/50g) for each towel.
Needles
I like a tight tension for towels, so I use 3mm needles.
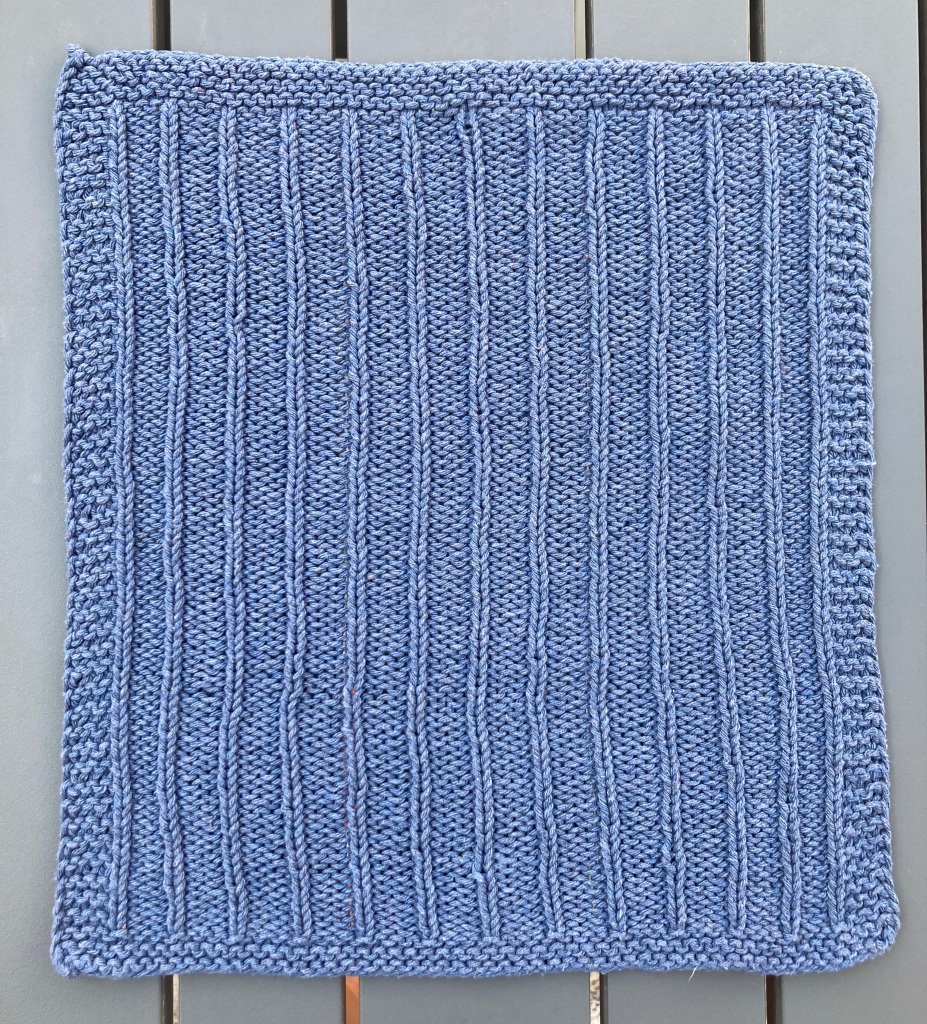
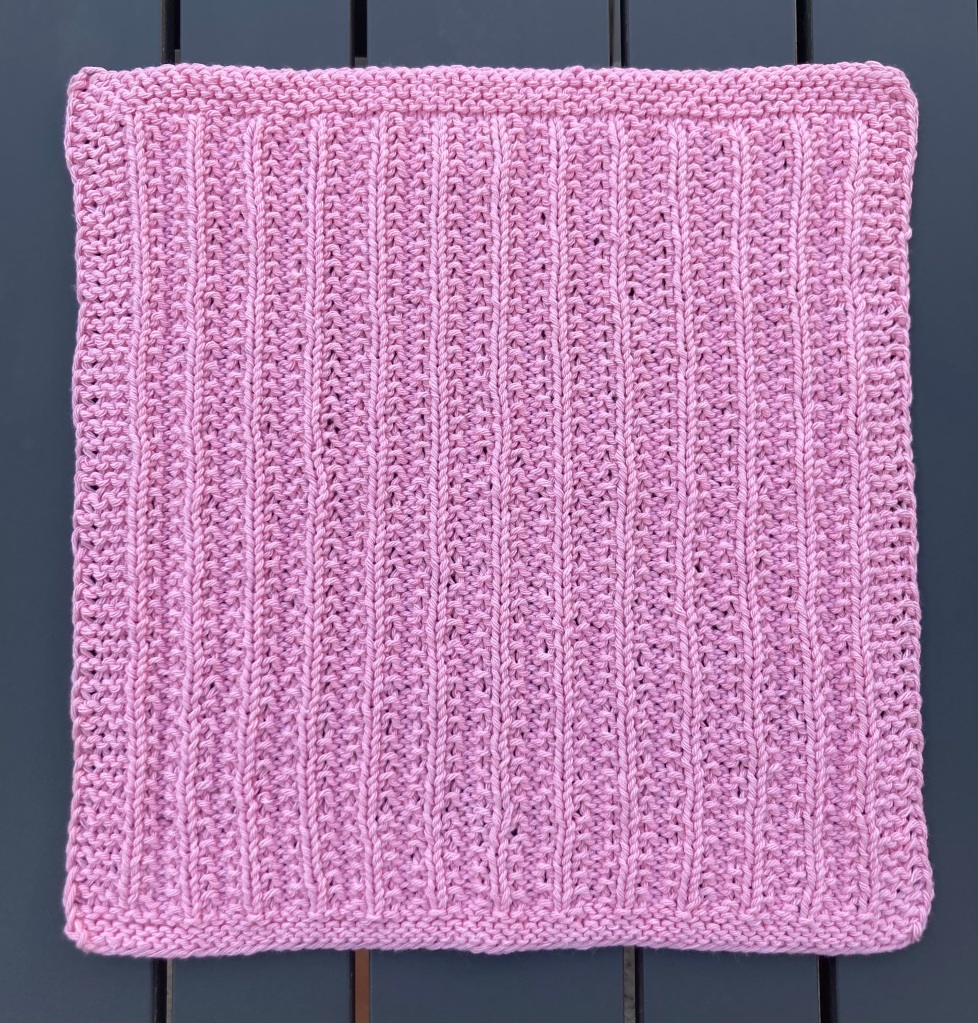
Towel With Vertical Lines
Instructions
Cast on 57 sts.
Rows 1 to 5: Sl1p, k to end of row.
Row 6 and all even-numbered rows up to row 92: Sl1p, k3, [k1, p3] 12 times, k5.
Row 7 and all odd-numbered rows up to row 93: Sl1p, k3, [p1, k3] 12 times, p1, k4.
Rows 94 to 99: Sl1p, k to end of row.
Cast off and weave in ends.
Seed Stitch Towel
Instructions
Cast on 57 sts
Rows 1 to 5: Sl1p, k to end of row.
Rows 6 to 93: Sl1p, k3, [p1,k1] to last 5 sts, p1, k4.
Rows 94 to 99: Sl1p, k to end of row.
Cast off and weave in ends.
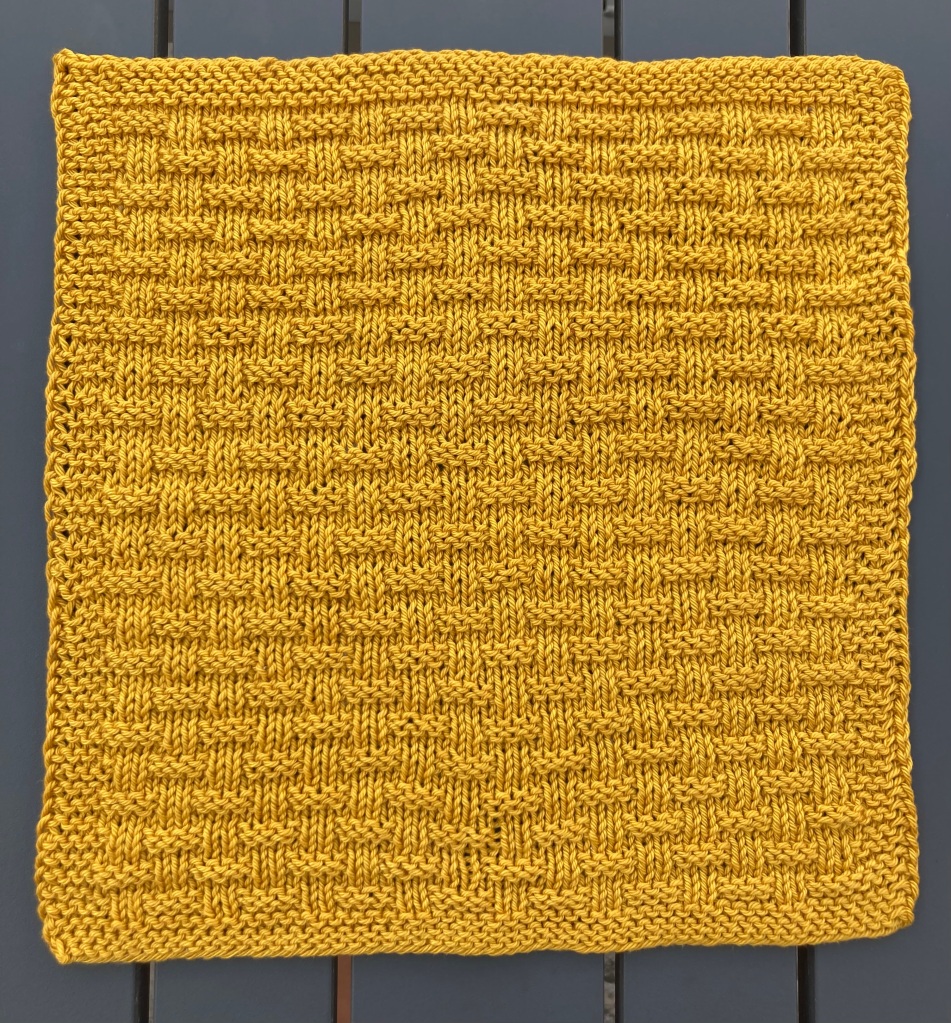
Basketweave Towel
Instructions
Cast on 57 sts.
Rows 1 to 5: Sl1p, k to end of row.
Row 6 (RS): Sl1p, k to end of row.
Row 7 (WS): Sl1p, k4, [p2, k4], 8 times, k4.
Row 8 (RS): Sl1p, k3, [p4, k2] 8 times, p1, k4.
Row 9 (WS): Sl1p, k3, p49, k4.
Row 10 (RS): Sl1p, k to end of row.
Row 11 (WS): Sl1p, k3, [k4, p2] 8 times, k5.
Row 12 (RS): Sl1p, k3, p1, [k2, p4] 8 times, k4.
Row 13 (WS): Sl1p, k3, p49, k4.
Repeat rows 6-13 another 10 times (93 rows completed in total).
Rows 94 to 99: Sl1p, k to end of row.
Cast off and weave in ends.
Mistake Rib Towel
Instructions
Cast on 57 sts.
Rows 1 to 5: Sl1p, k to end of row.
Rows 6 and all even-numbered rows up to row 92: Sl1p, k4, [p2, k2] 12 times, k4.
Row 7 and all odd-numbered rows up to row 93: Sl1p, k3, p1, [k2, p2] 12 times, k4.
Rows 94 to 99: Sl1p, k to end of row.
Cast off and weave in ends.
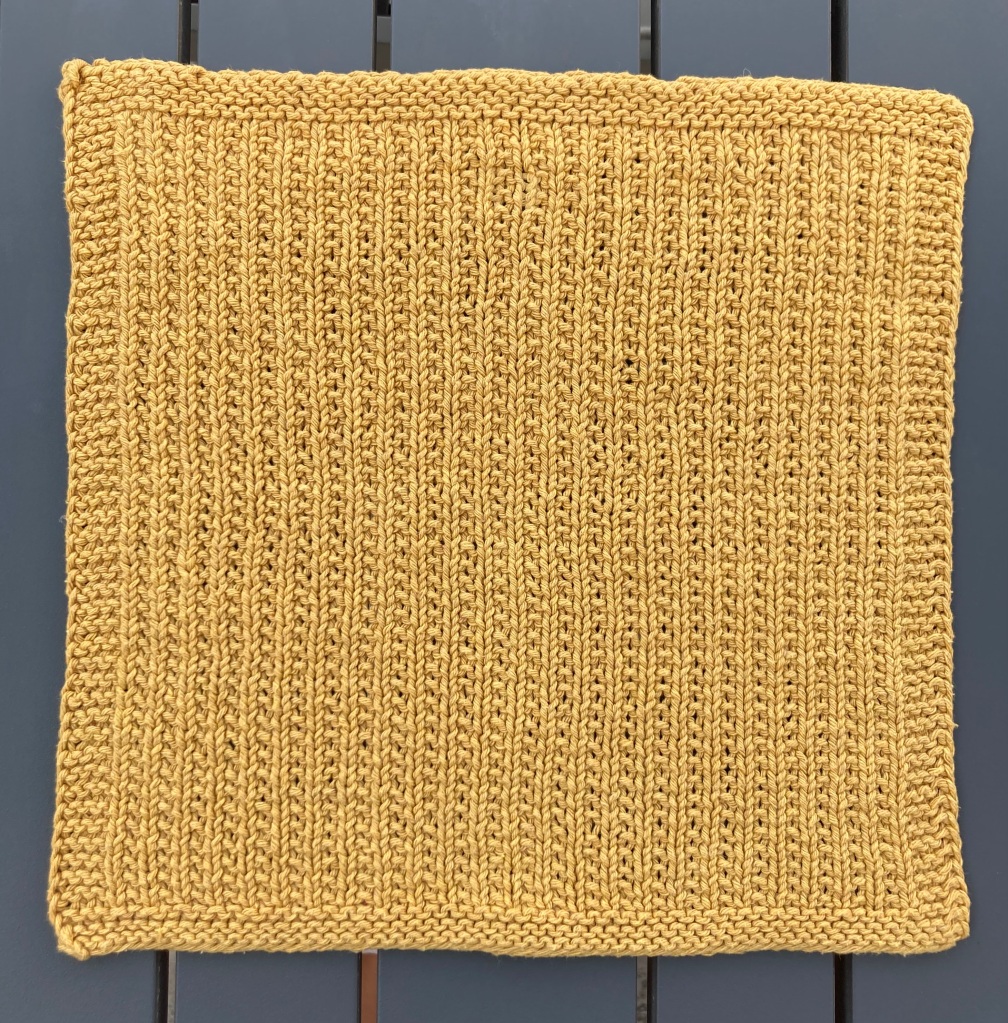
Broken Rib Towel
Instructions
Cast on 57 sts.
Rows 1 to 5: Sl1p, k to end of row.
Row 6 and all even-numbered rows up to row 92: Sl1p, k to end of row.
Row 7 and all odd-numbered rows up to row 93: Sl1p, k3, [p1, k1] to last 5 sts, p1, k4.
Rows 94 to 99: Sl1p, k to end of row.
Cast off and weave in ends.
You are welcome to share your work on social media and to tag me (@annaplexis.knits on Facebook, Instagram and Threads, @annaplexis on TikTok, X, Mastodon, tumblr and YouTube). I’d love to see your work 🙂
Hashtags #annaplexis and #PhiloxeniaTowels
Tutorials
Long tail cast on:
You can weave in the first tail in advance:
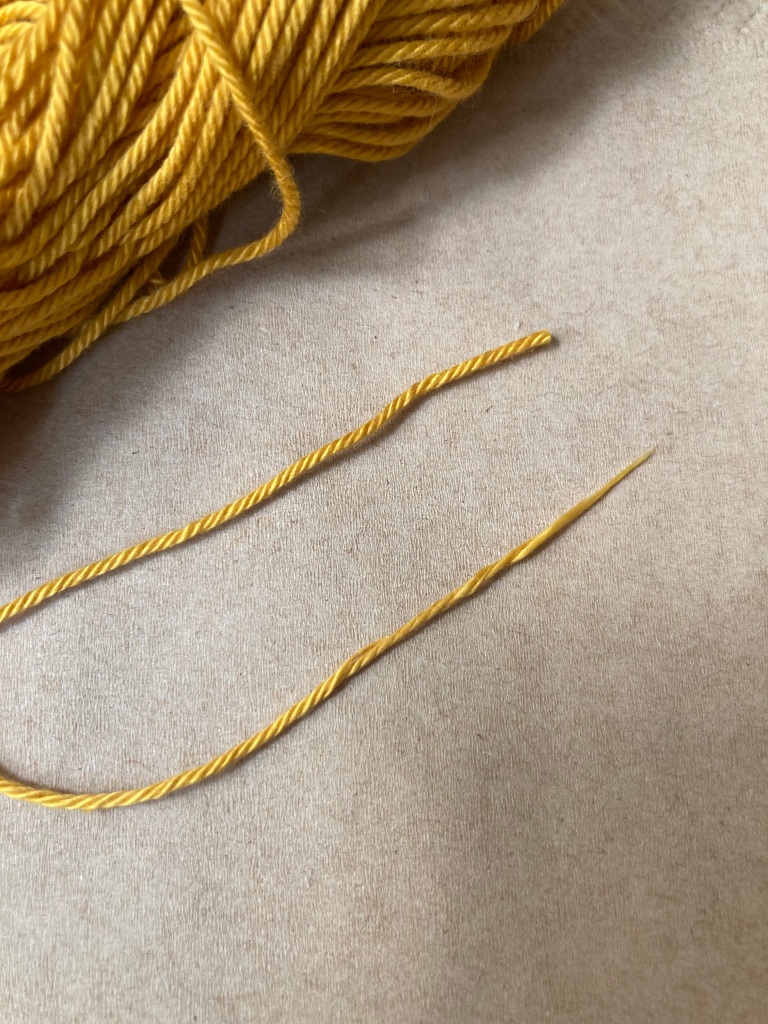
Make sure to taper the yarn end first:
Slip the first stitch purlwise with the yarn in front:
Cast off loosely using regular cast off:
When you get to the last stitch, cut the yarn and pull it through the stitch:
Weave in the end:
And if you REALLY want to be a perfectionist, you can cut the fibers of the yarn at different lengths to prevent the ends from peeping through:
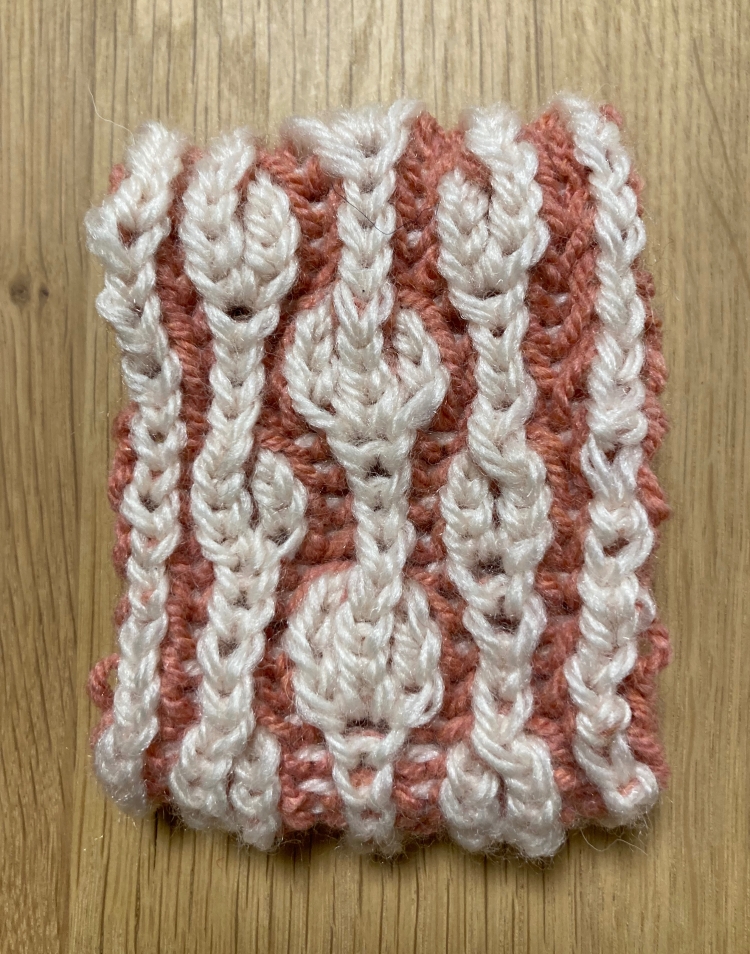
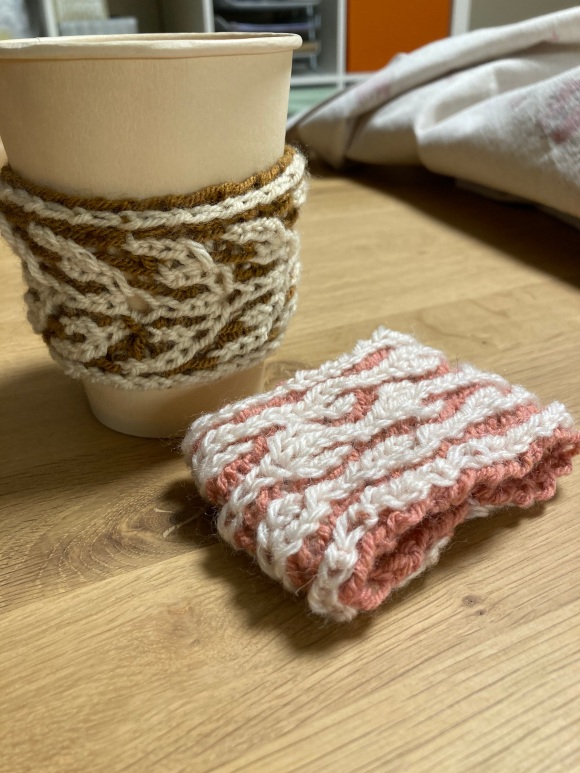
Cup sleeves are the ideal small scale project to practice new stitches. Here’s a pair to practice two-colour brioche with increases and decreases.
You should already be familiar with the basic brioche stitch as well as the general principle of two-colour brioche. If you are not, I suggest you start with the Brioche and Coffee Trio of dishcloths.
Brioche increases and decreases are done in pairs. This means every time you want to add a stitch, you also need to add a purl stitch to ensure continuity of the pattern. For a double increase, you need to add four stitches.
The same goes for decreases. Every time you decrease a stitch, you also have to decrease the purl stitch next to it. So, single brioche decreases actually follow the logic of double decreases in “normal” knitting.
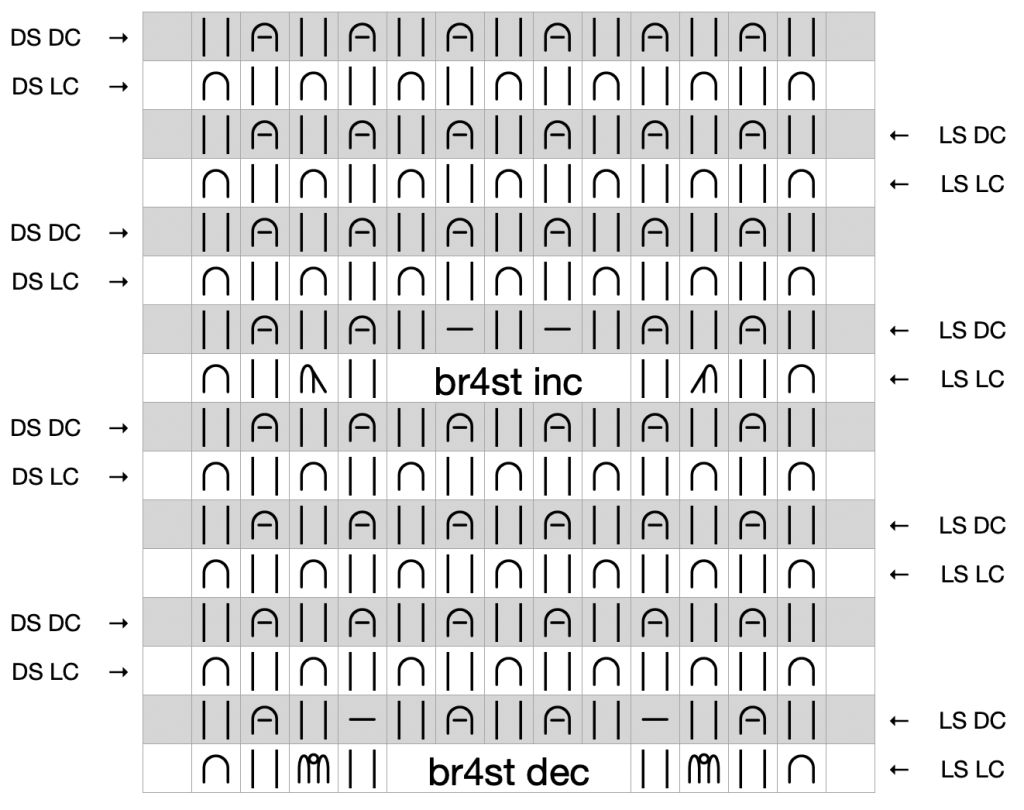
How to read these patterns and charts
If you have already made the Brioche and Coffee Trio of dishcloths, you will know that in two colour brioche every side is worked twice before turning. First you work the light side with the light colour (a LS LC row), then you slide the stitches to the other end of the (circular or double-pointed) needle to work the same side with the dark colour: a LS DC row. Turn and work a dark side – light colour row: DS LC. Slide the stitches and work a row on the dark side with the dark colour: a DS DC row.
The white squares in the charts are to be worked with the light colour, the grey squares with the dark colour.
The arrows show the direction of knitting. Like most knitting charts, these charts show the right side, i.e. the light side of the work. So if you are on the dark side and the chart shows a brk, you should work a brp and vice versa.
All the increases and decreases in these two charts are on light side rows, so they are all worked as written.
The empty squares right and left in the charts are the selvedge stitches. These are to be worked as follows:
on LC rows: slip the first stitch purlwise and bring the yarn to the front, slip the last stitch purlwise.
on DC rows: knit first and last stitch.
Slip the first stitch purlwise and bring the yarn to front is worked like this:
Below you will find the symbols and abbreviations used in the charts. Scroll down to the bottom of the page for video tutorials.
Abbreviations and symbols used in the charts and the pattern:
LS – light side
DS – dark side
LC – light colour
DC – dark colour
Flat White Cup Sleeve
You will need:
DK wool or acrylic, approx. 25 m of each colour
3.5 mm DPNs or circulars
Instructions:
Cast on 15 sts with DC and long tail cast on.
Turn. Join light colour.
Setup row DS LC (i.e. on the dark side with the light colour): Sl1p (p, slyo), to last 2 sts, p, bring yarn to front, slip last stitch. Slide sts to other end of needle.
Setup row DS DC (i.e. on the dark side with the dark colour): K1, (sl1yo, brk) to last 2 sts, sl1yo, k1. Turn.
Next rows:
LS LC i.e. light side with light colour : Sl1p, (brk1, sl1yo) to last 2 stitches, brk1, bring yarn to front, slip last stitch. Slide sts to other end of needle.
LS DC, i.e. light side with dark colour: K1 tbl, (sl1yo, brp) to last 2 sts, slyo, k1. Turn.
DS LC, i.e. dark side with light colour: Sl1p (brp, slyo), to last 2 sts, brp, bring yarn to front, slip last stitch. Slide sts to other end of needle.
DS DC. i.e. dark side with dark colour: K1 tbl, (sl1yo, brk) to last 2 sts, sl1yo, k1. Turn.
Start working chart. Continue working selvedge stitch as you did up to now, i.e. slip first and last stitch on all LC rows, knit first and last stitch on all DC rows.
Continue until work measures approx.. 16 cm or desired length.
Finish with a double row on the light side.
Break the LC yarn. With double-pointed needle pick up 15 stitches along the cast on edge. Fold the cast-on edge upwards with light sides facing each other and knit stitches together using the 3-needle bind off.
Work as Flat White Cup Sleeve above. Use the chart below.
Geeky Notes 🤓
MAKE A LIFELINE every now and then. You won’t regret it. It is notoriously difficult to correct mistakes in patterned brioche and if you are anything like me, you are bound to miss an increase or decrease at some point.
It is possible to do single pass brioche even with increases or decreases, but I find that it’s too complicated and therefore offers no added value. I’d be interested to hear if you have come to a different conclusion! Let me know in the Comments field below.
You are welcome to share your work on social media and to tag me (@annaplexis.knits on Facebook, Instagram and Threads, @annaplexis on TikTok, X, Mastodon, tumblr and YouTube). I’d love to see your work 🙂
Brioche knitting has certain characteristics that put it in a category of its own. The texture and tension is very different from stocking stitch: It’s wonderfully squishy and very stretchy and uses up a lot more yarn than other patterns.
I like to find small useful projects to learn and teach new patterns and techniques rather than knit useless swatches, and I find that brioche is particularly suitable for dishcloths. I have often used these dishcloths as gifts – with limited success though, as my friends find them too pretty to use to wipe the kitchen counter 🤔
Below you will find three different sets of instructions: one for a single colour dishcloth, one for a two-colour brioche dishcloth explaining the basics of this technique and one for a two-colour dishcloth worked with single-pass brioche. The two latter sets of instructions produce identical dishcloths, the last one utilising a more complex but faster technique.
Single colour brioche is a very easy and simple pattern, which consists of two stitches: the sl1yo (slip 1 & yarn over – to be worked in one movement) and the brk (brioche knit, i.e. knit a stitch together with its yarn over).
Two-colour brioche is somewhat more complicated. You need to work each side twice, i.e. work a row with one colour and then slide the stitches back to the other end of the needle to work the row with the other colour. For this, you will need to work on circular needles or double-pointed needles. You will also be using the brp stitch (brioche purl, i.e. purl a stitch together with its yarn over).
It is, however, possible to work both colours in a single pass. As soon as you have mastered the principle of two-colour brioche and you feel you are ready for the next challenge, you can work two rows in one pass following the instructions for the Espresso Macchiato Dishcloth.
Abbreviations
sts: stitches
sl1p: slip 1 stitch purlwise
k: knit
sl1yo: Slip 1 stitch and yarn over
brk: brioche knit (i.e. knit a stitch together with its yarn over)
brp: brioche purl (i.e. purl a stitch together with its yarn over)
DC: dark colour
LC: light colour
Latte Macchiato Dishcloth
Single colour brioche
Yarn
150m of sport weight or 8/4 cotton (120-170m/50g)
Needles
A pair of 3mm knitting needles (Brioche is best worked with relatively thin needles)
Instructions
Cast on 45 sts.
If you haven’t tried brioche before, I suggest you use the long-tail cast on.
If you are ready to up your game though, you should try the Italian cast on. This is by far the most elegant way, in my opinion, to start a brioche project.
Take care not to twist the stitches. This can be a bit challenging. The Queen of Brioche Nancy Marchant suggests using a lifeline to keep track of the direction of the stitches, but I have to admit I have not (yet!) used that method myself.
Cast on the last stitch using the long-tail method to “lock” the stitches.
Remember that when doing the Italian cast on, every other stitch has got the “wrong” leg in front. Knit these stitches through the back loop (the right leg) so as not to twist them.
Set-up row: Sl1p (k1, sl1yo) to last 2 sts, k2.
From this point on, you will be using the brk stitch, i.e. you will be knitting a stitch together with its yarn over.
Row 1: Sl1p (sl1yo, brk) to last 2 sts, sl1yo, k1.
Row 2: Sl1p (brk1, sl1yo) to 2 sts, brk1, k1.
Repeat these 2 rows 80 times, i.e. until you have 80 knit stitches per column.
{If you are an English style knitter and have never knitted brioche before: please note that the working yarn must always be in front before slipping the stitch. You can find general information on brioche knitting for English style knitters on Nancy Marchant’s website.}
Bind off using some kind of stretchy bind off and weave in the ends.
Italian bind off is particularly suitable and matches the Italian cast on edge perfectly. You will find detailed instructions for the Italian bind off in this bind off overview.
Italian bind off is particularly suitable for brioche knitting
In brioche knitting you can weave in the ends along the side of a knit stitch column in the channel that is formed between the two layers of yarn.
Caffè Lungo Dishcloth
Two-colour brioche
Yarn
sport weight or 8/4 cotton in two different colours, approx. 75 m of each colour
Needles
3 mm DPNs or circulars
Instructions
Cast on 45 sts with the dark colour (DC).
Turn.
With light colour (LC): Sl1p, (k1, sl1yo) to last 2 stitches, k1, bring yarn to front, slip last stitch.
Slide sts to other end of needle.
With dark colour: P1, (sl1yo, brp) to last 2 sts, slyo, k1. Turn.
With light colour: sl1p (brp, slyo), to last 2 sts, brp, bring yarn to front, slip last stitch.
Slide sts to other end of needle.
With dark colour: P1, (sl1yo, brk) to last 2 sts, sl1yo, k1.
Turn.
With light colour: Sl1p, (brk1, sl1yo) to last 2 stitches, brk1, bring yarn to front, slip last stitch. Slide sts to other end of needle.
With dark colour: Sl1p, (sl1yo, brp) to last 2 sts, slyo, k1. Turn.
With light colour: Sl1p (brp, slyo), to last 2 sts, brp, bring yarn to front, slip last stitch. Slide sts to other end of needle.
With dark colour: Sl1p, (sl1yo, brk) to last 2 sts, sl1yo, k1. Turn.
Repeat the above 4 steps 40 times in all, i.e. until you have 80 knit stitches per column. Bind off with DC using Italian bind off. Weave in ends.
Geeky Notes 🤓
It is possible to cast on in two colours with the Italian method. For two-colour Italian cast-on, start by making a slip-knot with both yarns to hold the yarns together. This does not count as a stitch and will be untied eventually.
Espresso Macchiato Dishcloth
Single pass brioche
With single pass brioche, you work both colours on each side in one single row. I like to use a ring to separate the yarns on my left index finger. You do not need to slide the stitches back to the other end, so you can knit on a pair of ordinary needles – you do not have to use circulars or DPNs.
The front and back side rows are worked differently but are confusingly similar. It helps me to think that if I am working a double stitch, I should also end up with a double stitch, while single stitches remain single.
Remember to place the knit stitch colour to the right. This means you have to switch the position of the yarns when you turn the work.
Yarn
sport weight or 8/4 cotton in two different colours, approx. 75 m of each colour
Needles
A pair of 3 mm knitting needles
Instructions
Cast on 45 sts with dark colour (DC). Turn.
Place the two yarns on your left index finger with the knit stitch colour (the light colour) on the right and under the dark yarn.
Light side row: Sl1p, work light side single pass brioche as shown below to last stitch, i.e. hold dark colour down in front and brk. Let go of the dark yarn to make a yarn over. Purl the next stitch with the dark yarn.
When you come to the last stitch, bring light colour yarn (LC) to front. Knit last stitch with dark colour.
Turn and switch the position of the yarns, so that the dark colour is on the right.
Dark side row: Sl1p. Work dark side single pass brioche to last stitch, i.e. purl double stitch with light colour coming up between the two yarns, thus making a yarn over. Hold light colour in front of the needle and brioche knit from below.
When you get to the last stitch, bring LC to front. Knit last stitch with dark colour. Turn.
Repeat these 2 rows 40 times. Bind off with DC using Italian bind off. Weave in ends.
You are welcome to share your work on social media and to tag me (@annaplexis.knits on Facebook, Instagram and Threads, @annaplexis on TikTok, X, Mastodon, tumblr and YouTube). I’d love to see your work 🙂
Hashtags #annaplexis and #coffeeandbriochedishcloths
If you have mastered the basics of brioche and are ready for more advanced techniques, here’s a small project introducing brioche increases and decreases: The Brioche and Takeaway Coffee Duo, a pair of cup sleeves for your takeaway coffee.
The linen stitch is quite unique among knitting stitches: it is not stretchy and it does not curl at the edges. In other words, it is the ideal stitch for a coaster.
These coasters are made in 100% cotton. You can use DK weight yarn or, as I have done, combine 2 strands of fingering/lace weight yarn for a speckled look.
Aim for a size somewhere between 8.5 x 8.5cm and 10 x 10cm. If you don’t get the desired dimensions, switch to larger/smaller needles and/or thicker/thinner yarn.
For a drink served on the original coasters, go to The Honky Tonk Bar in Athens, Greece (Address: Mpotasi 5, 106 82 Athens, close to the city centre). (Insider tip: For a quiet night with jazz and classical music, go on a Sunday 😉)
Instructions
Cast on 25 stitches.
Continue in linen stitch as follows:
Row 1 (WS): Sl1p wyif, *p1, sl1p wyib*. Repeat from * to * to last 2 sts. P1, sl1p wyif.
Row 2 (RS): *K1, sl1p wyif*. Repeat from * to * to last stitch. K1.
Work these 2 rows ±21 times.
Work row 1 once more.
Next row: (RS) Cast off knitwise and weave in ends.
You are welcome to share your work on social media and to tag me (@annaplexis.knits on Facebook, Instagram and Threads, @annaplexis on TikTok, X, Mastodon, tumblr and YouTube). I’d love to see your work 🙂
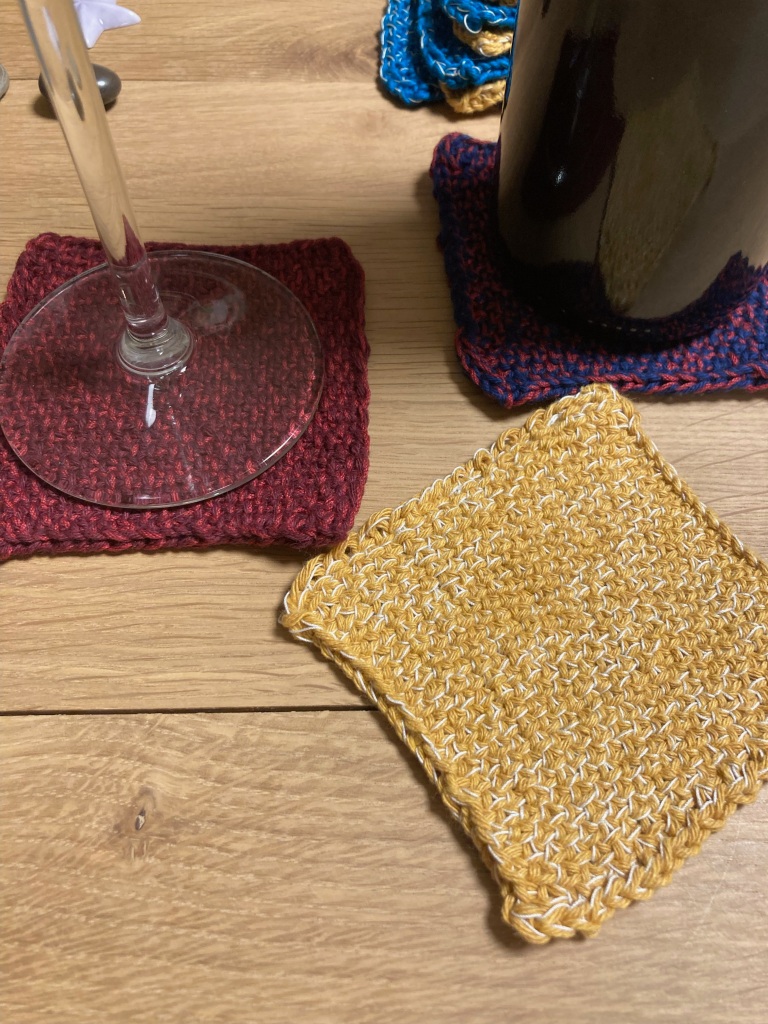
The ideal small-scale project to learn double-knitting is a coaster.
Below you will find patterns for three coasters: one in single-colour double knitting, one with a different colour on each side and one in colourwork. The coasters measure 9 x 9cm.
I have used DK yarn and my tension is 21 sts/10cm. If you want to use another weight of yarn or have a different gauge, you can easily adapt the pattern by changing the number of stitches and rows. That being said, double knitting works best with a tight gauge.
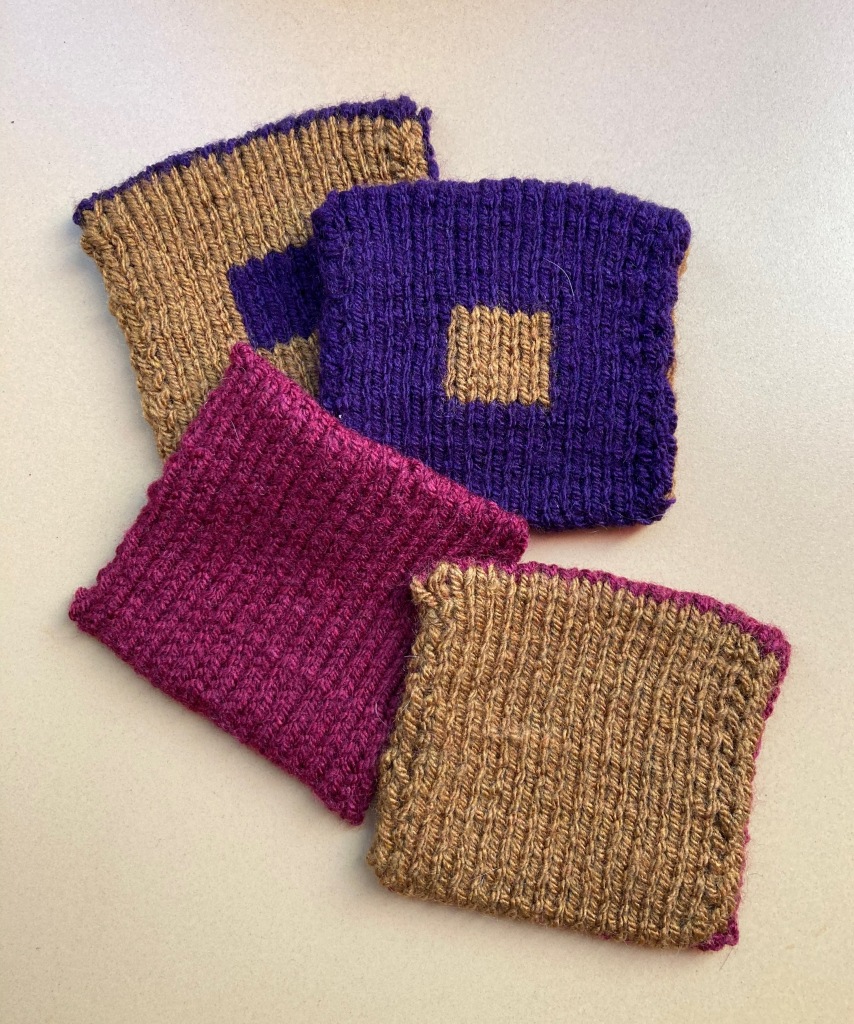
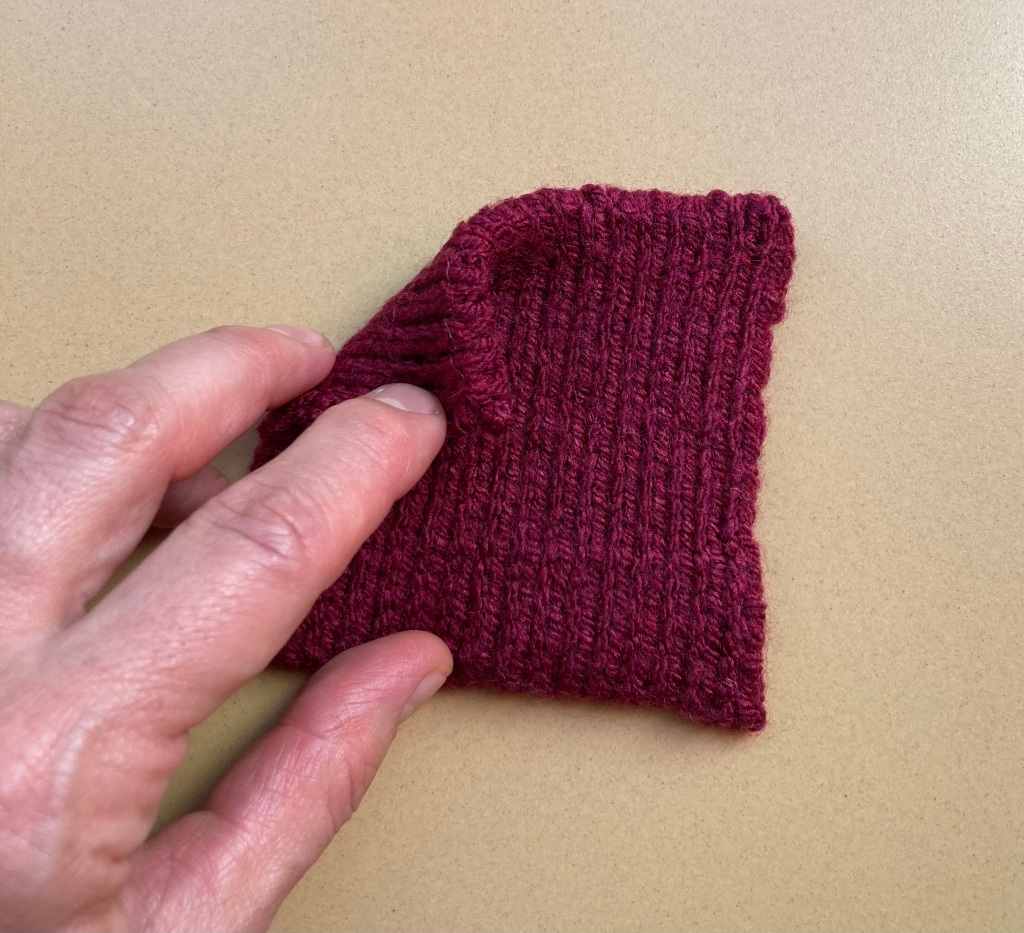
Coaster I (Single-coloured coaster)
Instructions:
Using Italian cast on, cast on 34 sts, i.e. 17 pairs of sts. Cast on as follows: begin with a single twist of the yarn (your first stitch), continue with a purl st (your second stitch), continue alternating k and p sts. Use the long tail cast on for your last st (which would otherwise have been a p st), to secure the stitches.
Make sure not to twist the stitches on the needle.
Notice that in the first row the knit stitches have the wrong leg in front, so you should knit them through the back loop, i.e. through the right leg.
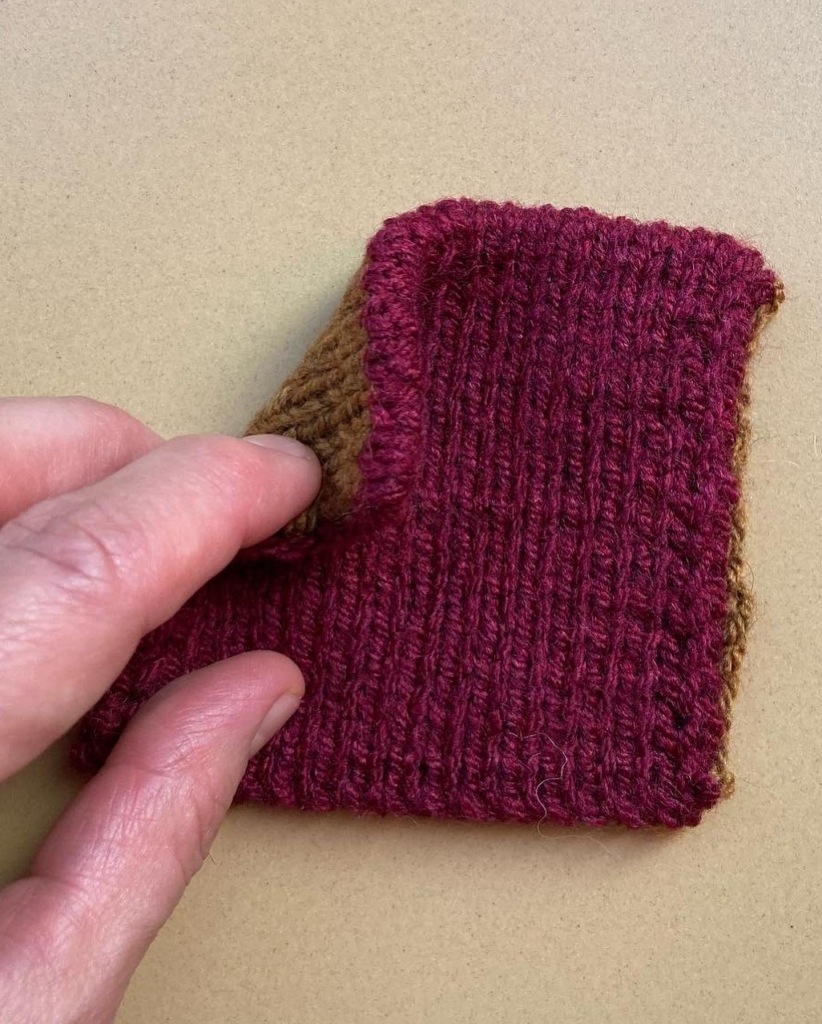
In single-coloured double knitting, you only work the stitches on the front of the work, since the stitches of the back are merely slipped. So, to complete one row, you need to work both sides.
When you have worked 27 rows or coaster has desired length, bind off using Italian bind off.
Italian bind off
Cut the yarn leaving a tail of at least 4x the width of the coaster. Use a darning needle. Enter the first st (a knit st) purlwise and the second st (a purl st) knitwise leaving them on the knitting needle. Enter the first st knitwise and slip it off the needle. *Enter the second st (a knit st) purlwise. Enter the first st purlwise and slip it off the needle. Pass the needle back to front between the first and second sts. Enter the second st (a purl st) knitwise. Enter the first st knitwise (a knit st) and slip it off the needle.* Repeat from * to *. Think: “purl(wise), purl(wise) off, (pass needle through), knit(wise), knit(wise) off”.
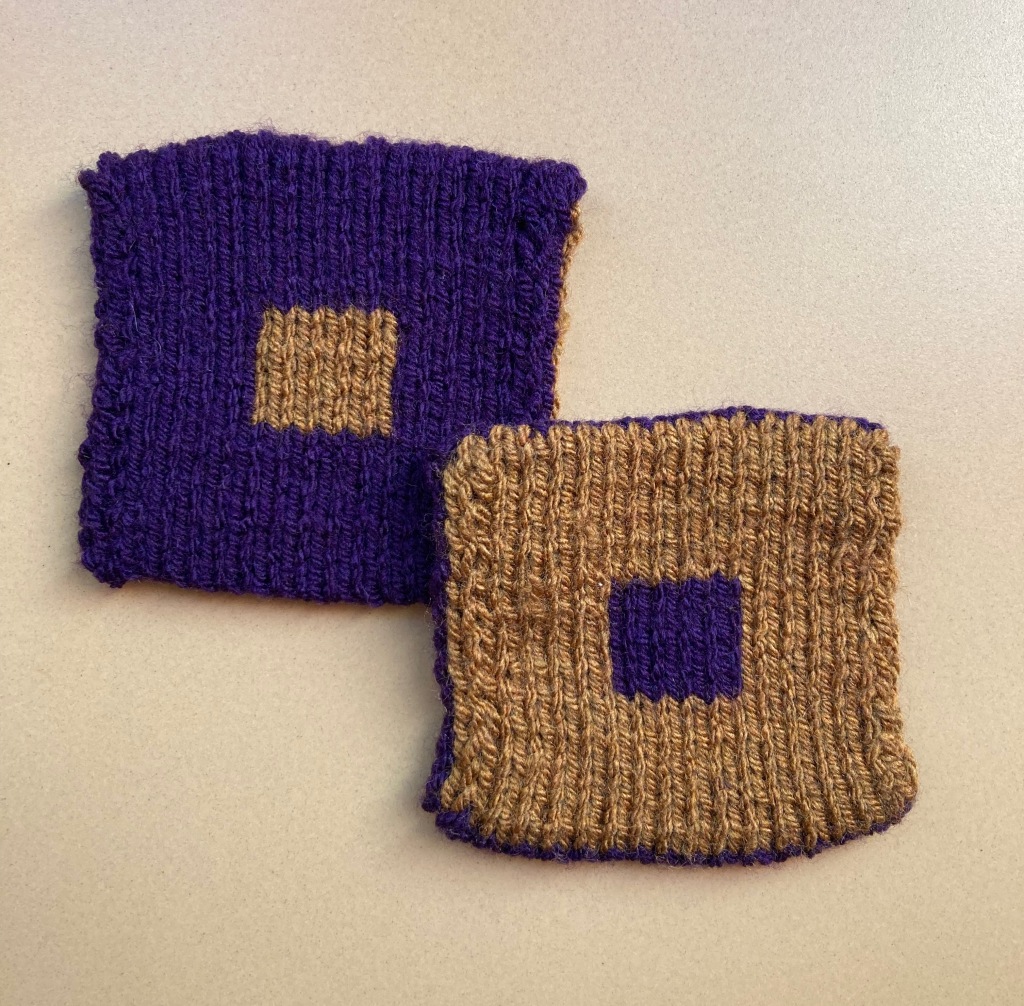
Coaster II (Two-coloured double knitting)
In two-coloured double knitting you should think in pairs of stitches. The first stitch of every pair (the front stitch) is knitted, while the second (the back stitch) is purled. When knitting the front stitch, the other colour should be held in the back. When purling the back stitch, the other colour should be held in front.
I hold both yarns on the index finger of the left hand with the “knit” colour to the right. That way, I do not need to move the yarns between stitches.
Instructions:
Cast on as for Coaster I using MC yarn
Pick up the contrast colour. In the first row, this will be your “knit” colour, so it should be on the right.
Row 1: *k1 with the CC, p1 with the MC* Repeat from * to * to end of row.
Turn the work, twist the yarns and switch their positions. placing the MC to the right, since that will be the “knit” colour. Make sure the yarns are twisted, otherwise the two layers will not be joined to each other at the sides.
Row 2: Slip the first stitch knitwise, slip the second stitch purlwise with the yarn in front, *k1 with the MC, p1 with the CC* to end of row.
Turn the work, twist the yarns and switch their positions, placing the CC to the right
Row 3: Slip the first stitch knitwise, slip the second stitch purlwise with the yarn in front, *k1 with the CC, p1 with the MC* to end of row.
Turn the work, twist the yarns and switch their positions.
Repeat rows 2 and 3 until you have worked 27 rows. Bind off using Italian bind off with the MC as described under Coaster I
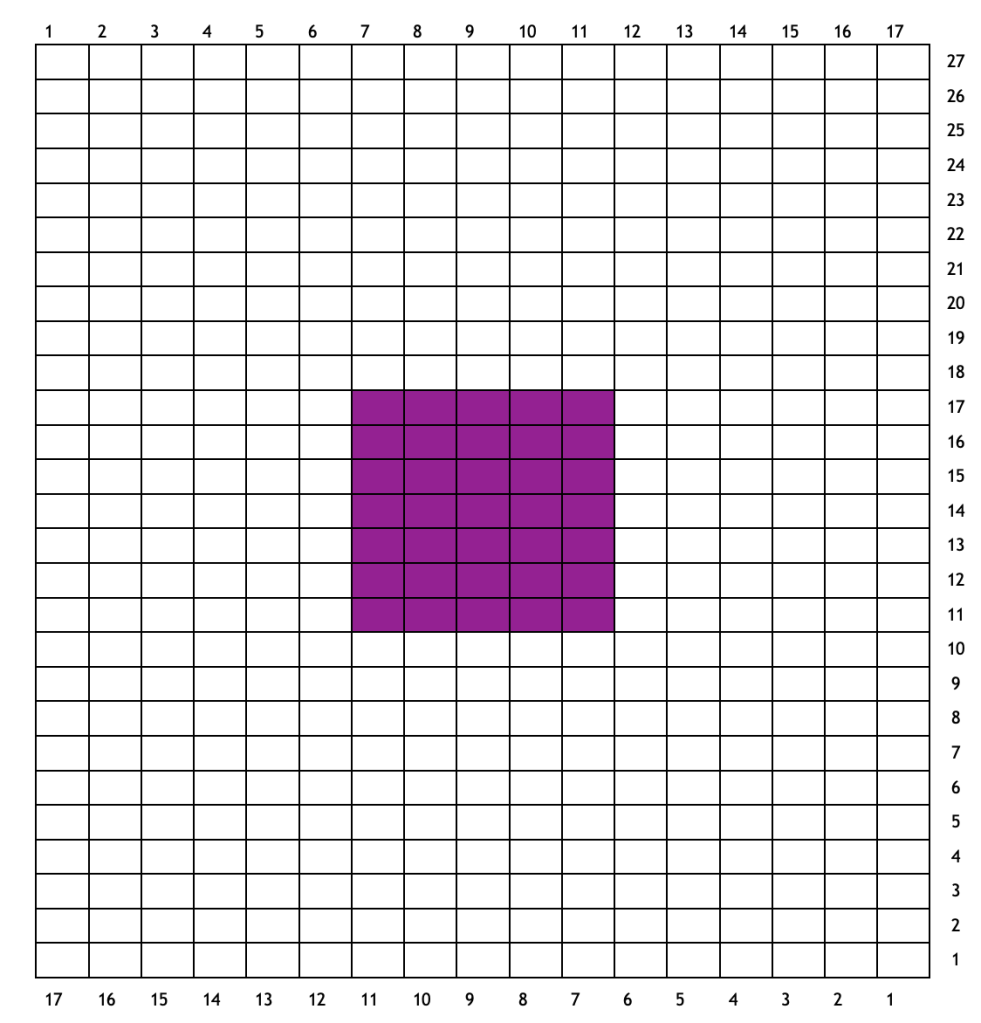
Coaster III (Double knitting colourwork)
Instructions:
Knit as Coaster II, following the chart below.
Each square represents a pair of stitches. The first of these stitches is knitted with one colour and the second is purled with the other colour as in Coaster II.
When you get to the purple squares in row 11, reverse the order of the colours, i.e. knit 1 with the yarn on the left, and purl 1 with the yarn on the right. When purling, you need to hold the other yarn in front of the needles.
You are welcome to share your work on social media and to tag me (@annaplexis.knits on Facebook, Instagram and Threads, @annaplexis on TikTok, X, Mastodon, tumblr and YouTube). I’d love to see your work 🙂
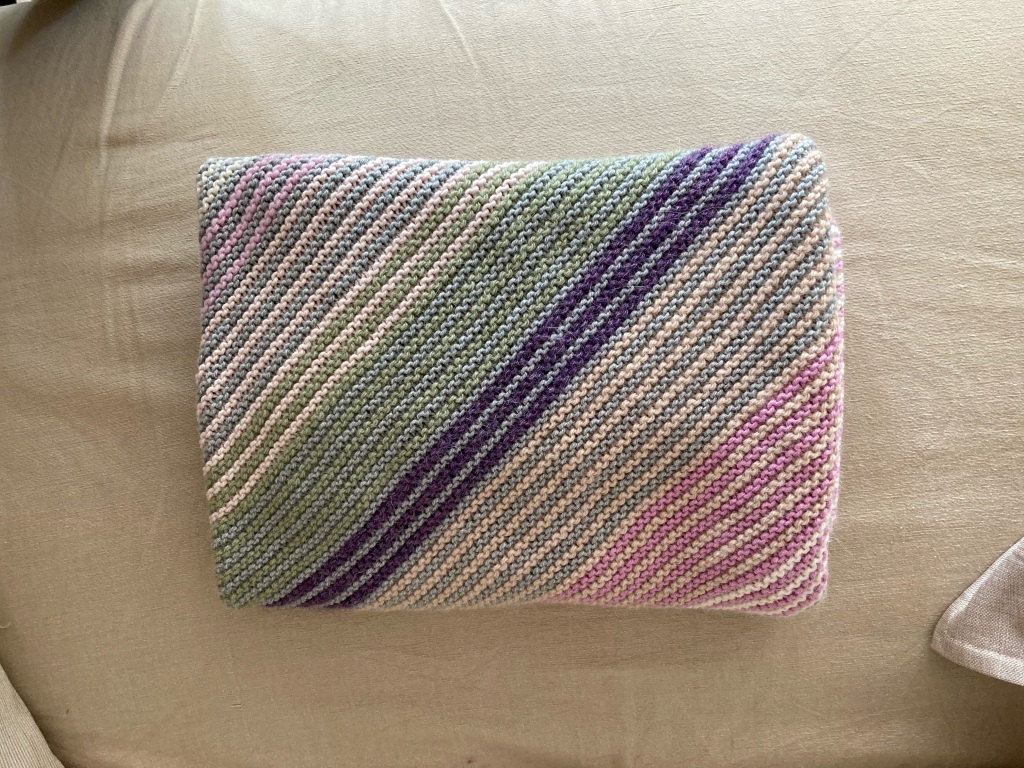
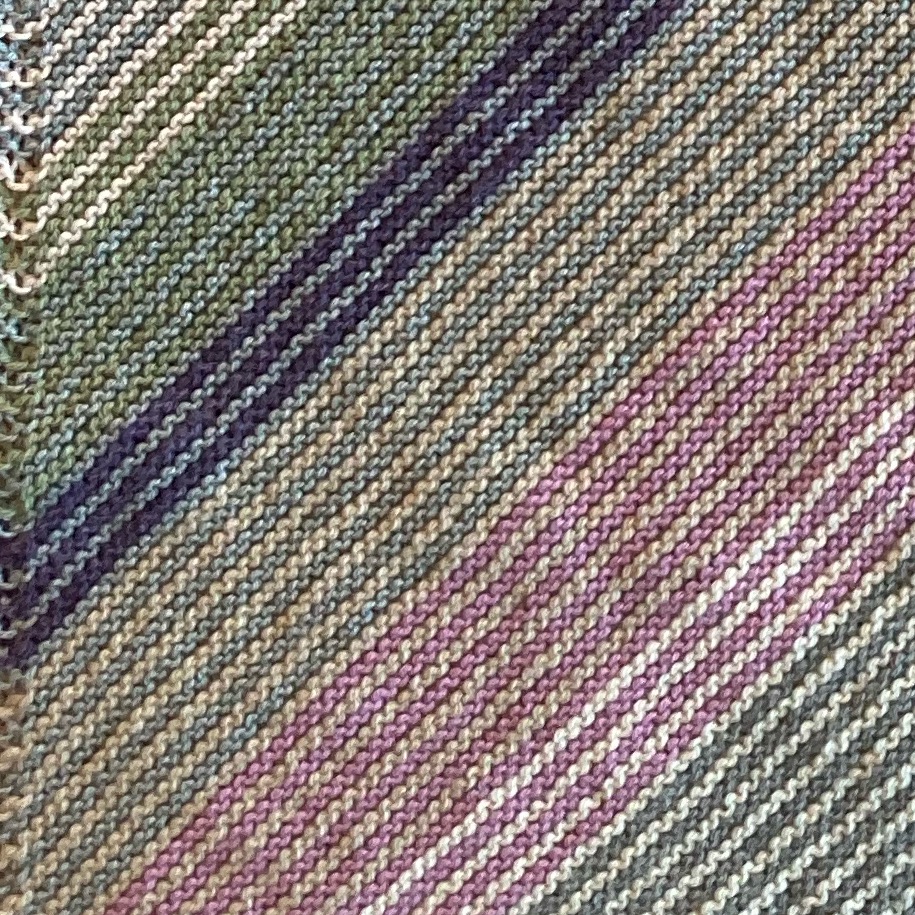
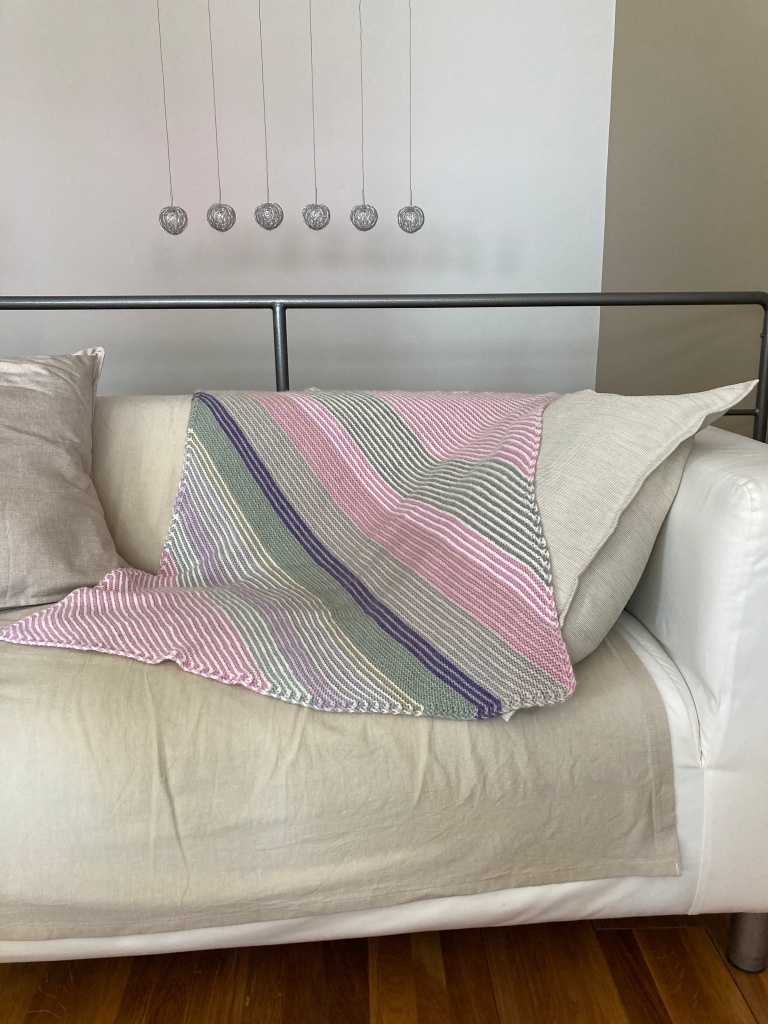
I like to welcome babies into this world with a hand knit blanket. It will keep them warm and cozy and they will not grow out of it the first couple of years. 🙂 My most recent baby blankets have been versions of the #tutorialthrow, i.e. made up of squares, the instructions for which you can find on this website. However, in the times before the website, my go-to baby blanket pattern was this one with diagonal garter stitch stripes. It’s an easy no-purl pattern, perfect for TV-knitting and a great stash buster!
Dimensions:
The finished blanket measures ca. 80 x 80cm.
Materials:
You can use any weight of yarn you like – wool, cotton, acrylic, silk… The thicker the yarn, the more you will need. I used DK wool (ca. 100m/50g). In total I used approx 500g.
You will need a circular needle with a length of 60cm or more. At some point you will have a lot of stitches on your needle! Needle size will depend on the yarn you choose.
Instructions:
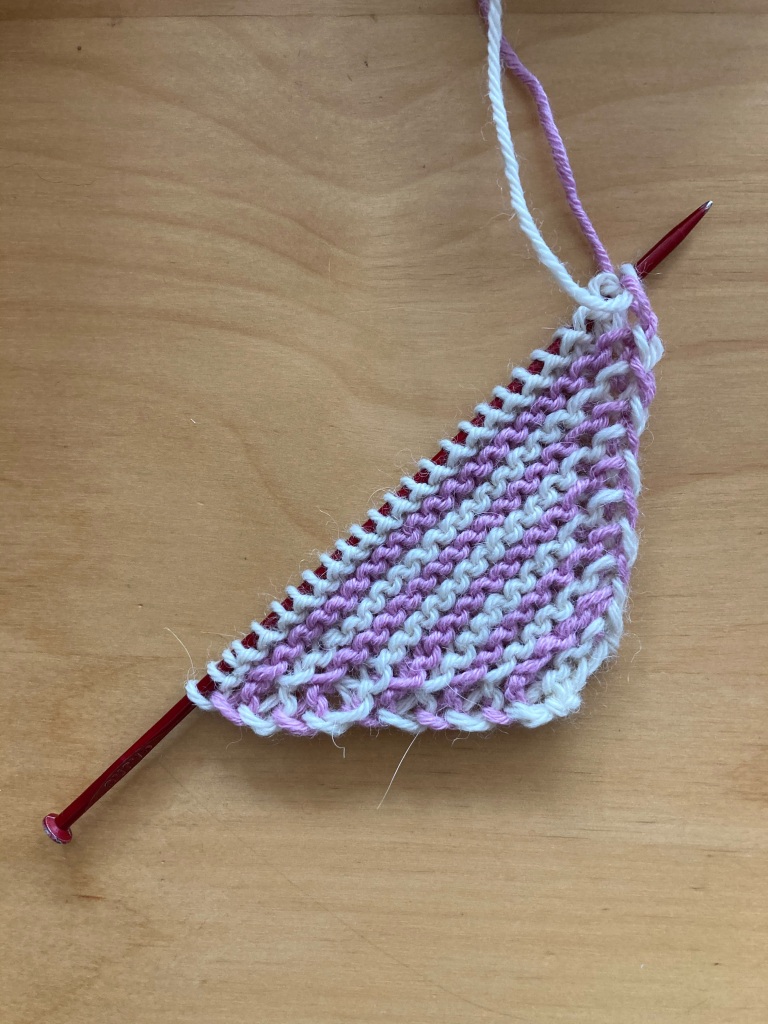
Cast on 5 stitches.
Knit a row.
Increase row: Slip 1st stitch purlwise, knit 1, make a twisted loop, knit to end of row.
Make any stripes you like! Since the first stitch is slipped, colour changes are made on the second stitch.
Repeat the increase row until work measures 50-52cm from cast on.
Next, start decreasing.
Decrease row: Slip 1st stitch purlwise, knit 1, knit 2 together, knit to end of row.
Repeat the decrease row until there are 5 stitches left.
Cast off. Weave in ends.
Anna’s tips 😉
🧶 Make any stripes you like! I like to knit single garter ridges alternating between a main colour and contrast colour(s). But I have also made blankets with wider stripes in the past. Follow your heart!
🧶 When decreasing, do not make the first stitches of the row too tight, or the second half of the blanket will turn out tighter than the first half!
You are welcome to share your work on social media and to tag me (@annaplexis.knits on Facebook, Instagram and Threads, @annaplexis on TikTok, X, Mastodon, tumblr and YouTube). I’d love to see your work 🙂