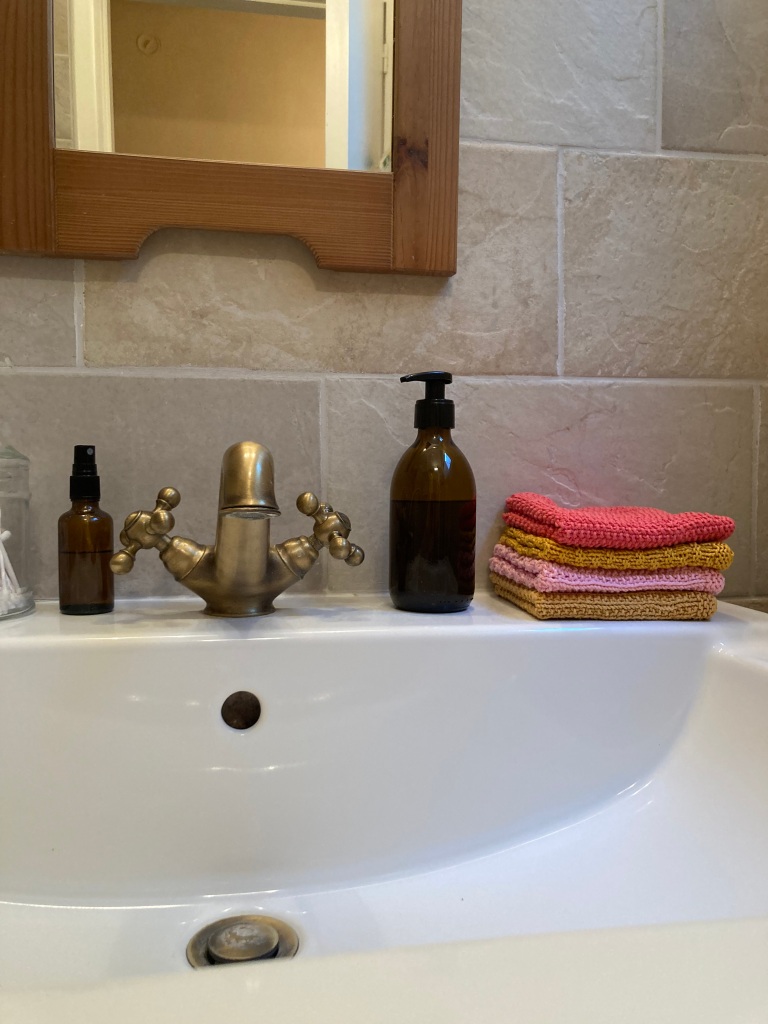
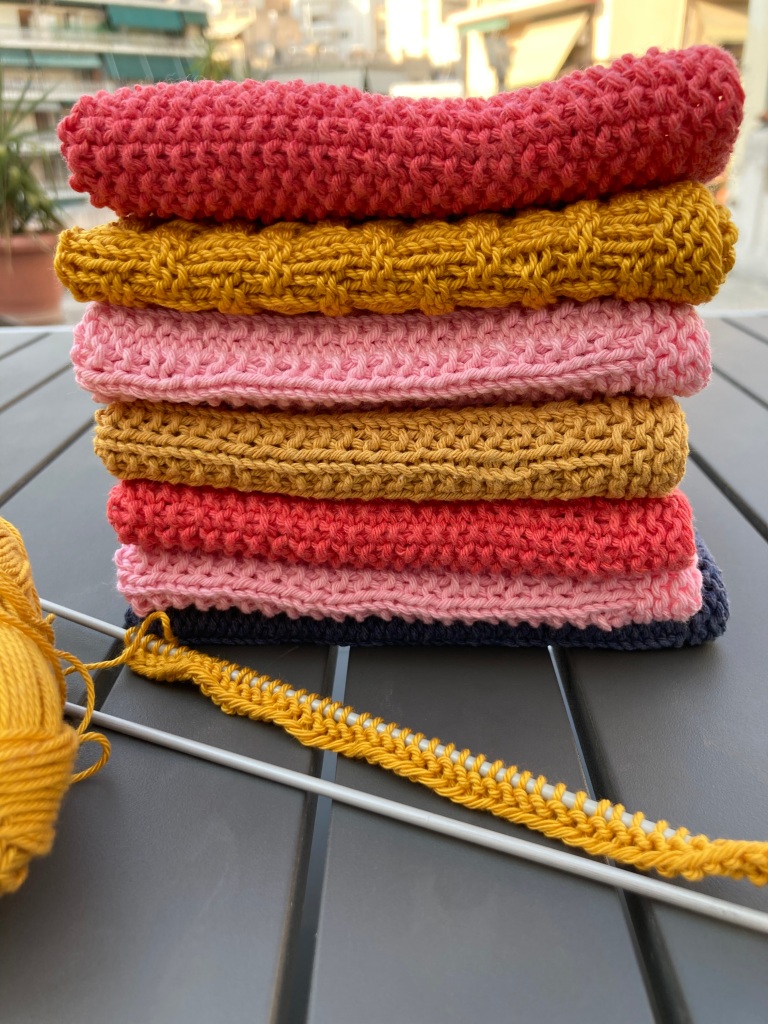
Philoxenia is the Greek word for hospitality, so it’s an apt name for these small personal guest towels. They are easy to make: You need one 50g skein of cotton yarn for each and you only need to know how to knit, purl and slip the first stitch.
Abbreviations
k: knit
p: purl
sl1p: slip one stitch purlwise
RS: right side
WS: wrong side
sts: stitches
Measurements
Approx 27 x 27cm.
Yarn
1 skein (50g) of DK cotton (approx 120m/50g) for each towel.
Needles
I like a tight tension for towels, so I use 3mm needles.
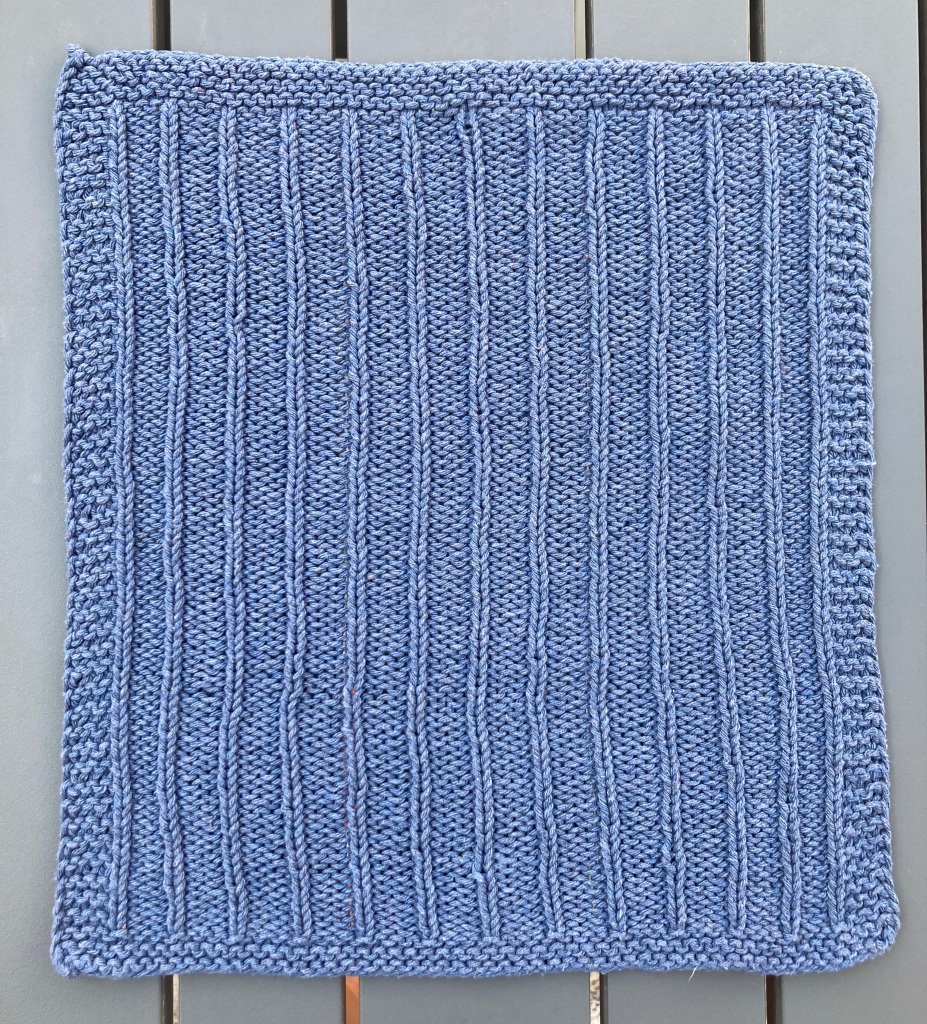
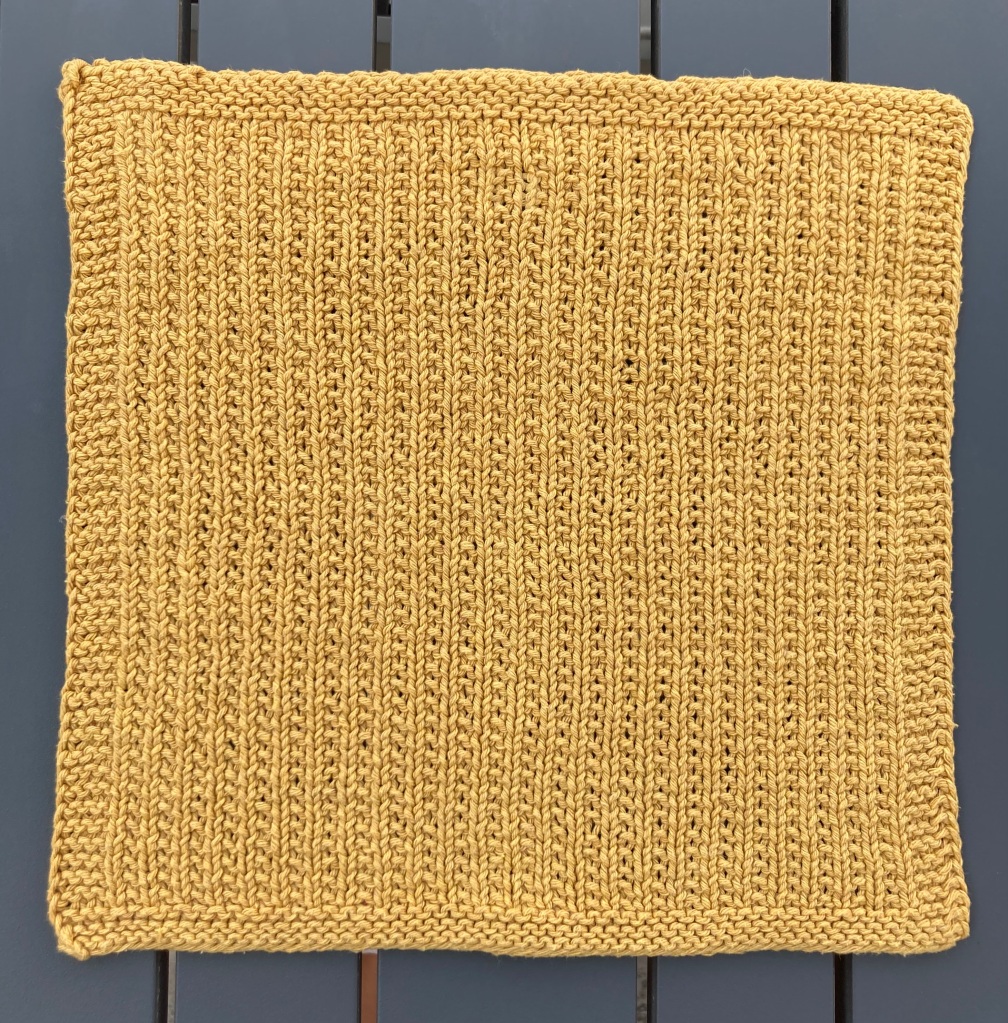
Towel With Vertical Lines
Instructions
Cast on 57 sts.
Rows 1 to 5: Sl1p, k to end of row.
Row 6 and all even-numbered rows up to row 92: Sl1p, k3, [k1, p3] 12 times, k5.
Row 7 and all odd-numbered rows up to row 93: Sl1p, k3, [p1, k3] 12 times, p1, k4.
Rows 94 to 99: Sl1p, k to end of row.
Cast off and weave in ends.
Seed Stitch Towel
Instructions
Cast on 57 sts
Rows 1 to 5: Sl1p, k to end of row.
Rows 6 to 93: Sl1p, k3, [p1,k1] to last 5 sts, p1, k4.
Rows 94 to 99: Sl1p, k to end of row.
Cast off and weave in ends.
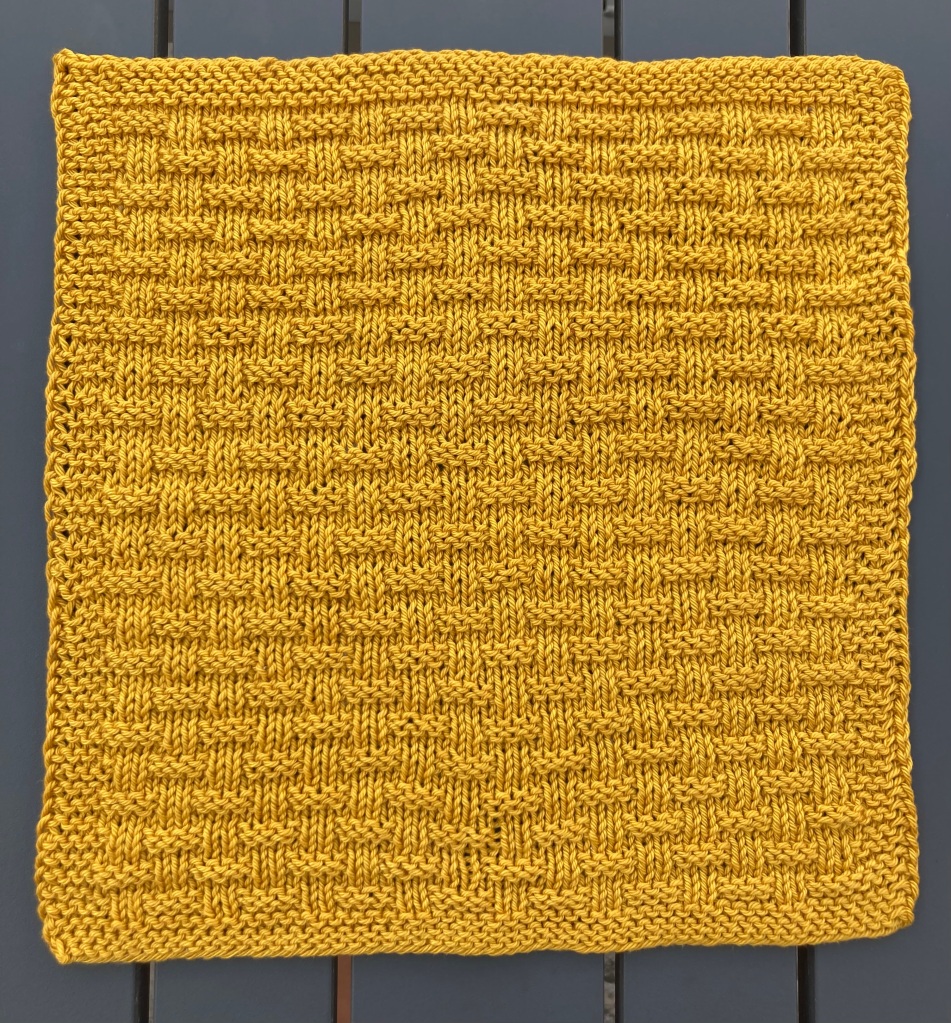
Basketweave Towel
Instructions
Cast on 57 sts.
Rows 1 to 5: Sl1p, k to end of row.
Row 6 (RS): Sl1p, k to end of row.
Row 7 (WS): Sl1p, k4, [p2, k4], 8 times, k4.
Row 8 (RS): Sl1p, k3, [p4, k2] 8 times, p1, k4.
Row 9 (WS): Sl1p, k3, p49, k4.
Row 10 (RS): Sl1p, k to end of row.
Row 11 (WS): Sl1p, k3, [k4, p2] 8 times, k5.
Row 12 (RS): Sl1p, k3, p1, [k2, p4] 8 times, k4.
Row 13 (WS): Sl1p, k3, p49, k4.
Repeat rows 6-13 another 10 times (93 rows completed in total).
Rows 94 to 99: Sl1p, k to end of row.
Cast off and weave in ends.
Mistake Rib Towel
Instructions
Cast on 57 sts.
Rows 1 to 5: Sl1p, k to end of row.
Rows 6 and all even-numbered rows up to row 92: Sl1p, k4, [p2, k2] 12 times, k4.
Row 7 and all odd-numbered rows up to row 93: Sl1p, k3, p1, [k2, p2] 12 times, k4.
Rows 94 to 99: Sl1p, k to end of row.
Cast off and weave in ends.
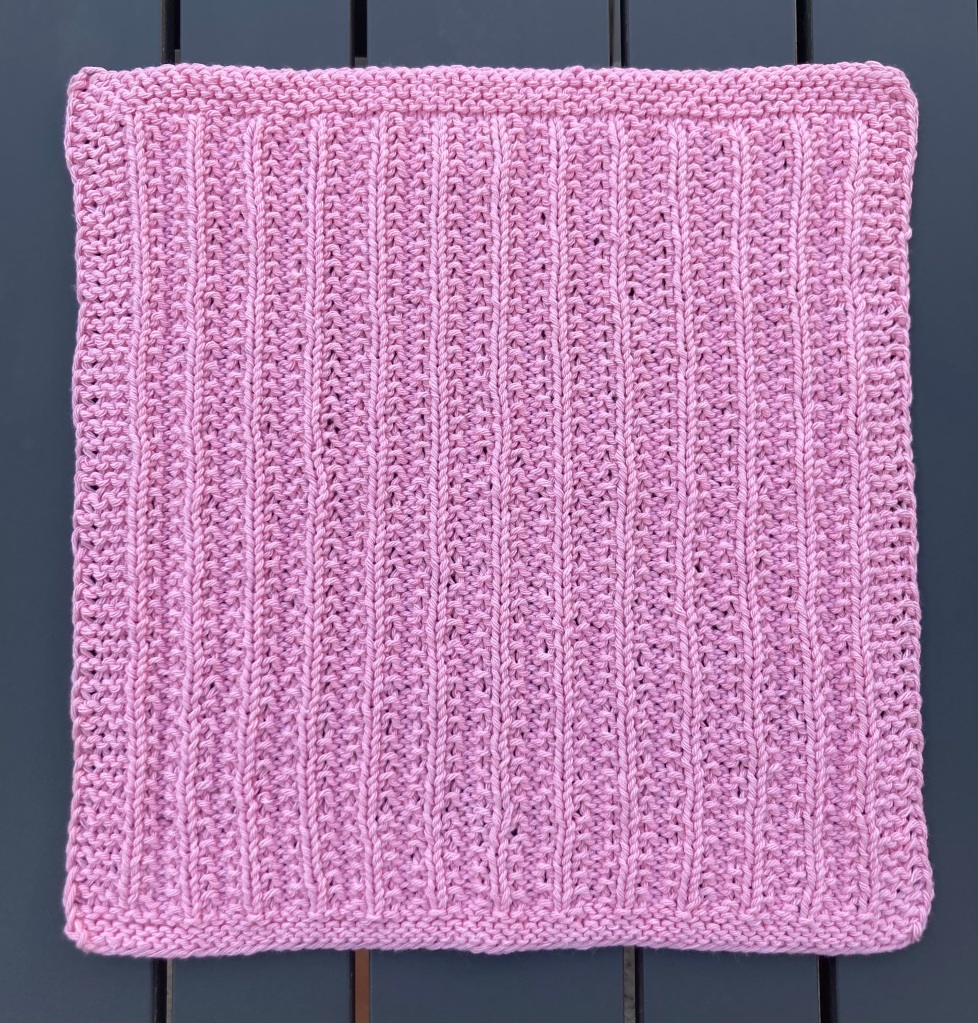
Broken Rib Towel
Instructions
Cast on 57 sts.
Rows 1 to 5: Sl1p, k to end of row.
Row 6 and all even-numbered rows up to row 92: Sl1p, k to end of row.
Row 7 and all odd-numbered rows up to row 93: Sl1p, k3, [p1, k1] to last 5 sts, p1, k4.
Rows 94 to 99: Sl1p, k to end of row.
Cast off and weave in ends.
You are welcome to share your work on social media and to tag me (@annaplexis.knits on Facebook, Instagram and Threads, @annaplexis on TikTok, X, Mastodon, tumblr and YouTube). I’d love to see your work 🙂
Hashtags #annaplexis and #PhiloxeniaTowels
Tutorials
Long tail cast on:
You can weave in the first tail in advance:
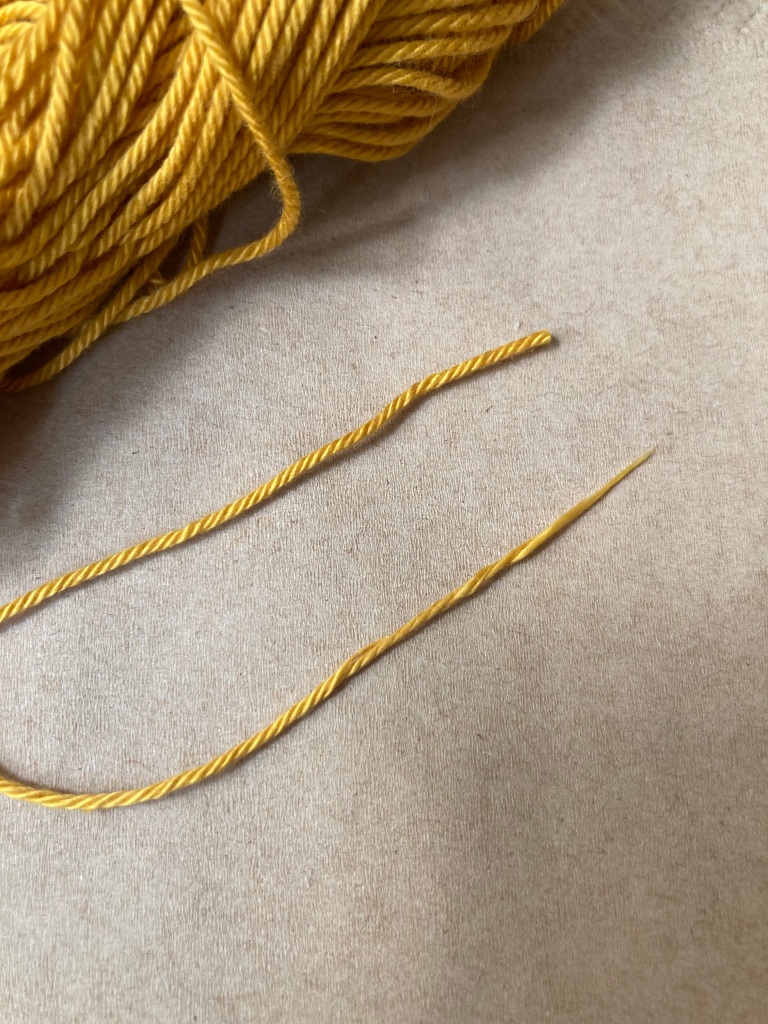
Make sure to taper the yarn end first:
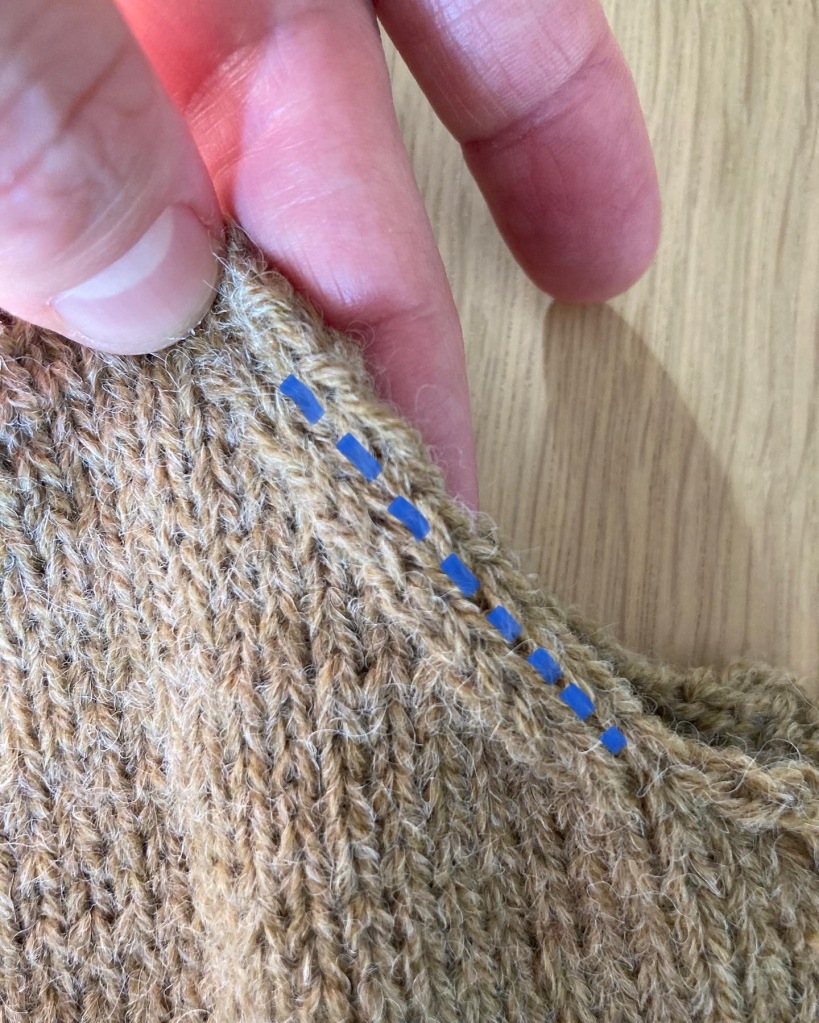
Slip the first stitch purlwise with the yarn in front:
Cast off loosely using regular cast off:
When you get to the last stitch, cut the yarn and pull it through the stitch:
Weave in the end:
And if you REALLY want to be a perfectionist, you can cut the fibers of the yarn at different lengths to prevent the ends from peeping through:
Depending on what you are making, you may need to increase the number of stitches on your needles. There is a number of ways to do this.
For a neat look, increases (like decreases) are best worked a couple of stitches from the selvedge.
Garter Stitch Increases
The following increases are common beginners’ increases. You may encounter them in all kinds of knits, but they are all very suitable for garter stitch. If, however, you are looking for increases to be used in a stocking stitch sweater, scroll down to the section Stocking Stitch Increases.
Yarn Over
The simplest kind of increase is probably the yarn over: simply bring the yarn over the right needle. In the next row, knit this loop as if it were a regular stitch.
Backward loop
But… a yarn over leaves a hole. This may be the effect you want if you are knitting lace, but if you do not want a hole, you can knit the yarn over through the back loop in the next row or you can twist it immediately: the backward loop increase.
The backward loop is my favourite increase for garter stitch.
This increase can also be used to cast on multiple stitches in the middle of your project at the end of a row.
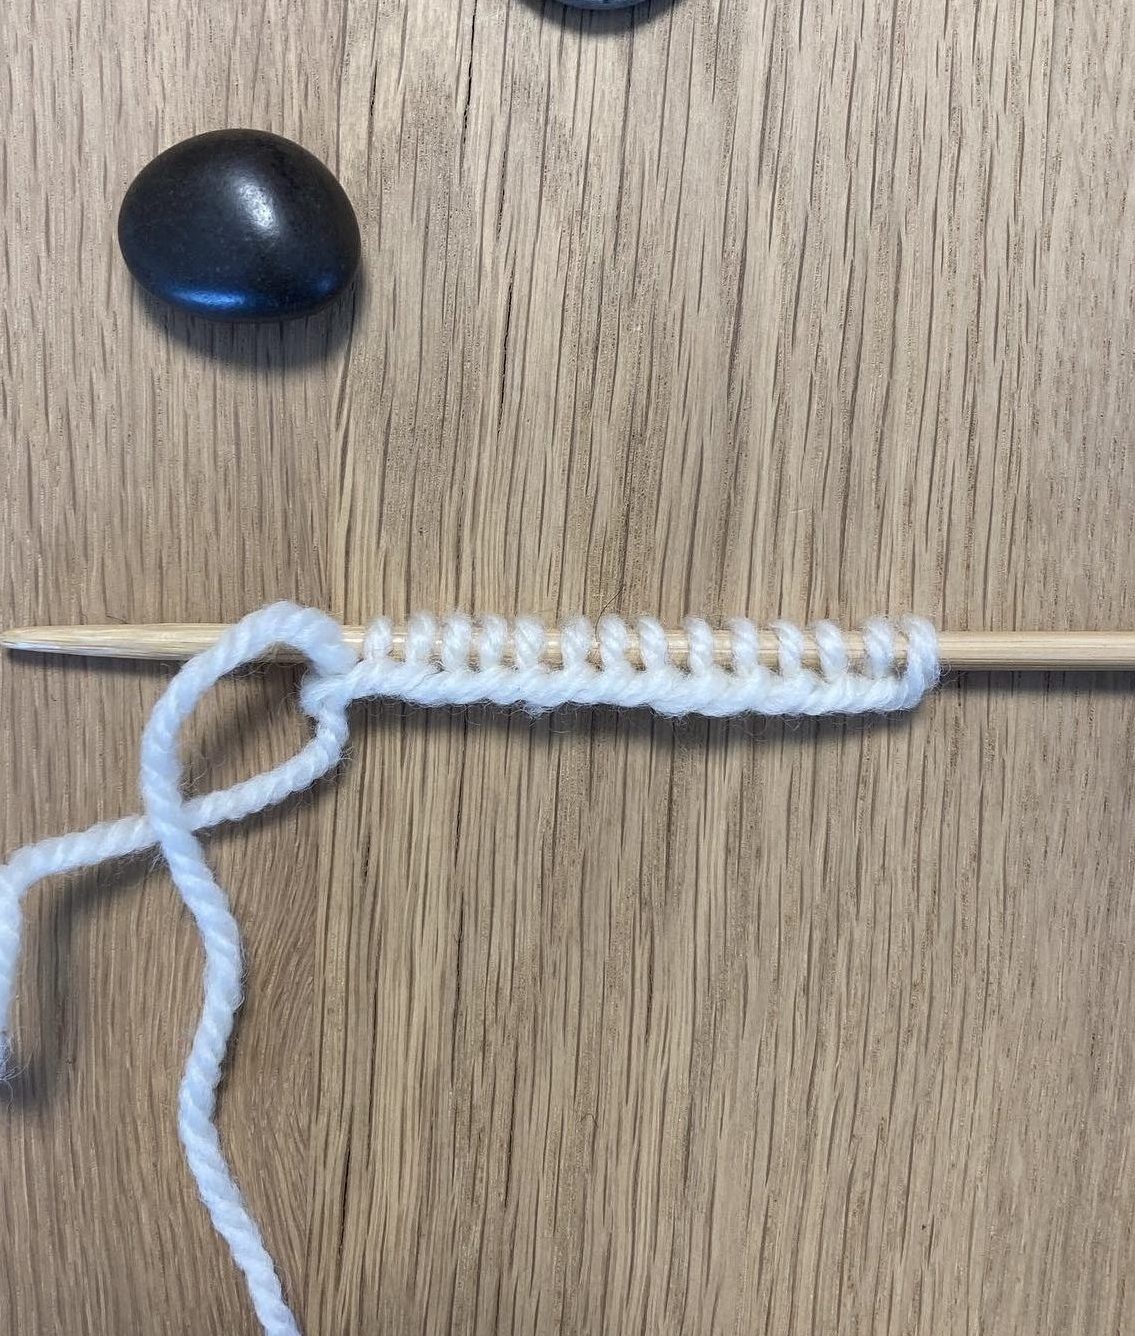
Knitted Cast on
Another way of adding multiple stitches at the end (or rather the beginning) of a row is the knitted cast on (a.k.a. chain edge cast on). When you have completed a row, turn the work and add the required number of stitches.
Kfb
Another common increase is the kfb (knit front back, i.e. knit the stitch first through the front loop and then through the back loop). This increase is asymmetrical: it creates a horizontal bar at the base of the new stitch. It is often used in garter stitch, where the increases are hidden behind the ridges, or in cases where you do not need symmetrical increases.
Kfb
Until recently I never used kfb’s if I needed symmetrical increases. But indeed it is possible to make a mirrored kfb. Here’s how it’s done:
Increases in Stocking Stitch
Whereas increases in garter stitch may be hidden by the ridges in the fabric, increases in stocking stitch are much more visible. So here you need symmetrical increases that will blend in with the fabric.
Make One Increases
My go to increases in stocking stitch are the make one increases (M1, M1R – make one right and M1L – make one left).
A neat and symmetrical alternative to the make one increases for stocking stitch are the lifted increases – RLI (right lifted increase) and LLI (left lifted increase).
Lifted increases on a sock toe
For a right lifted increase: pick up the right leg of the stitch below the stitch on the left needle and knit it.
For a left lifted increase (LLI) you need to pick up the left leg of the stitch two stitches below the one you have just knitted (since you have already knitted the stitch in question). Knit this leg through the back loop so as not to twist it.
Purl Increases
Shaping is usually done on right side rows, but occasionally you are going to need a purl increase.
This is how to work symmetrical increases on the purl side:
Make one purl right (M1PR)
Make one purl left (M1PL).
Multiple increases
Multiple increases can be done in different ways, depending on the effect you want to achieve: You can alternate:
between a knit stitch and a yarn over (Kyok) or
between knitting through the front and the back loop (Kfbfb) or
between knit and purl stitches (Kpkp).
Multiple increases are typically used in bobbles.
Kyok
Kyok
Kfbfb
KpKp
…
… and then, of course, it’s possible to make any number of combinations of the above. The following video e.g. shows how to make a multiple purl increase: pfbfb.
Have I forgotten something? Do you know any other technique for increases? Let me know in the comments below 👇
If you are just learning to knit, I would advise you not to be too perfectionist. In the very beginning, it’s more important to find the right rhythm and tension. Be proud of your first project even if it contains mistakes!
Remember that flawless handicraft is considered hubris or believed to trap your soul in certain cultures. Deliberate mistakes are made to avoid such a great sin or calamity! 😎
On the other hand, you might as well get used to the idea that discarding and undoing are an essential part of the creative process. Believe me, I hate having to undo several hours’ or days’ work, but these seemingly wasted hours are not really wasted: they are part of the process, and they will soon be forgotten, while you will hopefully cherish and enjoy your finished projects for many years to come.
Deciding if and when to correct mistakes can be a difficult dilemma.
How to correct mistakes
If you have made a mistake in the row you are in, you can unpick the stitches one by one, till you get to the mistake and correct it. This is called tinking (K-N-I-T, T-I-N-K, get it? 😉)
Tinking is done the same way, no matter whether you are unpicking knit or purl stitches: Insert the left hand needle into the stitch below the stitch on the right hand needle and drop the stitch off the right hand needle. The following video shows how to knit and un-knit purl stitches.
If you have dropped a stitch, you can pick it up again with a crochet hook, preferably one that is a bit thinner than what you would normally use for your yarn. In stocking stitch, this is quite easy:
It can even be done without a crochet hook:
In garter stitch, things are slightly more complicated:
If you have made a mistake several rows further down, you can knit or un-knit, till you get to the corresponding stitch in your row, and then undo the stitch, correct the mistake, and pick up the stitch again as shown in the videos above.
Lifelines
If it is not possible to correct your mistake this way, you might need to unravel part of your knitting. To do this, you can make a lifeline: Pass a circular or double-pointed needle through each stitch in a row below the point where the problem lies, and unravel down to this line.
Use a thinner needle than the one you have knitted with. Pick up the right leg of every stitch (no matter which side you are on).
In plain stocking stitch, there is the risk of inadvertently jumping to a row above or below. It is therefore better to pick up the stitches from the wrong side, where you can use the ridges as a guide.
When knitting especially intricate patterns, you can make a lifeline in advance at certain points. Use a darning needle to pass a piece of yarn, preferably in a contrasting colour, through each stitch on the needle.
Use unwaxed dental floss or some other kind of strong, thin and slippery yarn. Make sure it lies at the base of the stitches and that you do not split the knitting yarn.
Knit on, as you would normally. If the need arises you can frog up to that point, put the stitches back on a needle, and continue knitting.
Advanced surgery
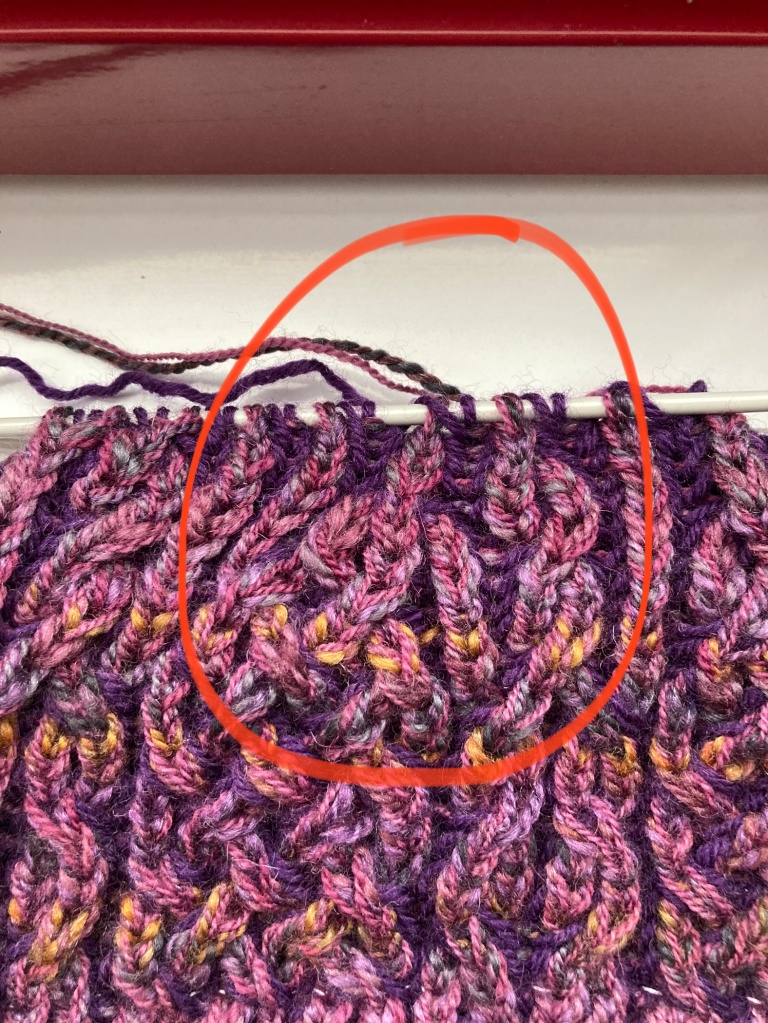
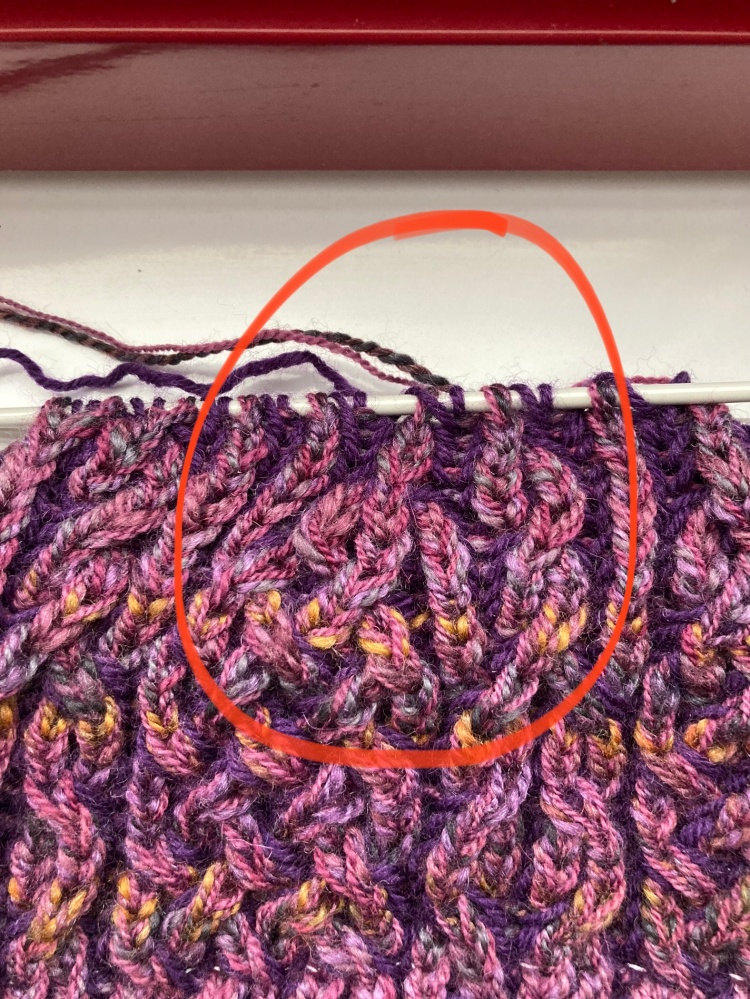
It is also possible to only frog a group of stitches and reknit them. This is useful if you have crossed a cable the wrong way or if you have knitted a section of an intricate pattern wrong.
In this case, I crossed the wrong cable in brioche 4 double rows down 😱 My latest lifeline was much further down and I definitely did not want to frog that far. Also, the pattern was far too complicated for an ex post lifeline, but I could save the situation with local surgery 👩🏻⚕️ i.e. only unravel as much as absolutely necessary.
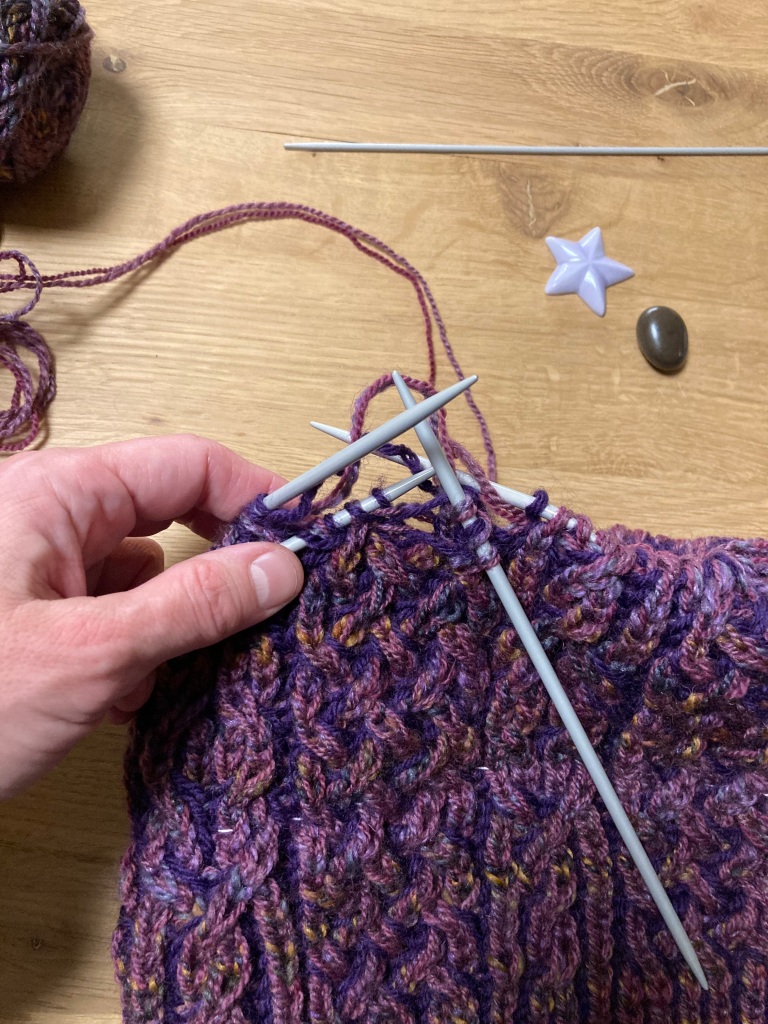
So, I dropped all the stitches that were or should have been involved in the crossed cables, down to a point below where the mistake happened. I picked up the stitches with a thin knitting needle (it’s harder to do if the needle is too thick) and I reknitted the section row by row.
The challenge here is to pick up the right strand to knit each row. Especially in brioche (but not only) it’s easy to pick up the yarn from another row by mistake.
Also you need to get the tension right, otherwise you will either have long loops hanging or you’ll run out of yarn before you finish reknitting the row.
This kind of intervention does require quite some experience, but if you have a lifeline further down, you have nothing to lose. (You did make a lifeline, right?? 😳) Give it a try and if, for whatever reason things go wrong, you can frog down to your lifeline.
Is there no hope?
If the situation is hopeless, or if you are still at the beginning, it will probably be easier to start anew.
Ripping out your work is tedious, so rather than frog, I start anew with the other end of the skein. The knitting will unravel itself when I have used up the rest of the yarn.
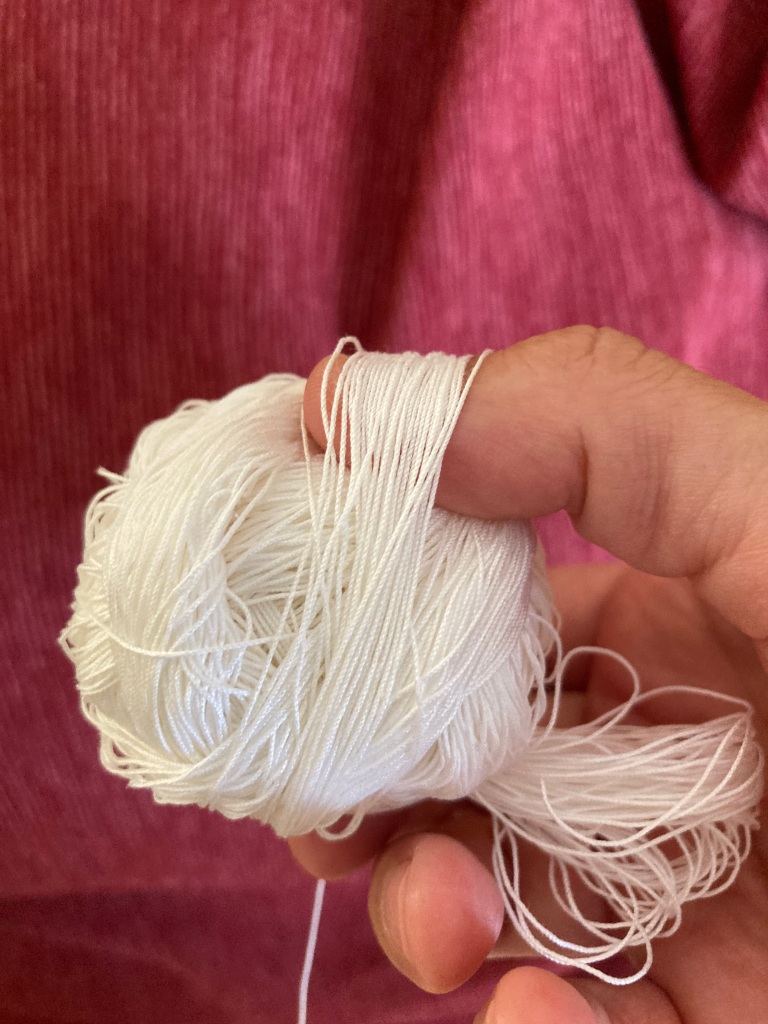
If you do choose to unravel the whole piece and make a ball of the yarn, make sure not to wind it too tightly: the yarn will lose its elasticity and sheen. I often wind the yarn around the ball and my thumb. When I pull out my thumb, the yarn is loose enough.
Thought of the day: Love your knits (and yourself) with all their flaws 😎
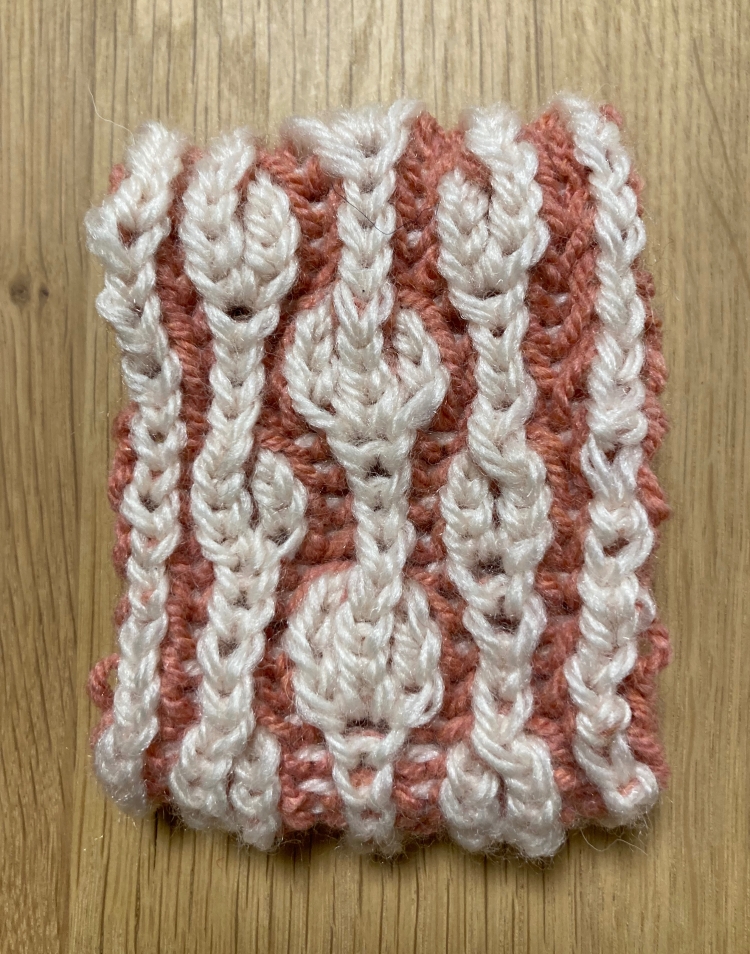
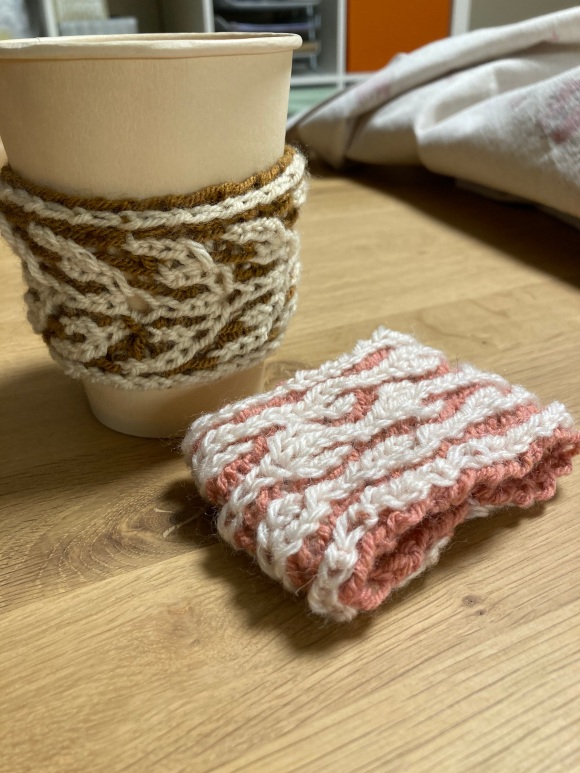
Cup sleeves are the ideal small scale project to practice new stitches. Here’s a pair to practice two-colour brioche with increases and decreases.
You should already be familiar with the basic brioche stitch as well as the general principle of two-colour brioche. If you are not, I suggest you start with the Brioche and Coffee Trio of dishcloths.
Brioche increases and decreases are done in pairs. This means every time you want to add a stitch, you also need to add a purl stitch to ensure continuity of the pattern. For a double increase, you need to add four stitches.
The same goes for decreases. Every time you decrease a stitch, you also have to decrease the purl stitch next to it. So, single brioche decreases actually follow the logic of double decreases in “normal” knitting.
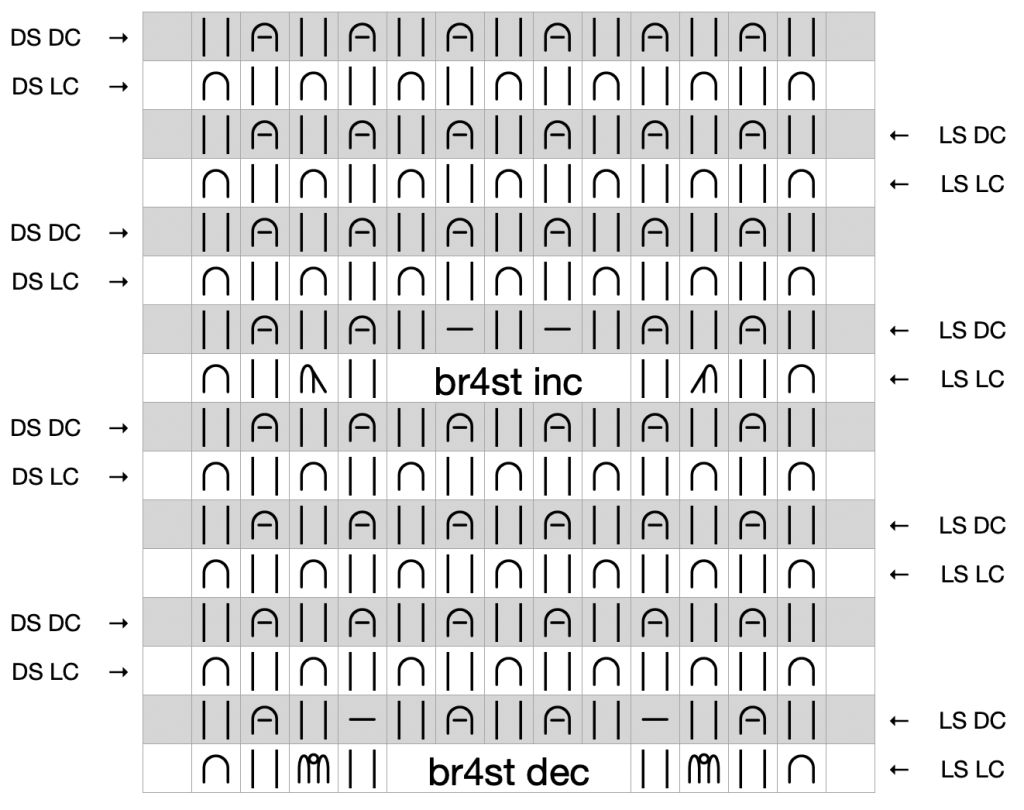
How to read these patterns and charts
If you have already made the Brioche and Coffee Trio of dishcloths, you will know that in two colour brioche every side is worked twice before turning. First you work the light side with the light colour (a LS LC row), then you slide the stitches to the other end of the (circular or double-pointed) needle to work the same side with the dark colour: a LS DC row. Turn and work a dark side – light colour row: DS LC. Slide the stitches and work a row on the dark side with the dark colour: a DS DC row.
The white squares in the charts are to be worked with the light colour, the grey squares with the dark colour.
The arrows show the direction of knitting. Like most knitting charts, these charts show the right side, i.e. the light side of the work. So if you are on the dark side and the chart shows a brk, you should work a brp and vice versa.
All the increases and decreases in these two charts are on light side rows, so they are all worked as written.
The empty squares right and left in the charts are the selvedge stitches. These are to be worked as follows:
on LC rows: slip the first stitch purlwise and bring the yarn to the front, slip the last stitch purlwise.
on DC rows: knit first and last stitch.
Slip the first stitch purlwise and bring the yarn to front is worked like this:
Below you will find the symbols and abbreviations used in the charts. Scroll down to the bottom of the page for video tutorials.
Abbreviations and symbols used in the charts and the pattern:
LS – light side
DS – dark side
LC – light colour
DC – dark colour
Flat White Cup Sleeve
You will need:
DK wool or acrylic, approx. 25 m of each colour
3.5 mm DPNs or circulars
Instructions:
Cast on 15 sts with DC and long tail cast on.
Turn. Join light colour.
Setup row DS LC (i.e. on the dark side with the light colour): Sl1p (p, slyo), to last 2 sts, p, bring yarn to front, slip last stitch. Slide sts to other end of needle.
Setup row DS DC (i.e. on the dark side with the dark colour): K1, (sl1yo, brk) to last 2 sts, sl1yo, k1. Turn.
Next rows:
LS LC i.e. light side with light colour : Sl1p, (brk1, sl1yo) to last 2 stitches, brk1, bring yarn to front, slip last stitch. Slide sts to other end of needle.
LS DC, i.e. light side with dark colour: K1 tbl, (sl1yo, brp) to last 2 sts, slyo, k1. Turn.
DS LC, i.e. dark side with light colour: Sl1p (brp, slyo), to last 2 sts, brp, bring yarn to front, slip last stitch. Slide sts to other end of needle.
DS DC. i.e. dark side with dark colour: K1 tbl, (sl1yo, brk) to last 2 sts, sl1yo, k1. Turn.
Start working chart. Continue working selvedge stitch as you did up to now, i.e. slip first and last stitch on all LC rows, knit first and last stitch on all DC rows.
Continue until work measures approx.. 16 cm or desired length.
Finish with a double row on the light side.
Break the LC yarn. With double-pointed needle pick up 15 stitches along the cast on edge. Fold the cast-on edge upwards with light sides facing each other and knit stitches together using the 3-needle bind off.
Work as Flat White Cup Sleeve above. Use the chart below.
Geeky Notes 🤓
MAKE A LIFELINE every now and then. You won’t regret it. It is notoriously difficult to correct mistakes in patterned brioche and if you are anything like me, you are bound to miss an increase or decrease at some point.
It is possible to do single pass brioche even with increases or decreases, but I find that it’s too complicated and therefore offers no added value. I’d be interested to hear if you have come to a different conclusion! Let me know in the Comments field below.
You are welcome to share your work on social media and to tag me (@annaplexis.knits on Facebook, Instagram and Threads, @annaplexis on TikTok, X, Mastodon, tumblr and YouTube). I’d love to see your work 🙂
Most people I know, hate weaving in ends. I used to hate it too, partly because I was young and impatient (that issue has been resolved: I am a lot older now 🤪) and partly because I was always in doubt regarding what the best way to weave in ends would be.
When I learned to knit as a child, I was just told to kind of sew in the ends up and down a couple of times. This is a) not a clear instruction and also b) not the best method.
The end result should be invisible, secure and not compromise the elasticity of the fabric. To achieve this:
Weave the ends in on the wrong side of the fabric (if there is a wrong side).
Weave in approx. 5 cm of yarn. This means, you should leave an end of at least 10 cm, so that you have enough length to thread the needle and sew easily. If the yarn is slippery, you need to weave in a longer strand, if it felts easily (like non-superwash wool) you can probably do with less.
Follow the direction of the stitches or weave in the ends diagonally.
Weaving in ends in advance
When you knit a piece, you will have at least two ends to weave in: One at the beginning and one at the end. You will have more ends if you use more than one colour or skein. I don’t totally *hate* weaving in ends anymore, but I still try to reduce the number of tails to be woven in.
So, I like to get the first end out of the way immediately after casting on.
I do more or less the same when joining a new colour.
Joining skeins is also in essence a way of weaving in ends in advance. This method works really well with wool (especially non-superwash).
For an optimal result, the yarn ends should be tapered. This is best achieved either by breaking the yarn (as opposed to cutting it) or by fraying the ends with a scissor blade.
I do not weave in the yarn in advance if I know that I’ll subsequently need to close a gap or even out a jog. When joining new yarn for the fingers on mittens, for example, I use the ends to close the gaps that are inevitably formed when picking up stitches.
Weaving in ends in stocking stitch
Weave in the ends on the wrong side of the work following the direction of the stitches. If you have to move up or down the rows, move diagonally.
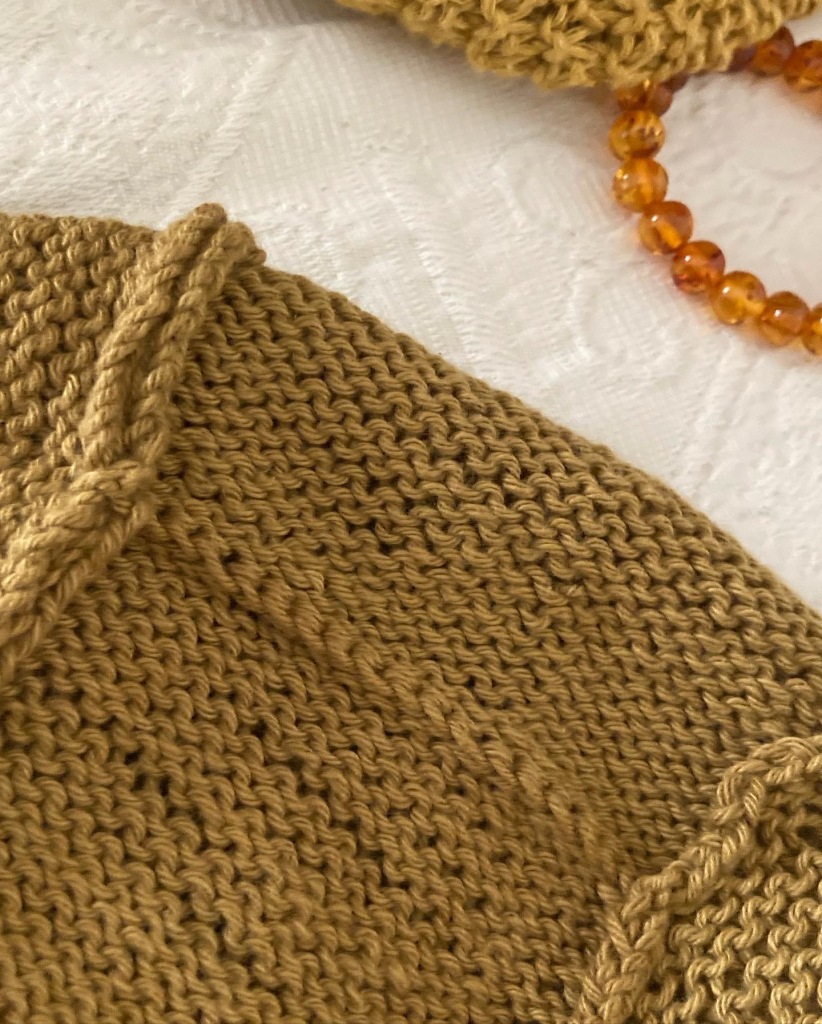
Weaving in ends in garter stitch
Garter stitch is very stretchy in all directions. Weaving in the ends diagonally, will have minimal impact on the stretchiness of the fabric.
Sometimes you have to weave in an end in a single garter stitch ridge. As always, do it on the wrong side.
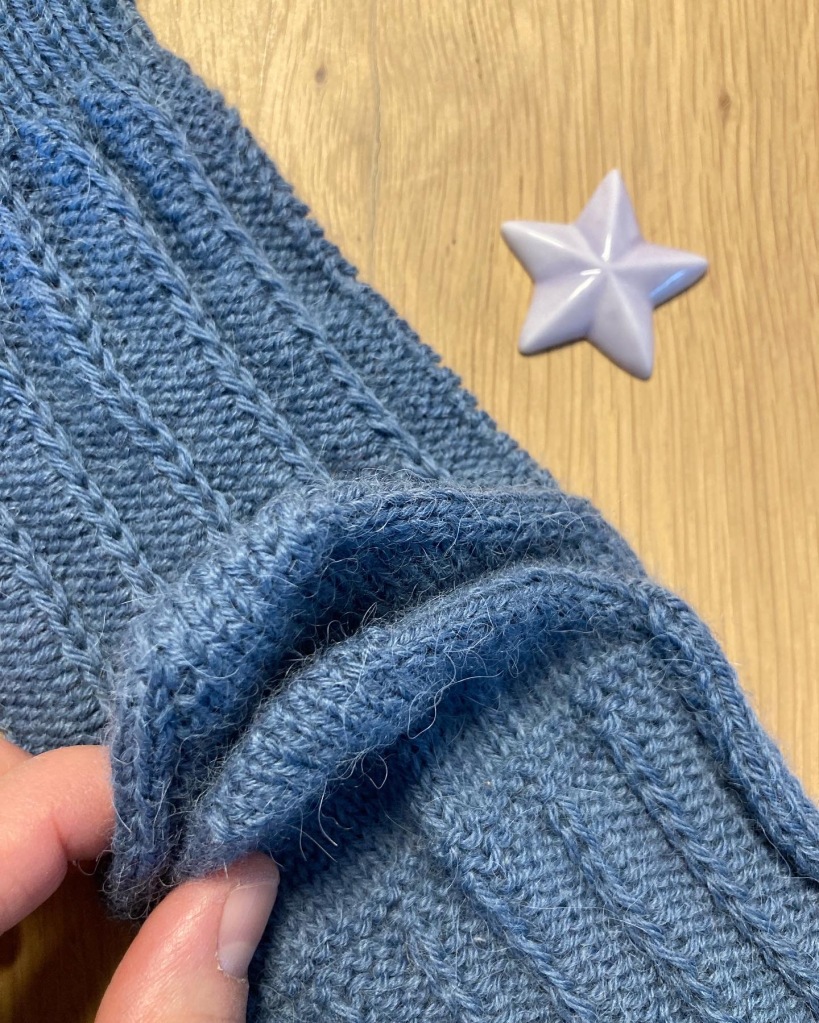
Weaving in ends in ribbing
This is one exception to the rule that you should weave in ends diagonally: Ribbing is stretchiest horizontally, so the easiest way to weave in ends without compromising its stretchiness is perpendicularly.
Weaving in ends after casting off in the round
When casting off in the round, you get a gap between the first and last stitch of the round. Close the gap, when weaving in the end.
Weaving in ends in stranded knitting
In dense stranded knitting, i.e. if there are frequent colour changes and short floats, it’s sufficient to weave in the ends behind the strands, especially if you are knitting with non-superwash wool.
Weaving in ends in brioche
In brioche knitting you can weave in the ends along the side of a knit stitch column in the channel that is formed between the two layers of yarn.
Cotton Ends
Cotton ends are harder to hide. They tend to peep through the knitting, as cotton doesn’t felt.
Therefore, when weaving in ends, I cut each fiber of the yarn at a different length.
To taper the yarn when joining skeins or weaving in ends in advance, I also cut the fibers at different lengths.
End too short to weave in?
Let me know in the comments below 👇 if you’ve found a better way of weaving in the ends 🧶🧶🧶
Brioche knitting has certain characteristics that put it in a category of its own. The texture and tension is very different from stocking stitch: It’s wonderfully squishy and very stretchy and uses up a lot more yarn than other patterns.
I like to find small useful projects to learn and teach new patterns and techniques rather than knit useless swatches, and I find that brioche is particularly suitable for dishcloths. I have often used these dishcloths as gifts – with limited success though, as my friends find them too pretty to use to wipe the kitchen counter 🤔
Below you will find three different sets of instructions: one for a single colour dishcloth, one for a two-colour brioche dishcloth explaining the basics of this technique and one for a two-colour dishcloth worked with single-pass brioche. The two latter sets of instructions produce identical dishcloths, the last one utilising a more complex but faster technique.
Single colour brioche is a very easy and simple pattern, which consists of two stitches: the sl1yo (slip 1 & yarn over – to be worked in one movement) and the brk (brioche knit, i.e. knit a stitch together with its yarn over).
Two-colour brioche is somewhat more complicated. You need to work each side twice, i.e. work a row with one colour and then slide the stitches back to the other end of the needle to work the row with the other colour. For this, you will need to work on circular needles or double-pointed needles. You will also be using the brp stitch (brioche purl, i.e. purl a stitch together with its yarn over).
It is, however, possible to work both colours in a single pass. As soon as you have mastered the principle of two-colour brioche and you feel you are ready for the next challenge, you can work two rows in one pass following the instructions for the Espresso Macchiato Dishcloth.
Abbreviations
sts: stitches
sl1p: slip 1 stitch purlwise
k: knit
sl1yo: Slip 1 stitch and yarn over
brk: brioche knit (i.e. knit a stitch together with its yarn over)
brp: brioche purl (i.e. purl a stitch together with its yarn over)
DC: dark colour
LC: light colour
Latte Macchiato Dishcloth
Single colour brioche
Yarn
150m of sport weight or 8/4 cotton (120-170m/50g)
Needles
A pair of 3mm knitting needles (Brioche is best worked with relatively thin needles)
Instructions
Cast on 45 sts.
If you haven’t tried brioche before, I suggest you use the long-tail cast on.
If you are ready to up your game though, you should try the Italian cast on. This is by far the most elegant way, in my opinion, to start a brioche project.
Take care not to twist the stitches. This can be a bit challenging. The Queen of Brioche Nancy Marchant suggests using a lifeline to keep track of the direction of the stitches, but I have to admit I have not (yet!) used that method myself.
Cast on the last stitch using the long-tail method to “lock” the stitches.
Remember that when doing the Italian cast on, every other stitch has got the “wrong” leg in front. Knit these stitches through the back loop (the right leg) so as not to twist them.
Set-up row: Sl1p (k1, sl1yo) to last 2 sts, k2.
From this point on, you will be using the brk stitch, i.e. you will be knitting a stitch together with its yarn over.
Row 1: Sl1p (sl1yo, brk) to last 2 sts, sl1yo, k1.
Row 2: Sl1p (brk1, sl1yo) to 2 sts, brk1, k1.
Repeat these 2 rows 80 times, i.e. until you have 80 knit stitches per column.
{If you are an English style knitter and have never knitted brioche before: please note that the working yarn must always be in front before slipping the stitch. You can find general information on brioche knitting for English style knitters on Nancy Marchant’s website.}
Bind off using some kind of stretchy bind off and weave in the ends.
Italian bind off is particularly suitable and matches the Italian cast on edge perfectly. You will find detailed instructions for the Italian bind off in this bind off overview.
Italian bind off is particularly suitable for brioche knitting
In brioche knitting you can weave in the ends along the side of a knit stitch column in the channel that is formed between the two layers of yarn.
Caffè Lungo Dishcloth
Two-colour brioche
Yarn
sport weight or 8/4 cotton in two different colours, approx. 75 m of each colour
Needles
3 mm DPNs or circulars
Instructions
Cast on 45 sts with the dark colour (DC).
Turn.
With light colour (LC): Sl1p, (k1, sl1yo) to last 2 stitches, k1, bring yarn to front, slip last stitch.
Slide sts to other end of needle.
With dark colour: P1, (sl1yo, brp) to last 2 sts, slyo, k1. Turn.
With light colour: sl1p (brp, slyo), to last 2 sts, brp, bring yarn to front, slip last stitch.
Slide sts to other end of needle.
With dark colour: P1, (sl1yo, brk) to last 2 sts, sl1yo, k1.
Turn.
With light colour: Sl1p, (brk1, sl1yo) to last 2 stitches, brk1, bring yarn to front, slip last stitch. Slide sts to other end of needle.
With dark colour: Sl1p, (sl1yo, brp) to last 2 sts, slyo, k1. Turn.
With light colour: Sl1p (brp, slyo), to last 2 sts, brp, bring yarn to front, slip last stitch. Slide sts to other end of needle.
With dark colour: Sl1p, (sl1yo, brk) to last 2 sts, sl1yo, k1. Turn.
Repeat the above 4 steps 40 times in all, i.e. until you have 80 knit stitches per column. Bind off with DC using Italian bind off. Weave in ends.
Geeky Notes 🤓
It is possible to cast on in two colours with the Italian method. For two-colour Italian cast-on, start by making a slip-knot with both yarns to hold the yarns together. This does not count as a stitch and will be untied eventually.
Espresso Macchiato Dishcloth
Single pass brioche
With single pass brioche, you work both colours on each side in one single row. I like to use a ring to separate the yarns on my left index finger. You do not need to slide the stitches back to the other end, so you can knit on a pair of ordinary needles – you do not have to use circulars or DPNs.
The front and back side rows are worked differently but are confusingly similar. It helps me to think that if I am working a double stitch, I should also end up with a double stitch, while single stitches remain single.
Remember to place the knit stitch colour to the right. This means you have to switch the position of the yarns when you turn the work.
Yarn
sport weight or 8/4 cotton in two different colours, approx. 75 m of each colour
Needles
A pair of 3 mm knitting needles
Instructions
Cast on 45 sts with dark colour (DC). Turn.
Place the two yarns on your left index finger with the knit stitch colour (the light colour) on the right and under the dark yarn.
Light side row: Sl1p, work light side single pass brioche as shown below to last stitch, i.e. hold dark colour down in front and brk. Let go of the dark yarn to make a yarn over. Purl the next stitch with the dark yarn.
When you come to the last stitch, bring light colour yarn (LC) to front. Knit last stitch with dark colour.
Turn and switch the position of the yarns, so that the dark colour is on the right.
Dark side row: Sl1p. Work dark side single pass brioche to last stitch, i.e. purl double stitch with light colour coming up between the two yarns, thus making a yarn over. Hold light colour in front of the needle and brioche knit from below.
When you get to the last stitch, bring LC to front. Knit last stitch with dark colour. Turn.
Repeat these 2 rows 40 times. Bind off with DC using Italian bind off. Weave in ends.
You are welcome to share your work on social media and to tag me (@annaplexis.knits on Facebook, Instagram and Threads, @annaplexis on TikTok, X, Mastodon, tumblr and YouTube). I’d love to see your work 🙂
Hashtags #annaplexis and #coffeeandbriochedishcloths
If you have mastered the basics of brioche and are ready for more advanced techniques, here’s a small project introducing brioche increases and decreases: The Brioche and Takeaway Coffee Duo, a pair of cup sleeves for your takeaway coffee.
This is the most basic way to cast off. It normally turns out rather tight though. I like to go up half a needle size to get a more even tension.
When you come to the last stitch, cut the yarn and pull it through the stitch.
Occasionally, you may need to cast off purlwise or in rib. The principle is the same as with the regular cast off. The only difference is that you purl the stitches instead of knitting them.
Icelandic cast off
The regular cast off usually turns out rather tight, even if you go up half a needle size (as I normally do).
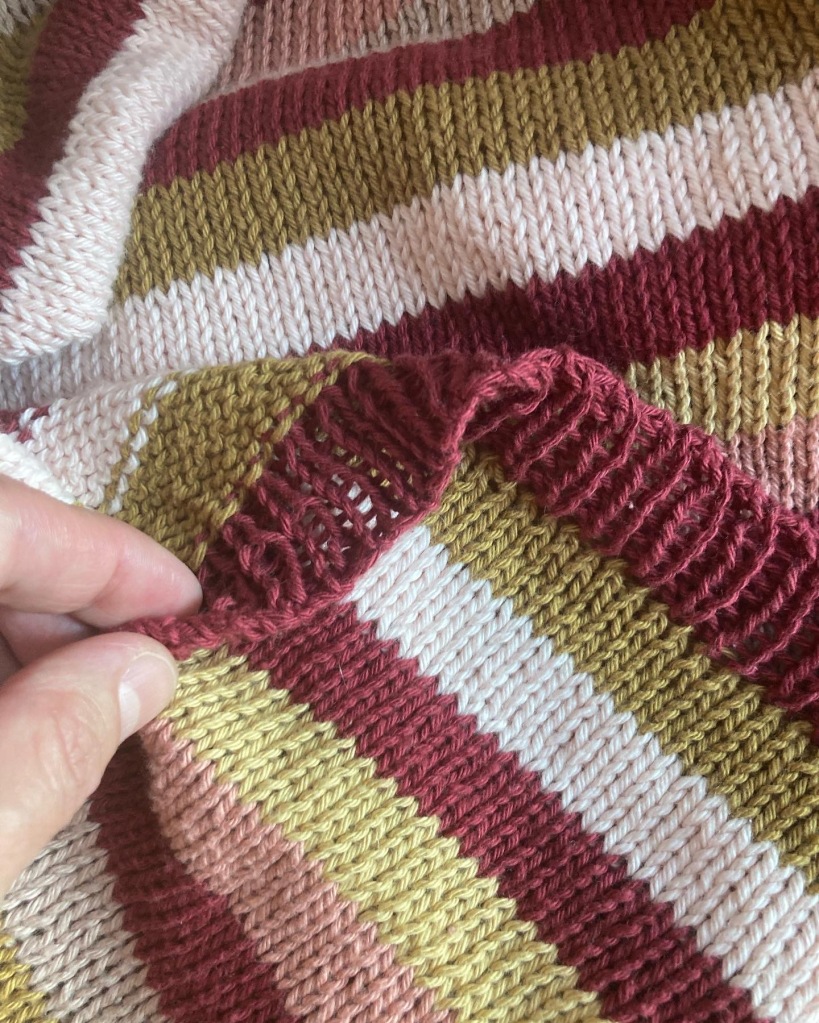
For garter and seed stitch borders I prefer the Icelandic cast off.
Jeny’s surprisingly stretchy cast off
The easiest stretchy cast off for ribbing is, in my opinion, Jeny’s surprisingly stretchy cast off. It is, indeed, surprisingly stretchy! Very suitable for toe-up socks.
Elastic cast off
This is an alternative to Jeny’s, which I actually find makes a neater edge.
Sewn cast off: Italian, tubular, Jeny’s and Kitchener
There are several types of sewn cast offs, i.e. techniques where you use a darning needle to close off the stitches. The ones I have tried produce a really neat result. The drawback is that, if you are casting off a large number of stitches, e.g. a sweater hem, you have to work with a long piece of yarn, which is annoying in itself, but can also result in the yarn getting frayed and breaking (depending on the kind of yarn you are using).
Italian/tubular cast off
The most elegant stretchy cast off for ribbing and brioche is the Italian or tubular cast off.
This cast off mirrors the Italian cast on. So, if you want your cast on and cast off to be identical, this is the way to go.
To work the Italian cast off:
Cut the yarn leaving a tail of at least 4x the width of your cast off edge. Use a darning needle. Enter the first st (a knit st) purlwise and the second st (a purl st) knitwise leaving them on the knitting needle. Enter the first st knitwise and slip it off the needle. *Enter the second st (a knit st) purlwise. Enter the first st purlwise and slip it off the needle. Pass the needle back to front between the first and second sts. Enter the second st (a purl st) knitwise. Enter the first st knitwise (a knit st) and slip it off the needle.* Repeat from * to *. Think: “purl(wise), purl(wise) off, (pass needle through), knit(wise), knit(wise) off”.
The following video shows how to begin and end the Italian cast off.
Italian cast off
Tubular cast off
The tubular cast off is the same as the Italian, but is preceded by two rows of double knitting to create a thin tube at the edge. Double knitting is worked by alternately knitting a stitch and slipping the next with the yarn in front. (For more detailed explanations on double knitting see The Annaplexis Coasters)
In the second row, knit the slipped stitches and slip the knitted ones.
If you are working double knitting in rounds, the second round is worked as follows: slip the knitted stitches with the yarn in the back and purl the slipped stitches.
Jeny’s interlock cast off
Jeny Staiman (of Surprisingly-stretchy- cast-off fame, see above) has worked out how to make a stretchy sewn cast off that exactly mirrors the twisted loop (and the long tail cast on – which in essence is twisted loops + a knitted row). (Don’t you just love knitting geeks?!?! 🤓)
This cast off is shown here in 1/1 ribbing, but can also be worked exclusively in knit stitches.
Kitchener stitch
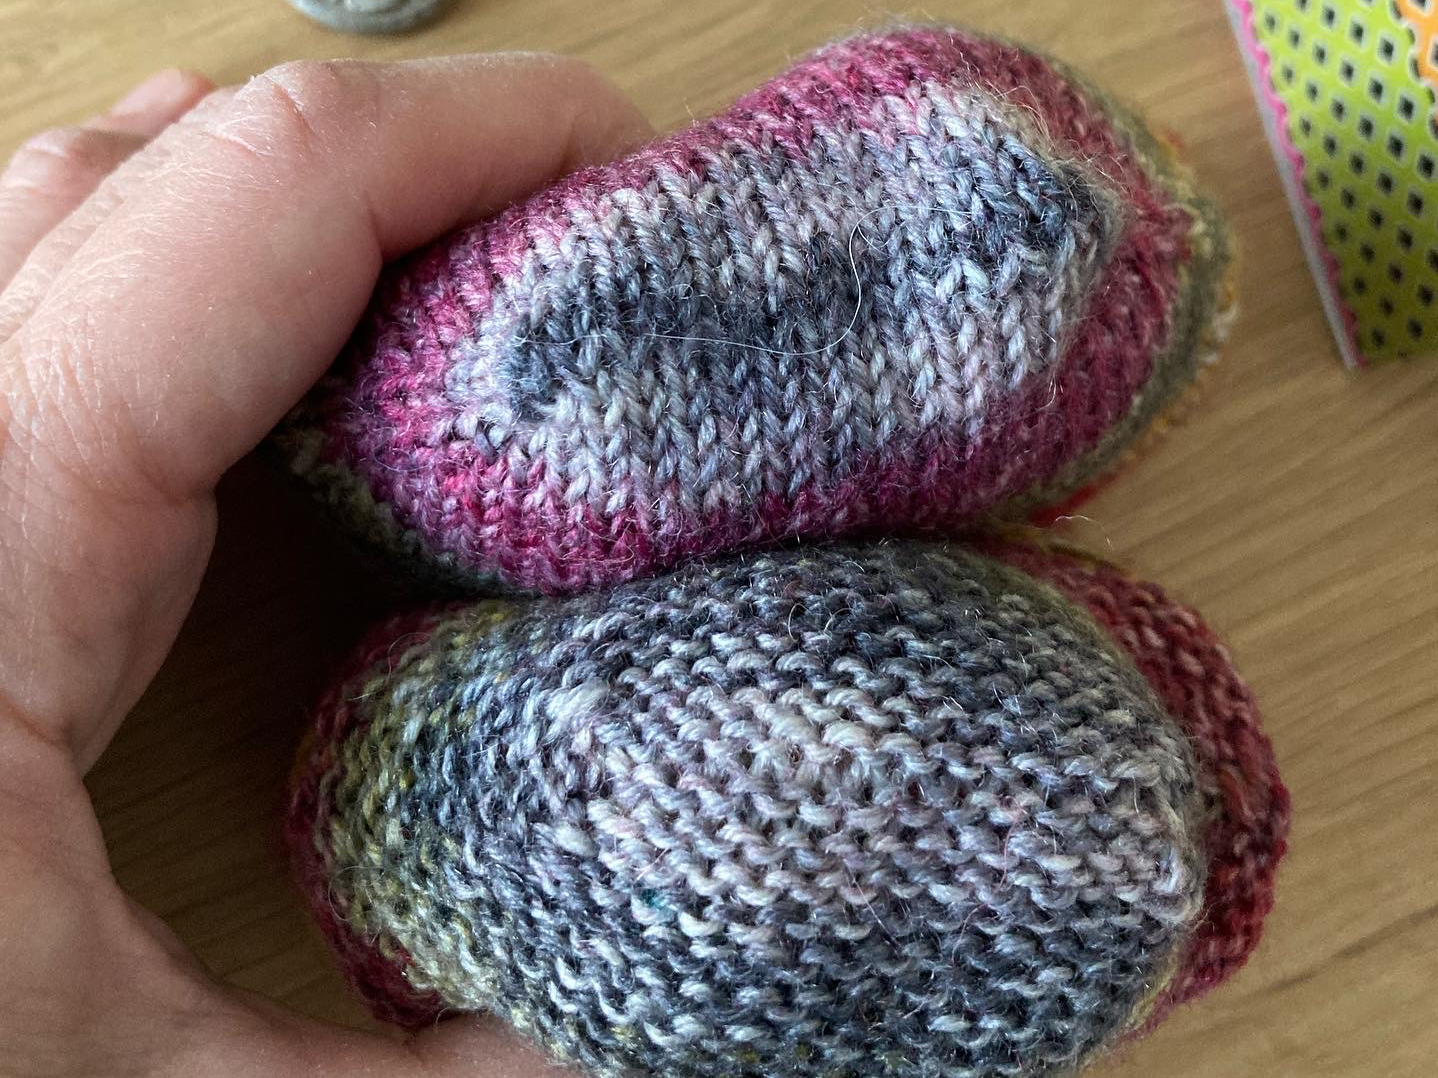
Kitchener stitch is in essence worked the same way as the Italian cast off but is used to join two edges together. It is typically used to close the toe in top-down socks or to close afterthought heels. It gives a perfectly seamless join, in the same way that Judy’s magic cast on is perfectly seamless.
In the photo you can see a toe made with Judy’s magic cast on and a heel closed with Kitchener’s.
3-needle cast off
I like to use this cast off for shoulders.
The shoulder seam keeps the garment together and is crucial for the fit around the armholes. Therefore, in most designs, it should be a sturdy seam.
Shoulder joined with 3-needle cast off
Cast off in the round
Instead of Kitchener stitch you can use this cast off to close the toe in top down socks. This is also used to cast off hats knitted in the round.
Cut the yarn leaving a tail of approx. 20 cm. Knit each stitch and pull the yarn through.
After having bound off all the stitches this way, pull the yarn to close the hole and weave in the end securely.
Fake Italian cast off
Not quite as stretchy as the real thing, but it is easier and looks quite neat.
Fake Italian cast off
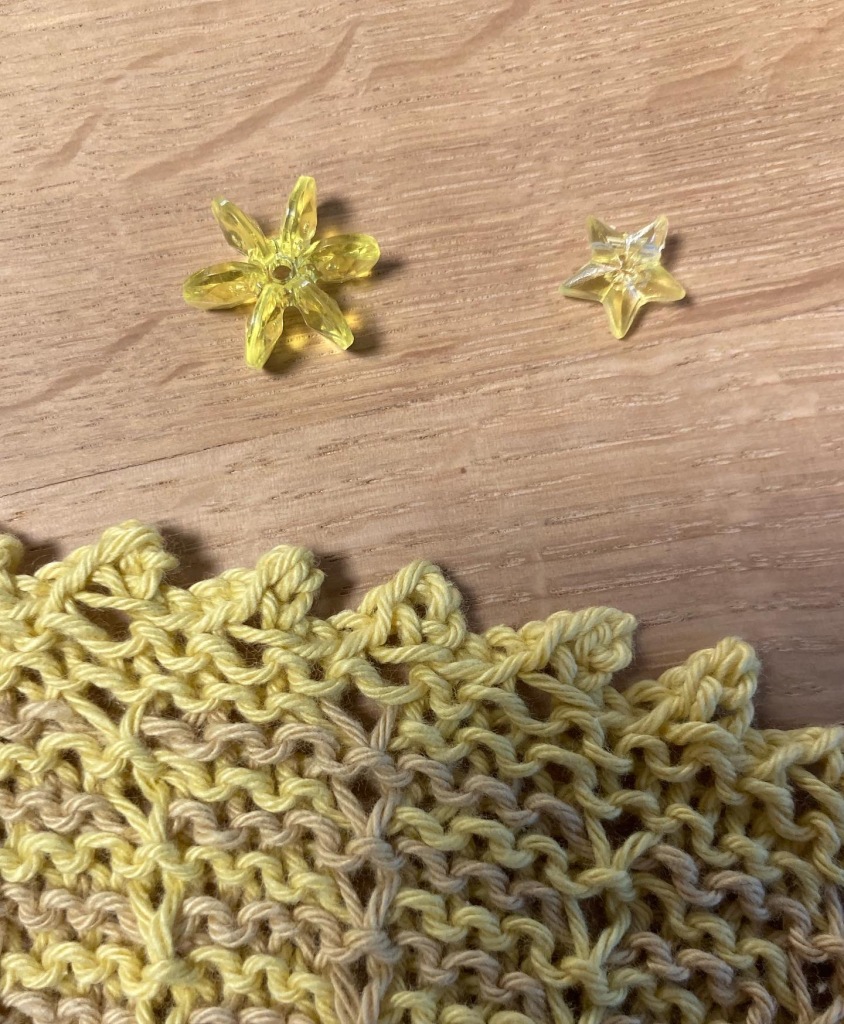
Picot cast off
Cast on 2 stitches with knitted cast-on method (See Everything you need to know about casting on). Knit 2, pass first stitch over, [knit 1, pass previous stitch over] knit brackets 3 times in total (i.e. cast off 4 stitches). Slip the remaining stitch back to left hand needle.
You can cast off more stitches between the picots if you want them spaced further apart.
I-cord cast off
In general the I-cord cast off is worked as follows:
Knit x number of sts (typically 1-3), make a decrease (k2tog or SSK), slip sts from right needle to left hand needle, repeat.
Before you start, you need to cast on x number of sts at the beginning of the row.
The following videos show two variations of this, but there are many other possibilities.
This concludes my cast-off overview! Have I missed something? What is your favourite cast-off? Let me know in the comments below 👇
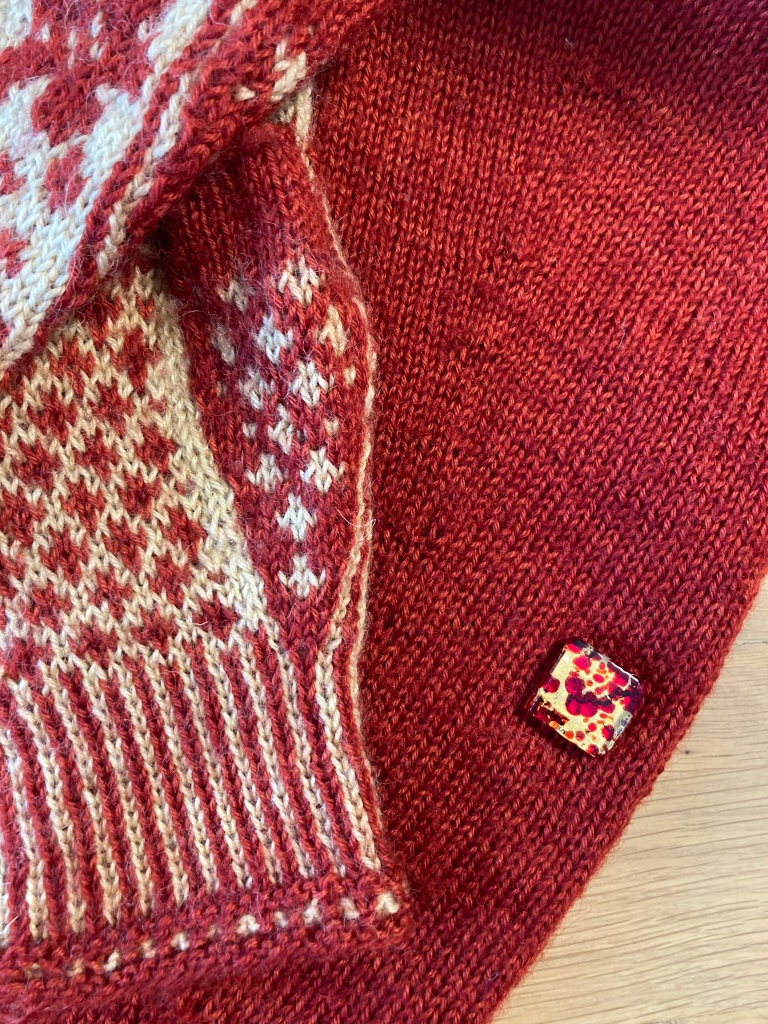
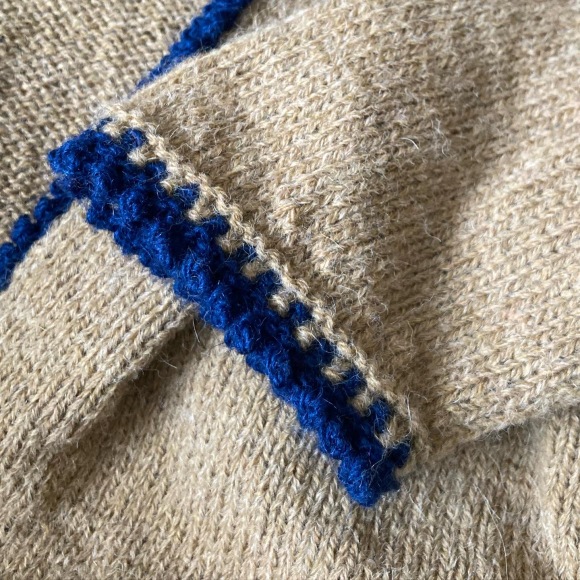
One of the simpler knits in the Tudor Roses book by Alice Starmore is the Elizabeth Woodville jacket: A beautiful border, elegant waist shaping and lots of stocking stitch.
I had a couple of skeins of blue yarn in my stash, which were the exact shade of a skirt I have. I was looking for a pattern to accent this colour without requiring a large amount of it.
So I used the blue (Einband Lopi 250m/50g) for the borders and beige Ice Yarns Baby Alpaca Superfine 400m/50g for the main body. Both yarns are held double. The jacket weighs 286 g in total. (Size medium).
The two yarns are completely different in texture: The Einband Lopi is rough and hard, while the Alpaca is very soft. I love this contrast and it works well on this jacket.
The sleeves
I started knitting with the sleeves. I do this often instead of (or even in addition to) swatching 🙂 Swatching is not an exact science: By starting with the sleeves, if there is something I don’t like, I will know sooner and will have to frog less than if I start with the body.
I worked the sleeves in the round on DPNs. I know from experience that my tension on DPNs is tighter than on other needles, so I went up half a size compared to the body: The rest of the jacket is worked on 3mm needles, for the sleeves I used 3.5 mm DPNs.
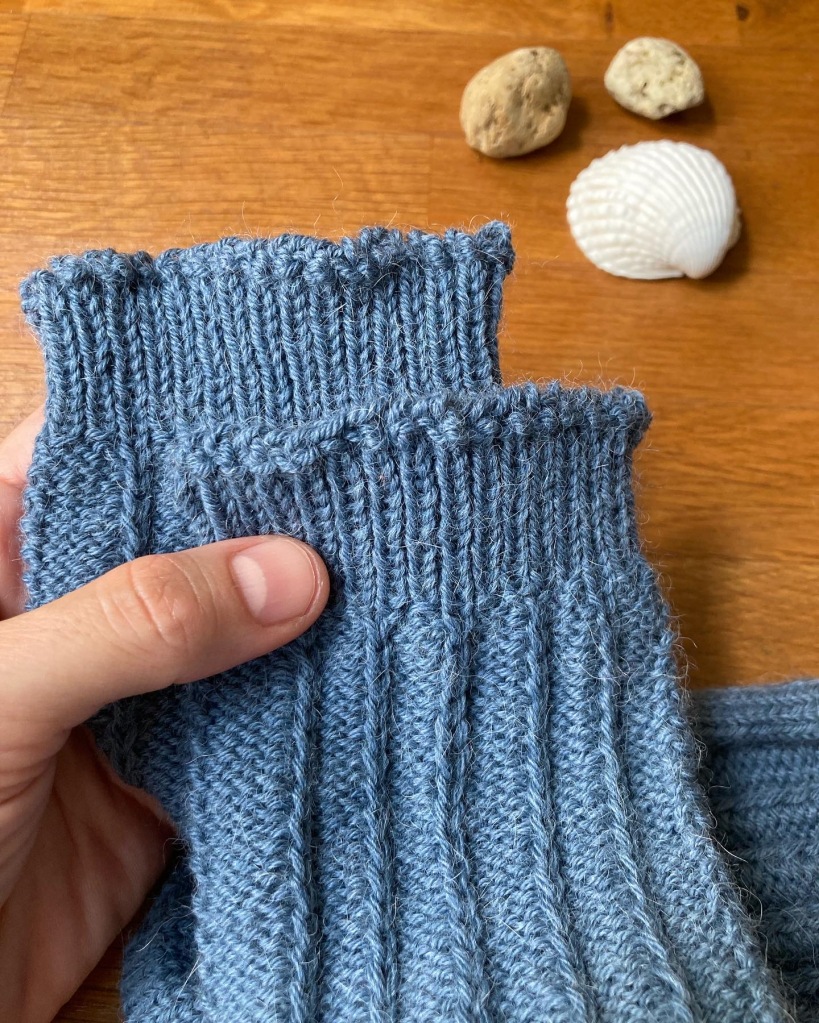
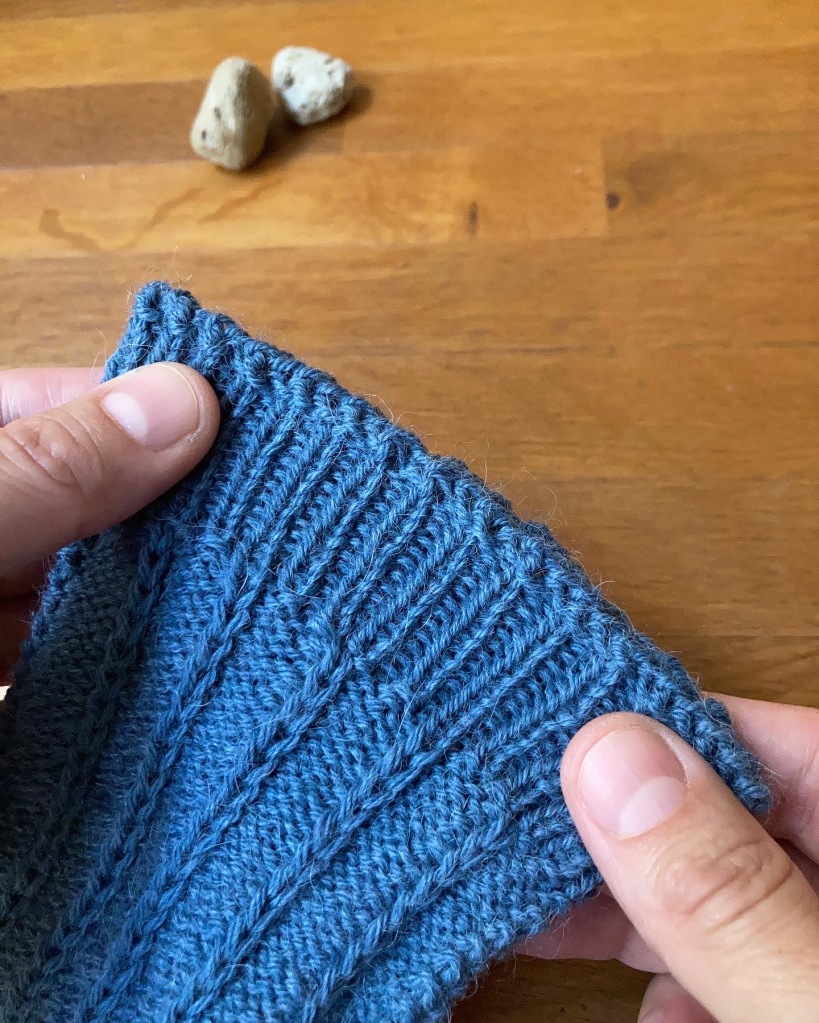
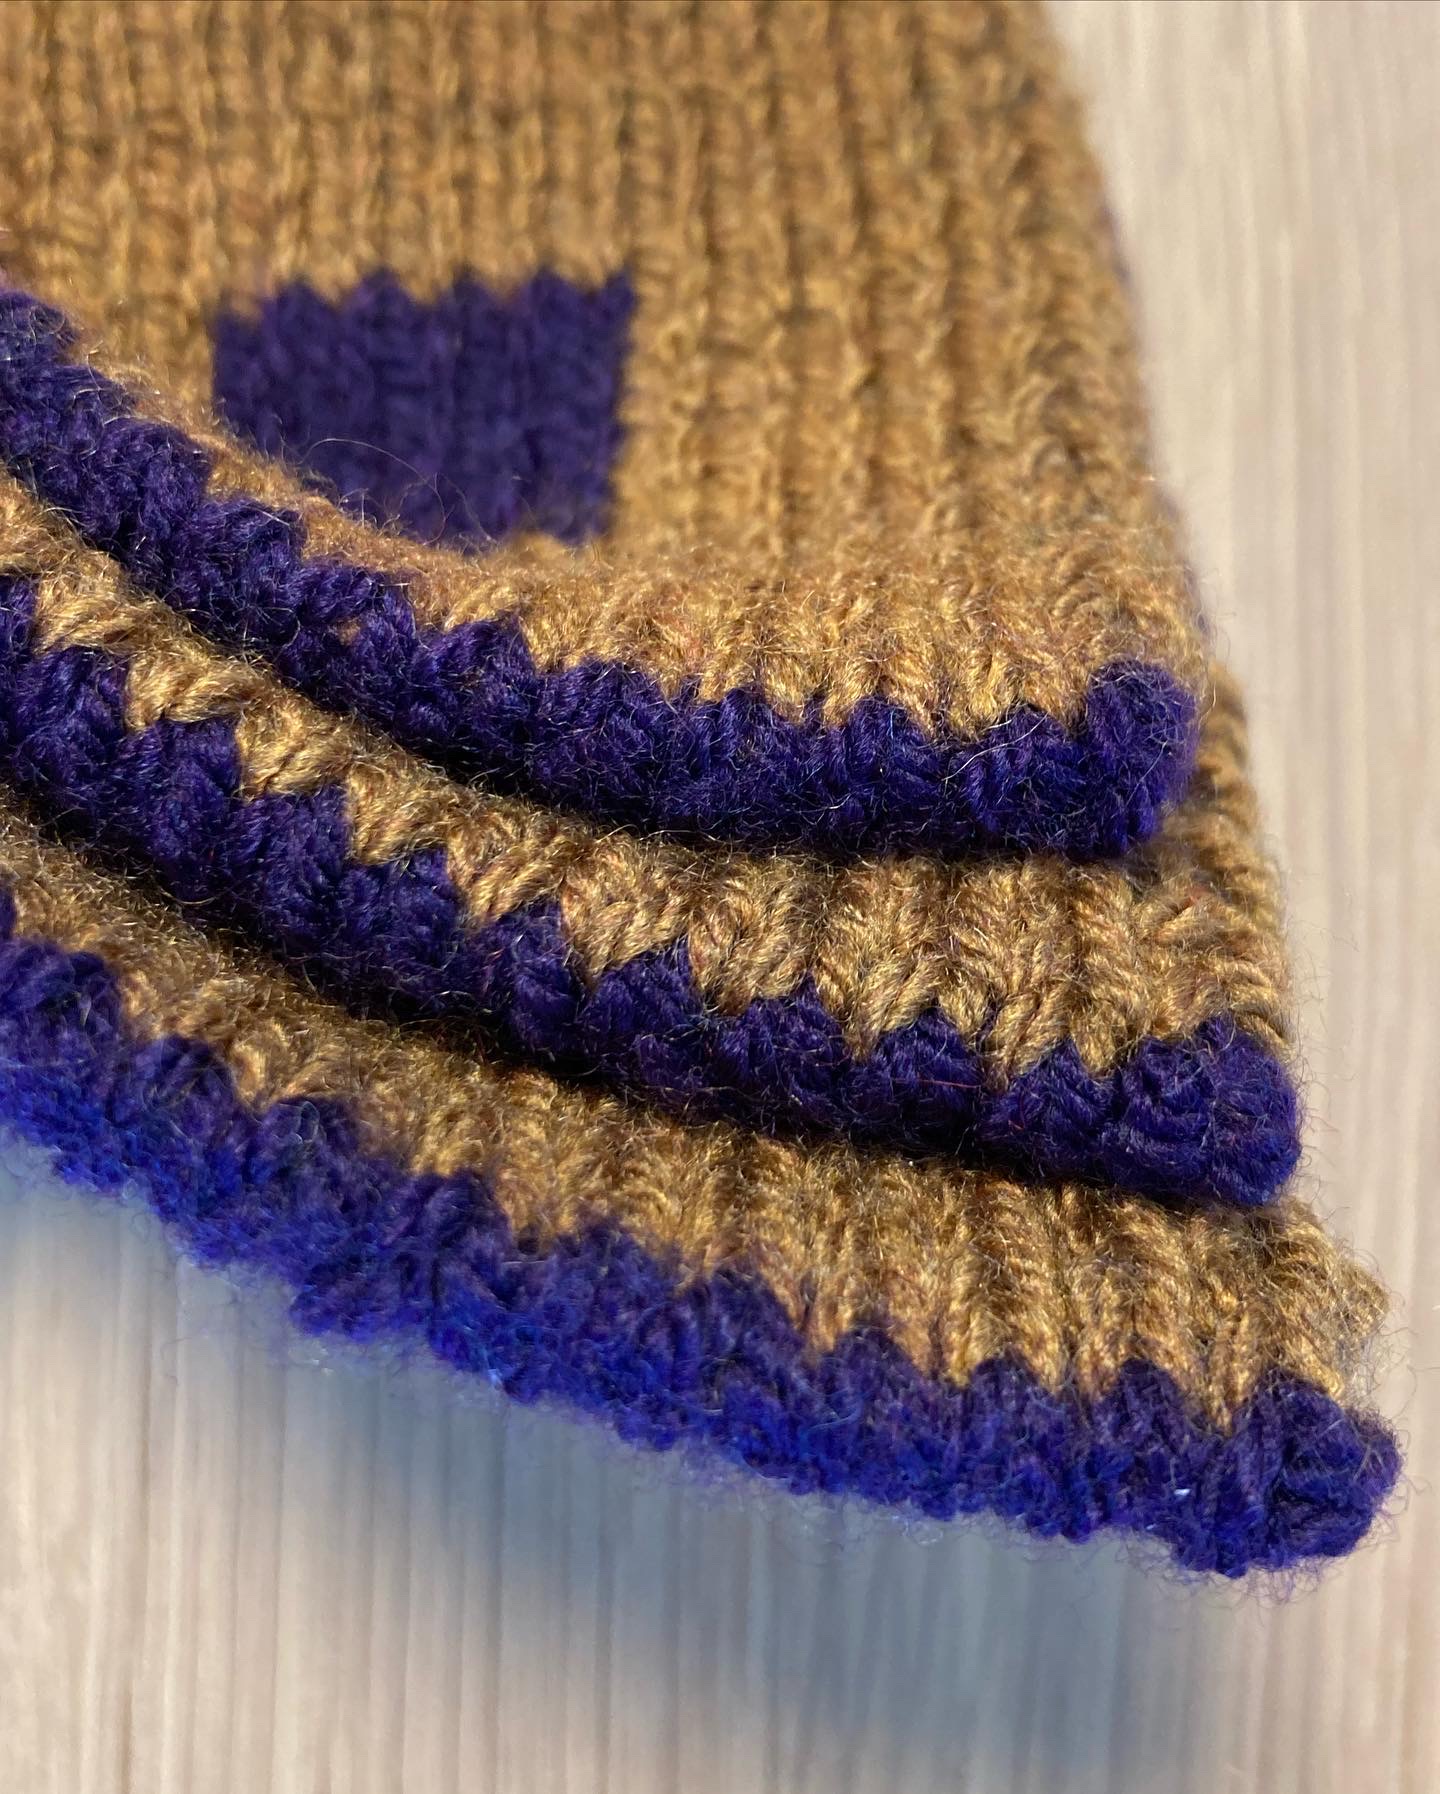
Much as I like the sleeve flare, I feel most comfortable wearing tight-fitting sleeves. So I started with the number of stitches after the decrease rounds (51 sts for size M), i.e. I made 25 picots. After having picked up the sts on the picots, I joined in the round.
Picot chain edging: Step 1 Make the chainPicot chain edging: Step 2 Pick up stitches
After the 5 border rows, there is a series of short rows. I used German short rows, which is, in my opinion, the easiest and neatest short row technique.
For the increases, I used M1R and M1L for symmetry.
I used my own stitch counts for the sleeve cap and armhole. I have quite a large bust, so I make steeper decreases for the armhole to avoid too much fabric at the sleeve join.
I love the neat tailored look of inset sleeves, but attaching them can be a bit of a challenge. This is how to do it: Turn the bodice inside out. Place the sleeve right side out in the armhole. Pin or clip together at shoulder seam and side seam. Then pin or clip together the rest distributing any slack evenly.
I make my sleeve cap and armhole decreases two stitches in from the edge, as follows:
RS dec rows: K2, ssk, k to last 4 sts, k2tog, k2.
WS dec rows: P2, purl 2 tog, p to last 4 sts, ssp, p2.
I join the sleeves to the body using crochet slip stitches through the second stitch from the edge. I find crocheting easier than sewing and I like the result better. It gives a neat join with the right amount of stretch.
I made the bodice in one piece to avoid the extra bulk and extra work of side seams.
I added up the total number of sts of back and front pieces (211 sts for size M), subtracted 1 and divided by 2 to find the total number of picots I would need.
I did not break the yarn, as stated in the pattern, but knitted to the point where I was supposed to re-attach the yarn on the right front, completed the short row section and then knitted on to the point where I was supposed to reattach the yarn for the back and so on. This meant, however, that I had to switch right and wrong side row turns.
After completing the short rows I continued knitting the bodice in one piece. Here, too, I used German short rows and symmetrical increases. I also used my own decreases to match the modified sleeve cap.
For the shoulders I used German short rows and I joined them together using the 3-needle bind-off.
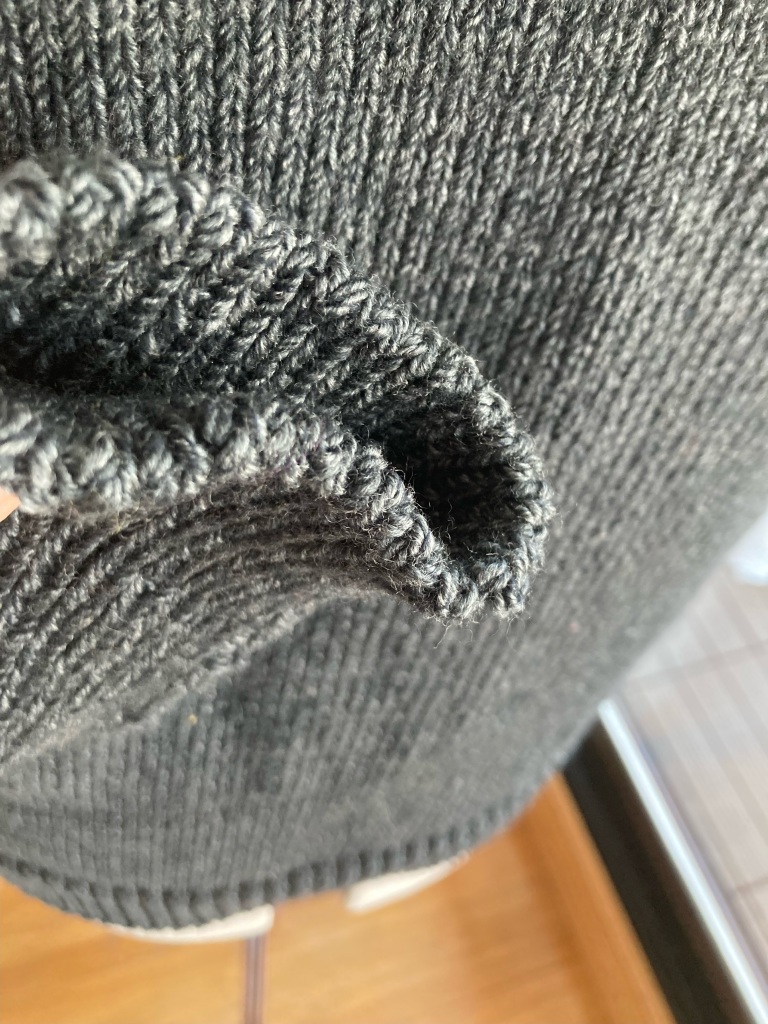
Finishing
I used my usual method of attaching the button bands, i.e. knitting them up on separate needles and attaching them to the bodice using the 3-needle method (without binding off). I then continue knitting to make a flap that I later stitch in place. This method is useful to cover up the raw edges of a steek, but it also provides support for the button band as a kind of light boning. So I use it even when there are no raw edges to cover up. You can find a detailed description in my blogpost on the Jane Seymour jacket.
I added a couple of extra buttons, i.e. I have 9 in all. I hate gaping button-bands, so I try not to space buttons too far away from each other…
When knitting the neckline, I also knitted a couple of garter rows in the contrast colour on top of the buttonbands, to get a neat top edge.
On my first attempt the neckline was quite loose letting the shoulders sag somewhat. I redid the bind-off row using a 2.5 mm needle to pull the neckline in somewhat. If I knit this jacket again, I will decrease some stitches at the neckline before binding off.
Let’s start from the very beginning. (🎶 A very good place to start 🎶😉):
My go-to cast-on method is the long-tail cast-on.
I prefer to start without a slipknot. Do not make the stitches too tight!
I like to go up half a needle size when casting on, compared to the main body of my project, to get a more even tension.
The eternal problem with this type of cast-on is how long a tail to leave: at least 3 times the width of your project is a good rule of thumb, but depends on yarn and needle thickness. Better too much than too little!
You can also choose to make a sample: cast on 10 (or 20) stitches, measure how much yarn you used and do the math: multiply by the number of stitches you need and divide by 10 (or 20). Add 15 cm (6 inches) for the tail to be woven in.
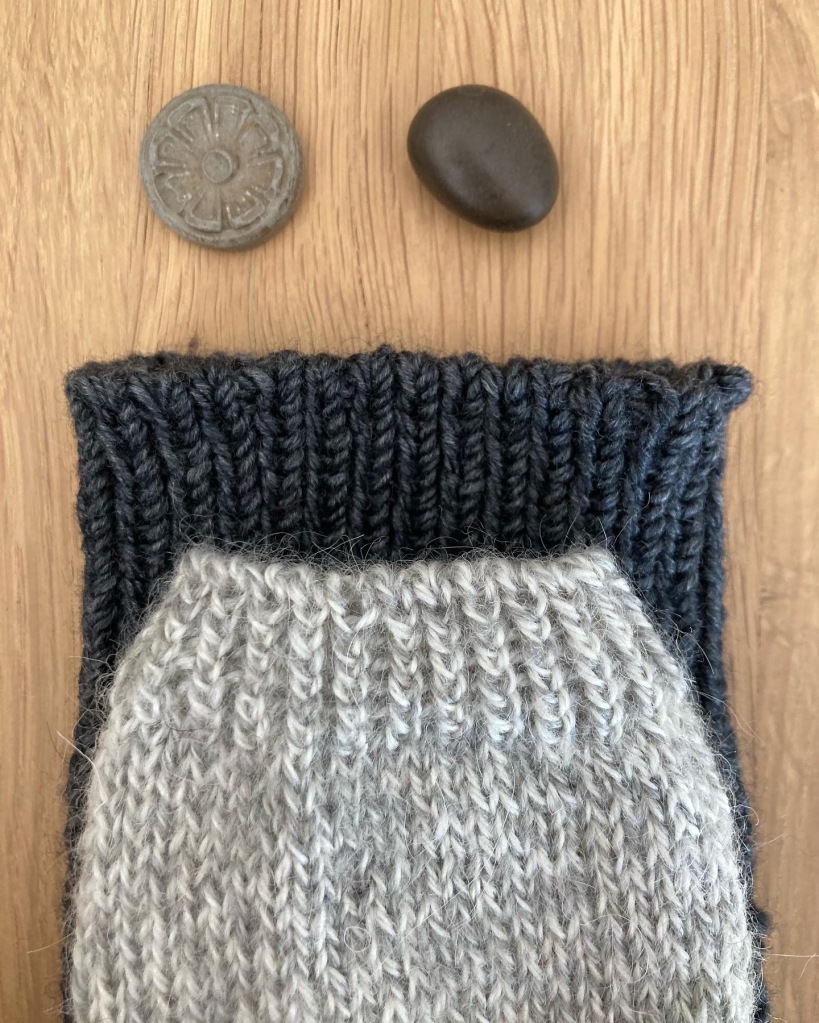
With the long-tail cast-on, a purl ridge is formed on the side of the work facing away from you. The way I have learned it, this purl ridge should be on the wrong side of the work.
The right sideThe wrong side
This means that if you are knitting flat, the first row will be a wrong side row.
If you are knitting in the round this purl ridge will automatically be on the inside.
I usually weave in the first tail before starting to knit. That is already one end less to weave in 🤓
However, I do not use this method if I know I’ll subsequently need to use the yarn end to close a gap or even out a jog. I also do not use this method with the pinhole cast-on (see below) since the tail is used to tighten the hole.
To avoid a jog when knitting in the round, cast on an extra stitch and slip it over the first stitch of the round.
Stretchy cast-ons
Twisted German a.k.a. Old Norwegian Cast-on
Strangely enough, all the stretchy cast-ons I know of, have geographical names. A stretchy variant of the long-tail cast-on is the Twisted German cast-on 🇩🇪, a.k.a. Old Norwegian 🇳🇴. This is useful for cuff-down socks and top-down sweaters.
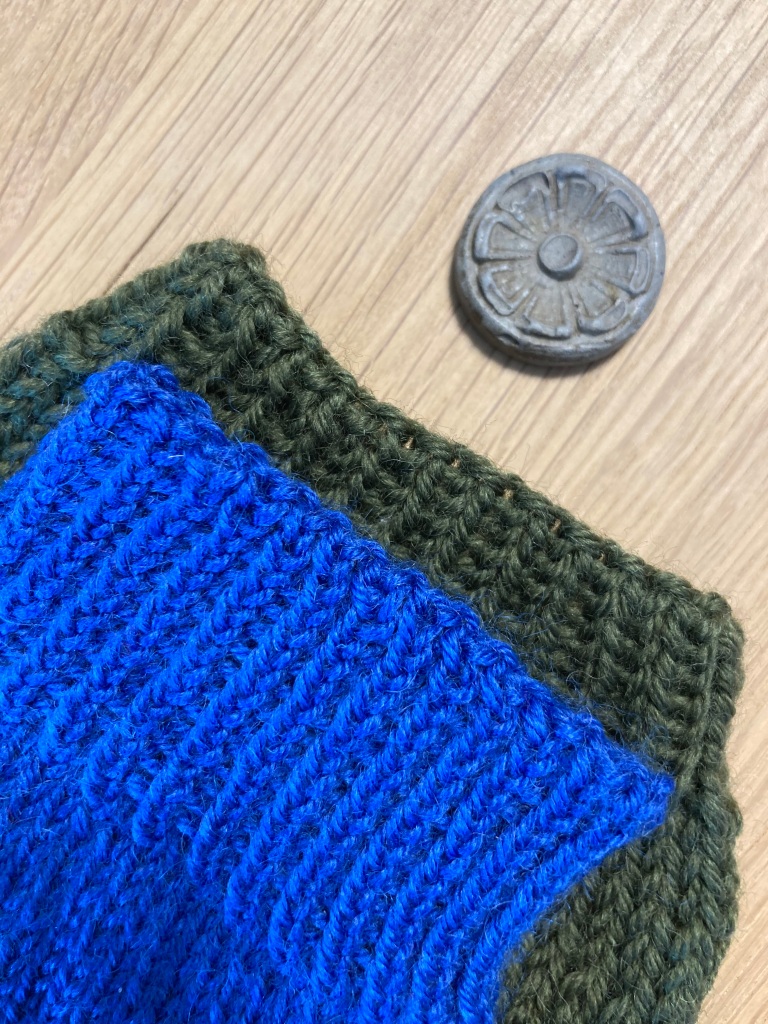
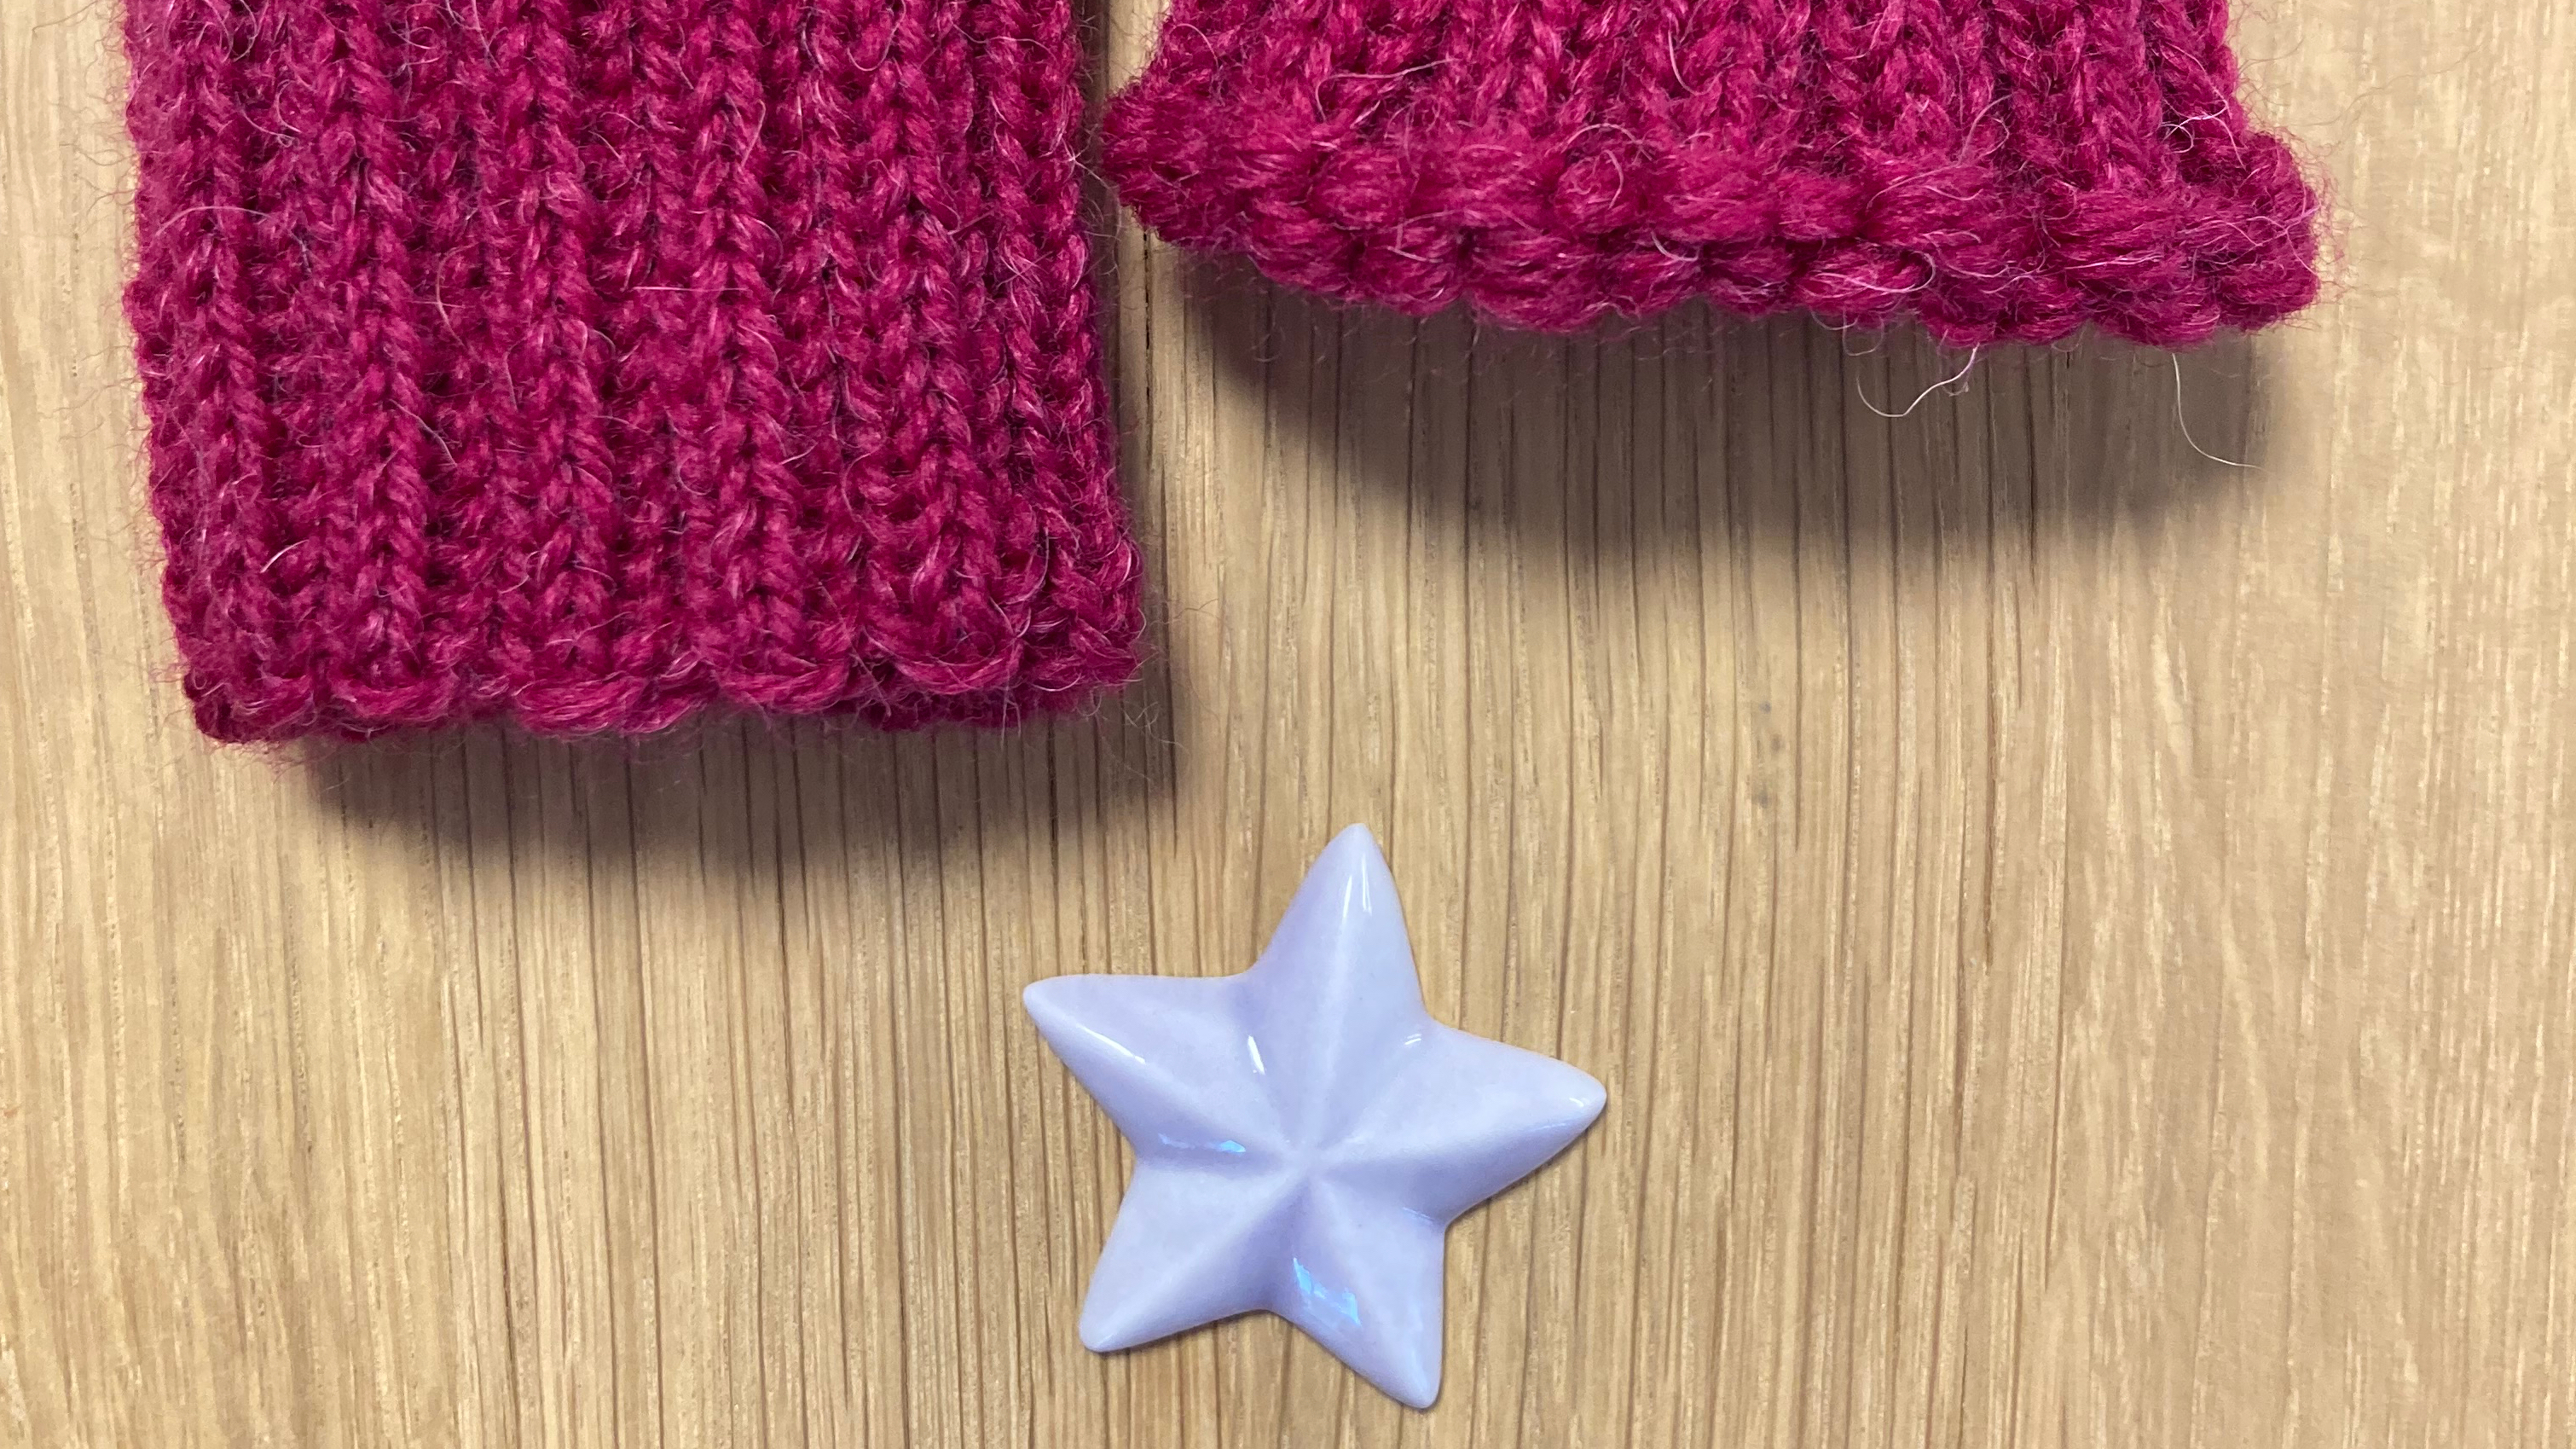
Bulgarian/Estonian/Latvian Cast-on
Another stretchy and decorative variant of the long-tail cast-on is the East European method known as the Estonian 🇪🇪, Latvian 🇱🇻 or Bulgarian 🇧🇬 cast-on. You can use a double or triple strand of yarn on your thumb for a more pronounced edge.
The cuff on the right has been cast on with a triple strand of yarn.
I prefer to use this cast-on with 2/2 ribbing, but I have also seen it used with 1/1 ribbing.
Italian Cast-on
The Italian 🇮🇹 cast-on is used for 1/1 ribbing, double knitting or brioche for a perfectly seamless edge. Cast on the last stitch with the long-tail method to secure the stitches.
Notice that in the first row every other stitch has the wrong leg in front. These stitches should be worked through the back loop, i.e. through the right leg.
You can start directly after the cast-on with ribbing, double knitting or brioche, or, for a tubular cast-on you can knit 2 rows (or rounds) of double knitting before starting on a 1/1 rib.
For two-colour Italian cast-on, start by making a slip-knot with both yarns to hold the yarns together. This does not count as a stitch and will be untied eventually. Perfect for two-colour brioche.
Cast on from anywhere in your project
Sometimes you need to cast on a number of stitches in the middle of a project. The problem is, that you only have one yarn to work with, whereas most cast ons use two.
You have two options:
the backward loop cast on
the chain-edge or knitted cast on
The backward loop cast on
This is really simple and easy:
The chain-edge cast on
There is another variant of this method called the cable cast-on, where you insert the needle between the first two stitches to catch the yarn, rather than through the last stitch. The result is slightly more bulky, so it all depends on the effect you want to achieve.
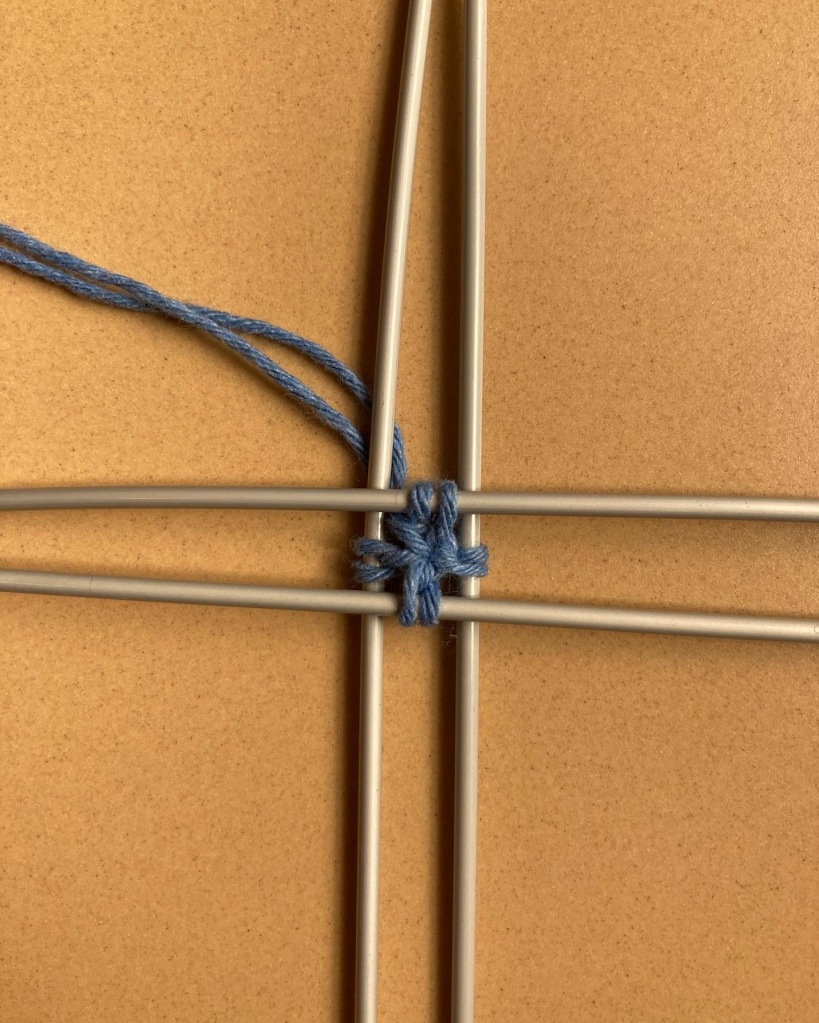
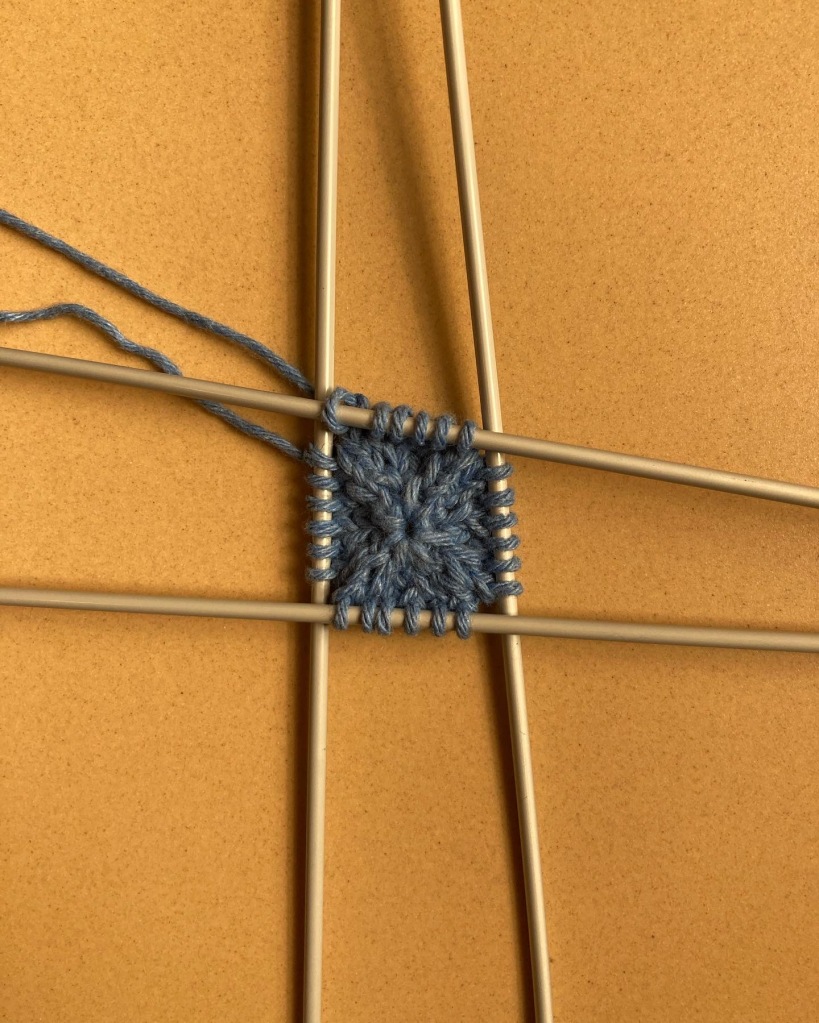
Pinhole and Judy’s Magic Cast-On
Pinhole cast-on
The pinhole cast-on can be used when knitting in the round from the center out. By pulling the cast-on tail you can tighten the center stitches, leaving no hole in the middle, or rather, well, a pinhole 🤓
After cast-on, distribute the stitches evenly on DPNs or use the magic loop method.
I like to start with 2 double-pointed needles until I have increased to approx. 20-30 stitches. I find it gets too fiddly to knit 8 stitches with 5 needles. (The first photo below is merely for demonstration purposes).
Judy’s Magic Cast-on
Judy’s magic cast-on is often used to start toe-up socks. It makes a perfectly seamless toe.
Right and wrong side of Judy’s Magic Cast-on
This cast-on is usually combined with the magic loop method. Having one set of the stitches on the wire rather than on a needle gives enough slack to work the stitches.
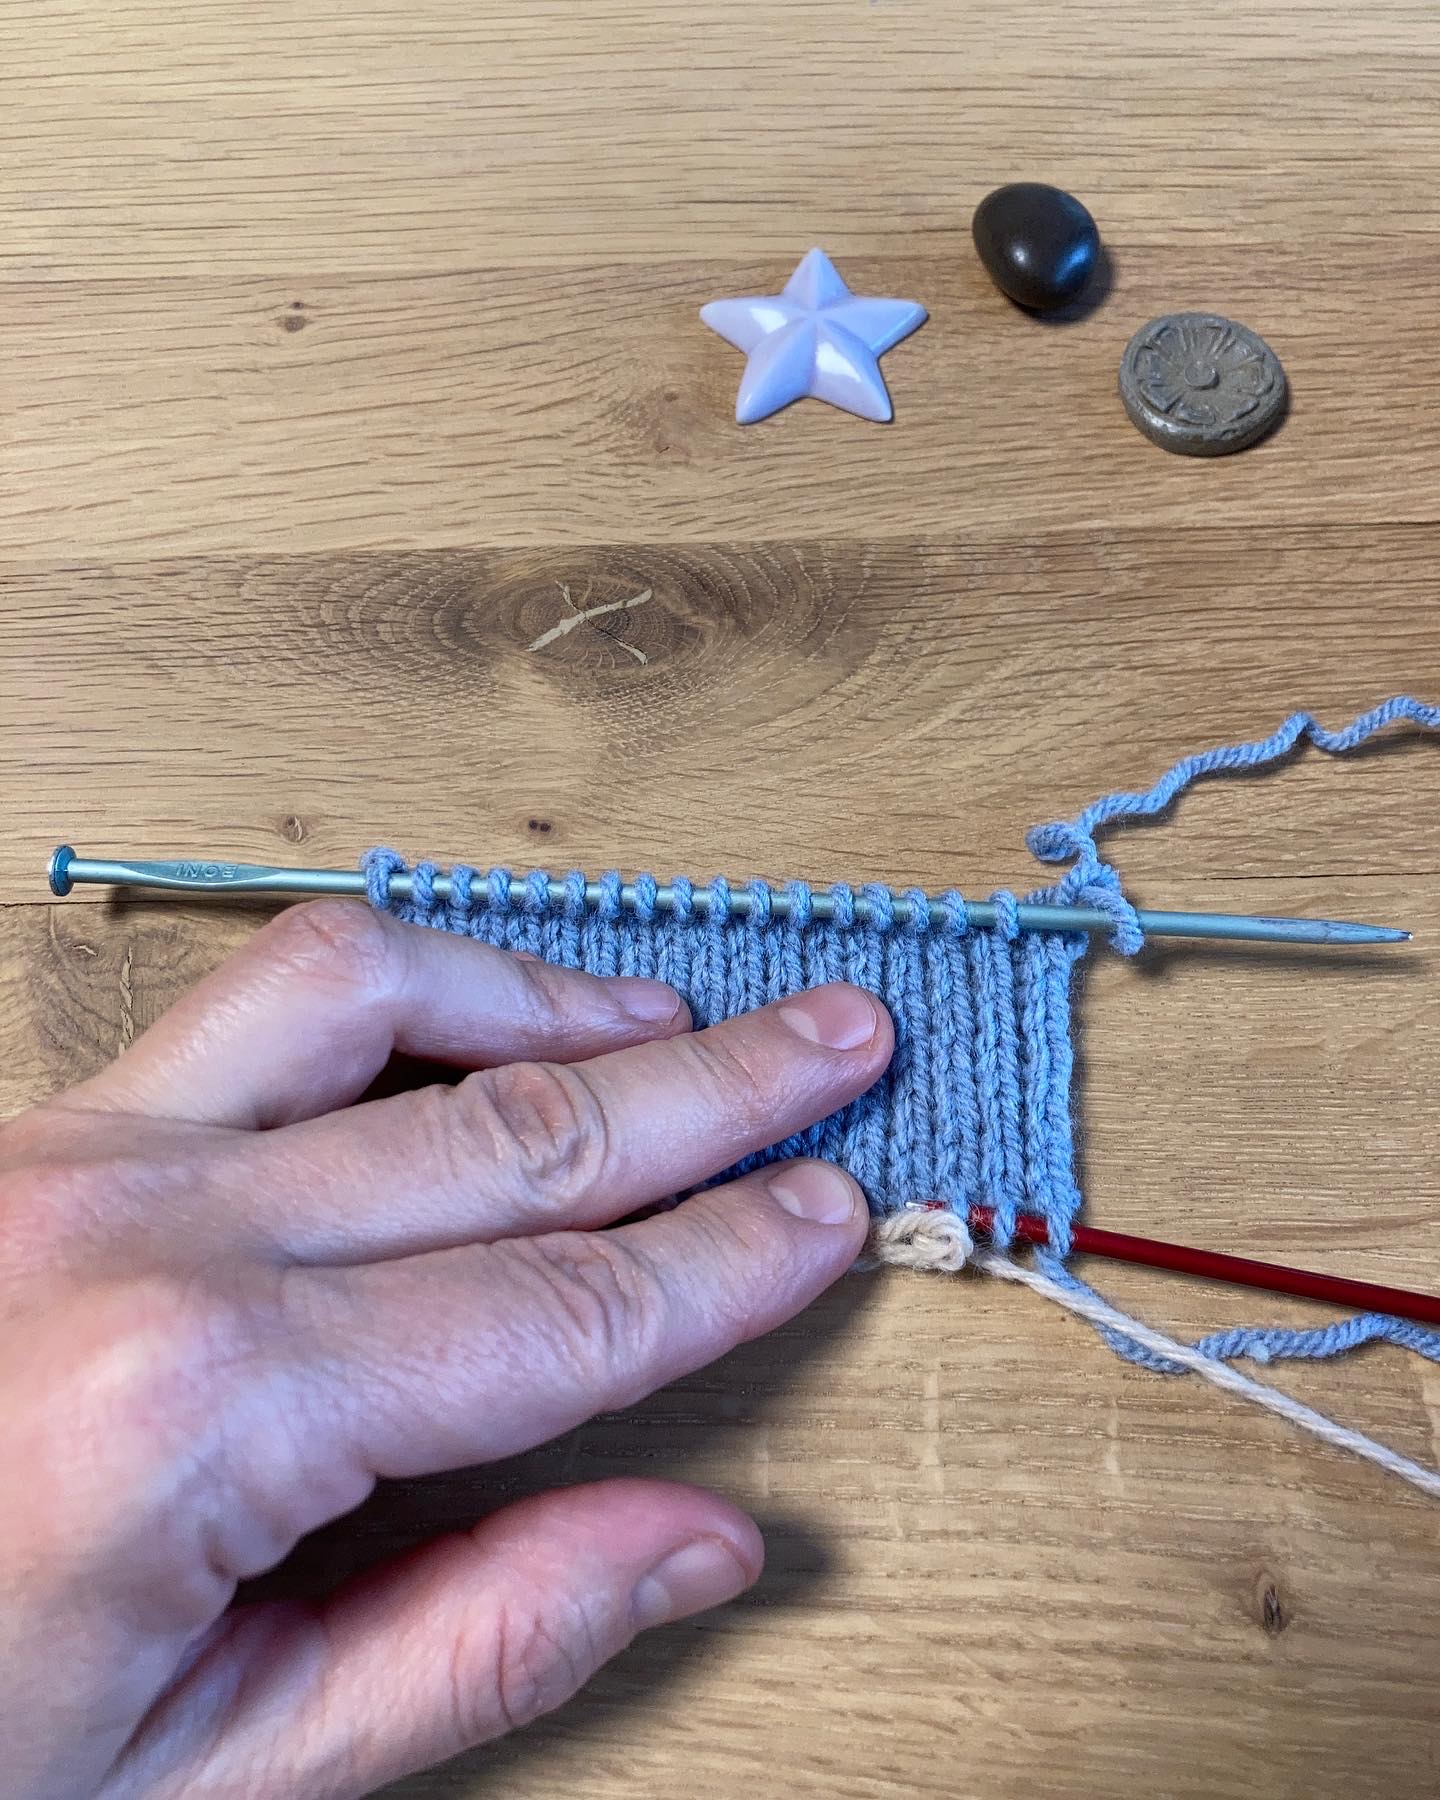
Provisional cast-on
Sometimes a project asks for stitches to be picked up along the cast-on edge. Instead of doing this, you can use a provisional cast-on. Stitches are picked up from a crochet chain, which is to be removed subsequently, leaving a series of “live” stitches. If you knit on from these stitches, you get a completely seamless join.
Crochet a chain with the number of stitches you need to cast on, plus 5-10 extra stitches. Knit up stitches through the loop on the back of the chain. (If you knit up stitches through one of the two front legs of the chain links, you will not be able to unravel the chain. Don’t ask me how I know this 🤨)
Alternatively, you can crochet the stitches directly onto your knitting needle:
Unpick the last stitch of the crochet chain. Pull the yarn carefully to slowly unravel the chain and transfer the stitches to a needle. You can then knit on from your cast-on edge.
For the crochet chain it is best to choose a slippery yarn that is easy to remove afterwards, e.g. mercerised cotton.
Special effects 👀
The last two cast-ons in this overview are decorative: the I-cord cast-on and the picot cast-on.
I-cord cast-on
This cast-on is often used on shawls.
For an I-cord cast-on, cast on 3 stitches. Slip the stitches to the left needle.
Next row: Yarn over, knit 3. Slip 3 stitches back to left needle.
Repeat this row until you have the desired number of stitches (excluding the 3 stitches of the i-cord).
Instead of [yarn over, knit 3] you can [knit the stitch through the front and the back loop (= kfb, i.e. 1 increase), knit 2].
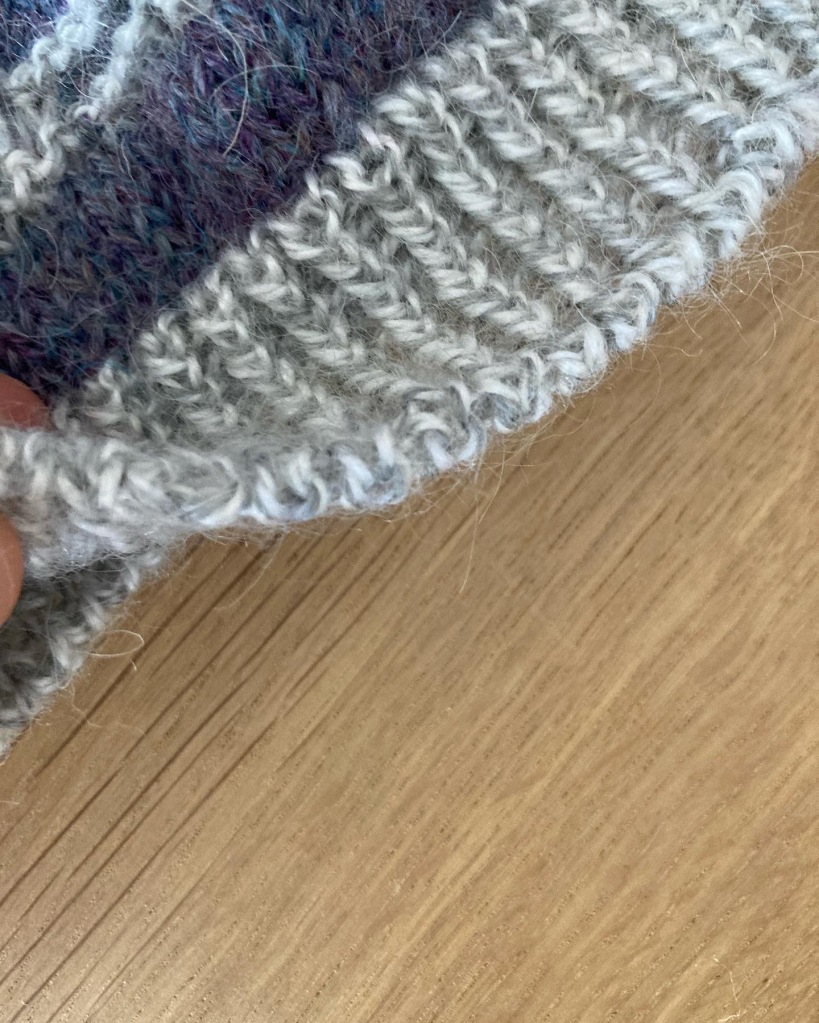
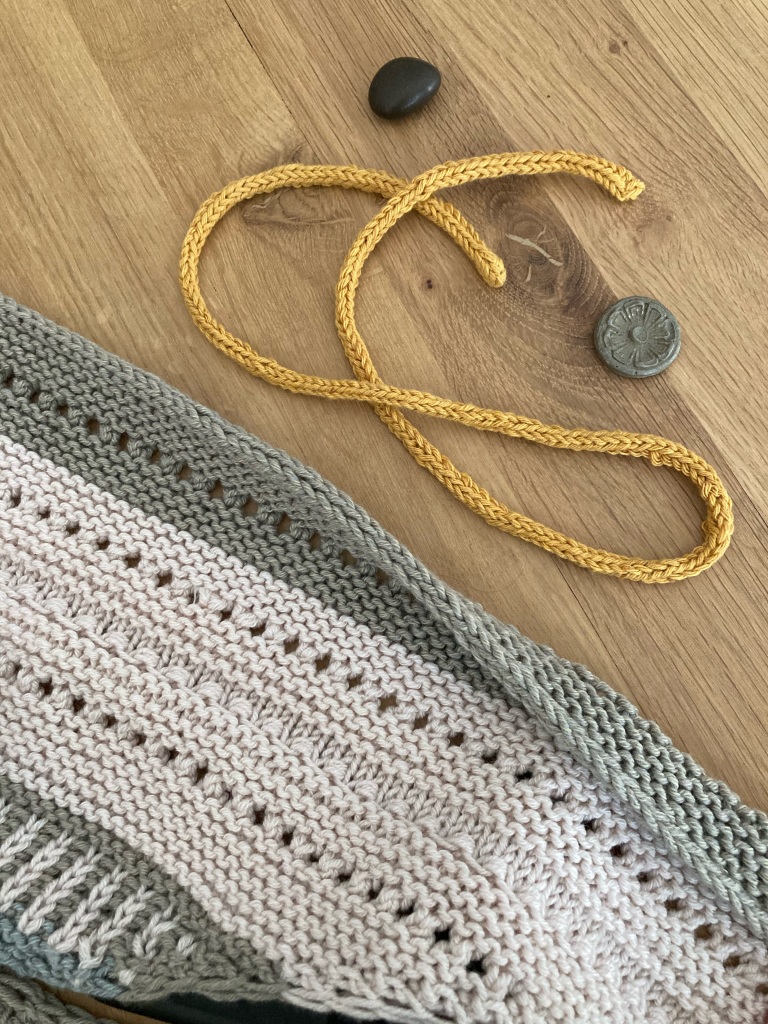
Picot chain edging
Picot chain edging
For this cast-on, first you make the picot chain and then you pick up stitches along it.
Make a slip-knot. *Using chain-edge method, cast on 2 more stitches (3 stitches in total). Knit 2 and cast off the first stitch; knit the 3rd stitch and cast off the 2nd stitch; slip the remaining stitch back to the left needle. This completes 1 picot. Repeat from *
Knit up stitches along the straight edge of the picot chain as follows: knit 1 stitch into the long loop on the straight edge, and knit another stitch into the top of the short loop between each picot (this loop is the 2nd cast off stitch of each individual picot).
This concludes my cast-on overview! Have I missed something? What is your favourite cast-on? Let me know in the comments below 👇
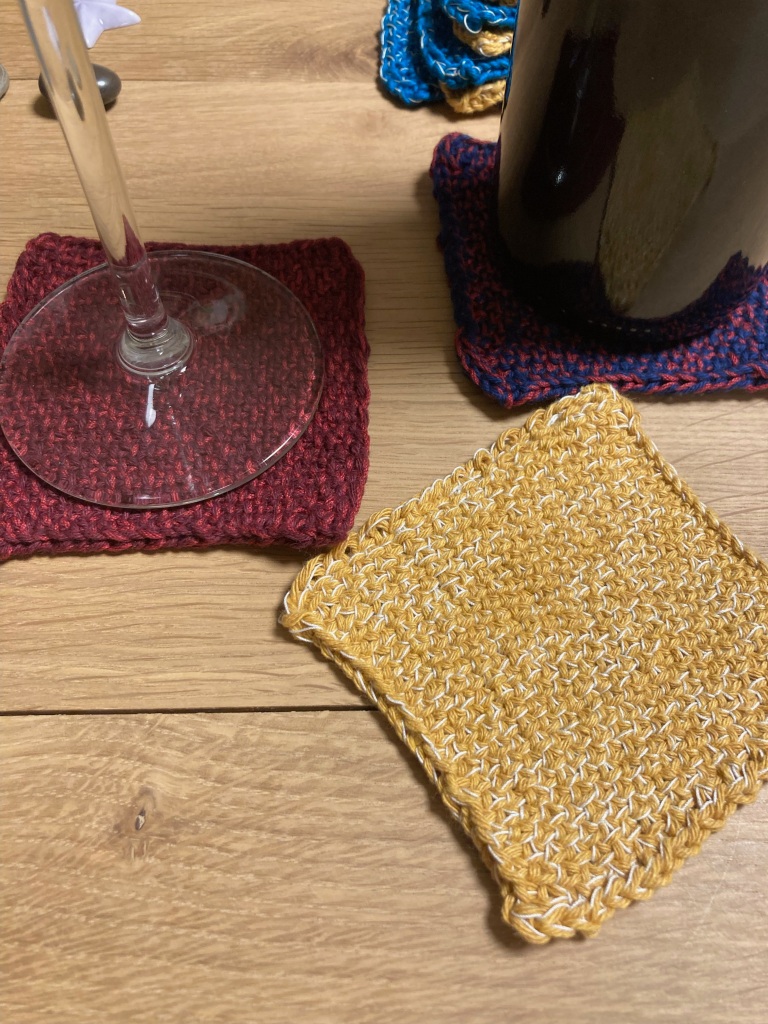
The linen stitch is quite unique among knitting stitches: it is not stretchy and it does not curl at the edges. In other words, it is the ideal stitch for a coaster.
These coasters are made in 100% cotton. You can use DK weight yarn or, as I have done, combine 2 strands of fingering/lace weight yarn for a speckled look.
Aim for a size somewhere between 8.5 x 8.5cm and 10 x 10cm. If you don’t get the desired dimensions, switch to larger/smaller needles and/or thicker/thinner yarn.
For a drink served on the original coasters, go to The Honky Tonk Bar in Athens, Greece (Address: Mpotasi 5, 106 82 Athens, close to the city centre). (Insider tip: For a quiet night with jazz and classical music, go on a Sunday 😉)
Instructions
Cast on 25 stitches.
Continue in linen stitch as follows:
Row 1 (WS): Sl1p wyif, *p1, sl1p wyib*. Repeat from * to * to last 2 sts. P1, sl1p wyif.
Row 2 (RS): *K1, sl1p wyif*. Repeat from * to * to last stitch. K1.
Work these 2 rows ±21 times.
Work row 1 once more.
Next row: (RS) Cast off knitwise and weave in ends.
You are welcome to share your work on social media and to tag me (@annaplexis.knits on Facebook, Instagram and Threads, @annaplexis on TikTok, X, Mastodon, tumblr and YouTube). I’d love to see your work 🙂