
The Cherry Bloom Cardigan by Lene Tøsti is one of the most beautiful knitting designs I have ever seen.
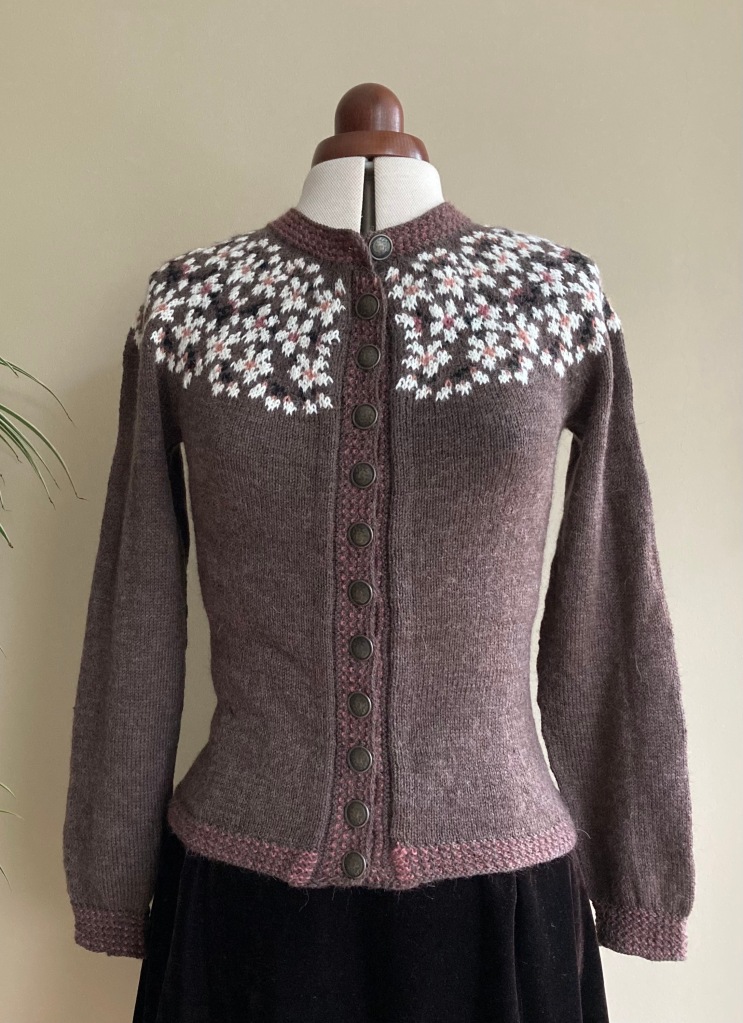
That being said, it is quite a challenging project. If you are looking for a pattern to push your colourwork technique boundaries, this is it!
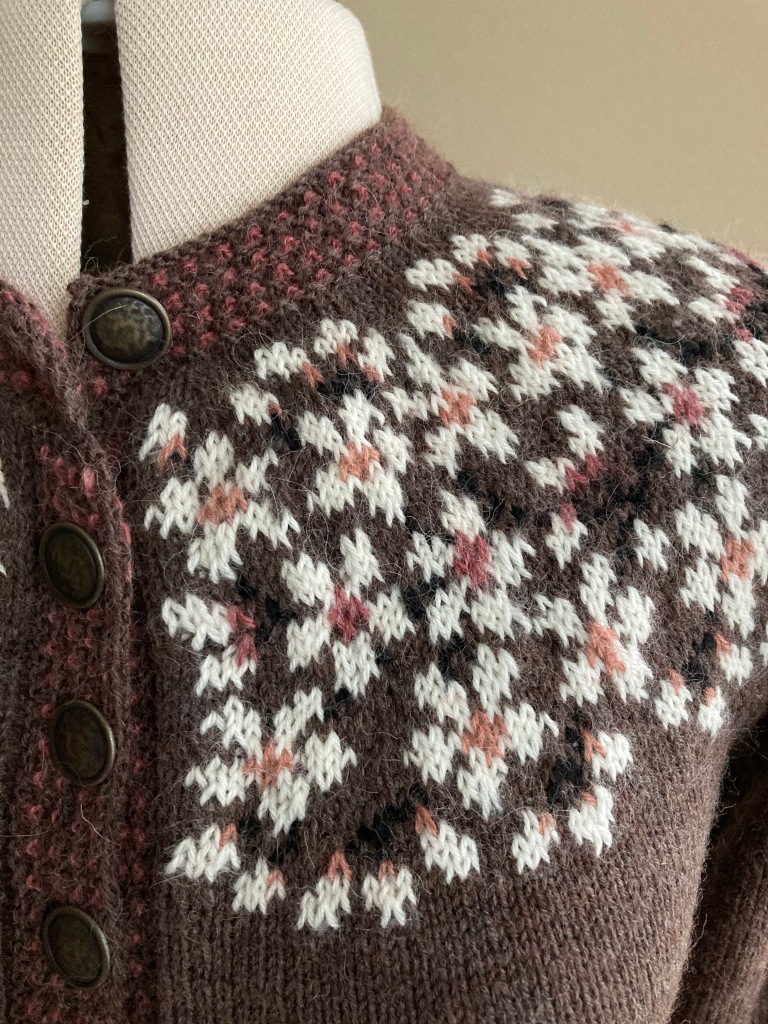
The Yoke
The cardigan is knitted in the round and steeked. Most rows in the patterned yoke are worked with three colours, a few with only two and some with four. 😳 Furthermore, you need to catch floats! 🤯
I had long ago given up on two-handed fair isle. Having both yarns on my left hand index finger works fine for me, whereas the yarn tension in the right hand was a big problem but I was kind of forced into two handed knitting with this design.
I considered buying a fair isle ring, but waiting for it to be delivered was not an option, so I looked through my jewellery box and found a couple of rings that could be used to separate the yarns. A real fair isle ring can hold many different yarns, but even being able to somewhat separate two of the strands on the left hand helped enormously and allowed me to pick up speed. In fact I now always use a ring, even when using two colours only.
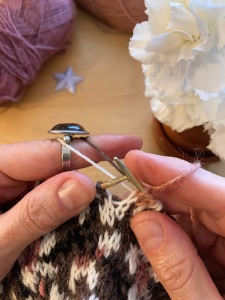
In two-handed knitting, the right hand should hold the least dominant colour, i.e. the background colour. I let practical rather than aesthetic considerations determine the distribution of the yarns: I chose to hold the least used colour (the black or pink) in my right hand, since this is my most awkward hand.
It does get quite fiddly with four colours and I was hoping by the end of the yoke to have found my “flow”, which is for me an essential part of the joy of knitting. I think I’m almost there… In fact I am considering making one more cherry bloom cardigan to master the technique (and also, obviously, because I 😍 love 😍 the design).
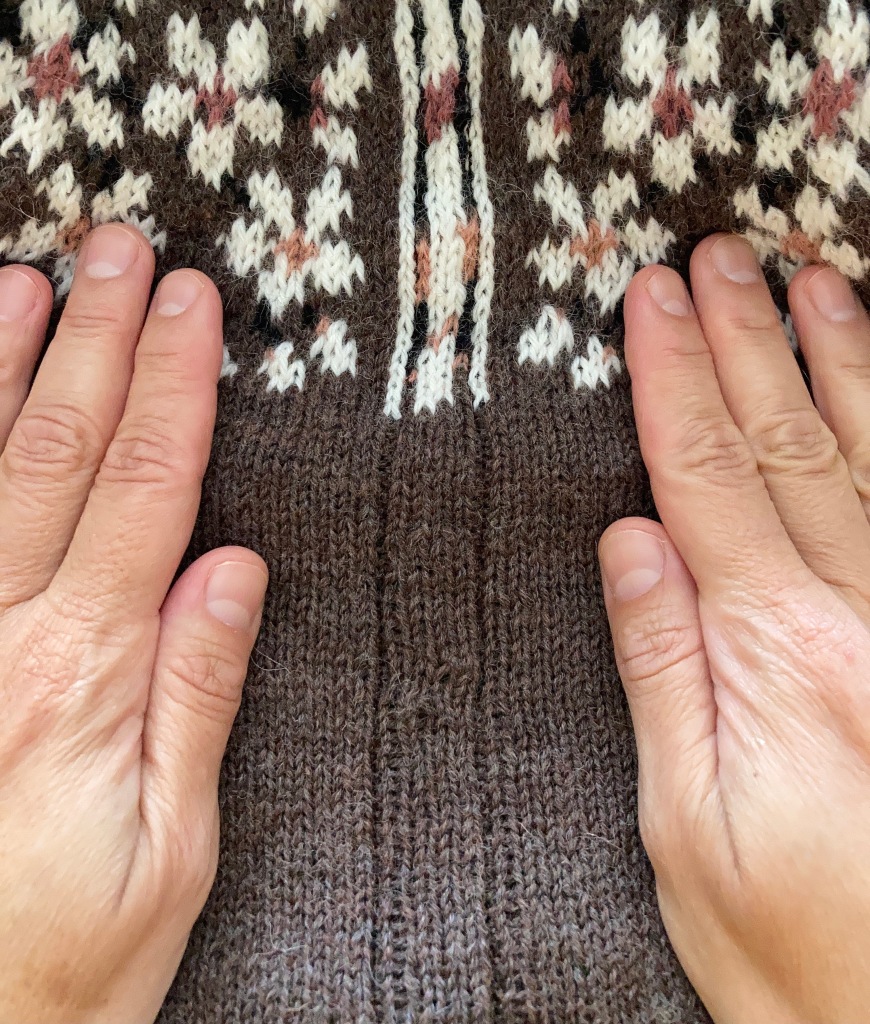
The pattern suggests catching floats every 5 or 6 stitches. I found it helpful to mark in the chart which colour I should catch onto which stitch in each row.
Avoid stacking the floats, i.e. catching the yarn onto the same stitch in two consecutive rows. Stacking floats makes them visible on the right side of the work, a.k.a. “grinning”.
I used the following yarns from my stash: Drops Fabel brown 300 for the background, Drops Alpaca in Blush 9026 and Dark Blush 9024 (I used the darker pink for rows 20-22), Drops Nord off white 01 and Drops Flora black. Only halfway through did I realize that I was not in fact knitting cherry blossoms but rather the almond blossoms of my childhood – white blossoms with a touch of pink on a black branch.
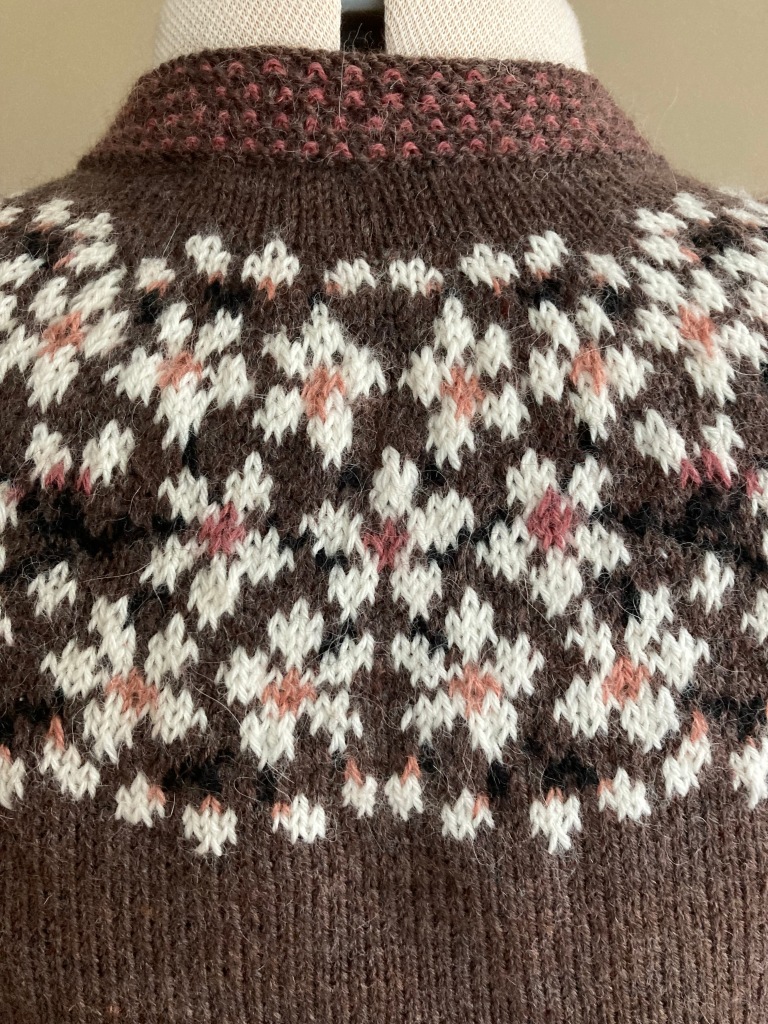
The yarns I used are all fingering weight, but Nord is slightly heavier and Flora slightly finer than the rest, which worked quite well, since I wanted the flowers to be in the foreground and the tree branches in the background.
Make sure to place markers of different colours between the different pattern segments, as the pattern suggests. When concentrating on the many different colours and trying to catch the proper floats, I did miss my marker a couple of times.
General info on the pattern
I am a native Danish speaker so I chose to follow the Norwegian instructions.
The pattern is very well written with different options for fit: you can choose between a slightly shaped, a medium shaped or a very shaped waist as well as a normal or narrow sleeve. I went for medium shaped and normal sleeve. I knitted the medium size.
Other techniques used in this pattern
The pattern begins with a provisional cast on made with a crochet chain. This was a new technique for me. Remember to use a slippery yarn for the provisional cast on. It will make your life a lot easier, when you get to removing it.
Subsequently, the yoke is shaped with wrap-and-turn short rows. I always use German short rows. They are faster and simpler and I like the result!
This is a very well-written pattern, so I made minimal modifications (If you know me well, you will know that I never follow a pattern strictly… )
I did, however, use my own method for the button band. You can find a description for it in my blogpost on the Jane Seymour jacket.
As I have written before, I always secure a steek with a sewing machine seam on either side of the cut. I use the straight seam for stretch fabrics, but if your machine doesn’t have one, you can make a double seam on either side.
Place a piece of cardboard between the layers when cutting so that you do not inadvertently cut the back of the garment 😱😱😱


I shaped the neckband, as I wanted it to lie flat around the neck. To do this I decreased 20 stitches twice, the first time in the WS row after the button hole and again in the WS row of the next garter ridge.
All in all, I am very pleased with the result. Kudos to Lene Tøsti for an amazingly beautiful design and a well constructed pattern and, not least, for clear instructions and detailed explanations.
